
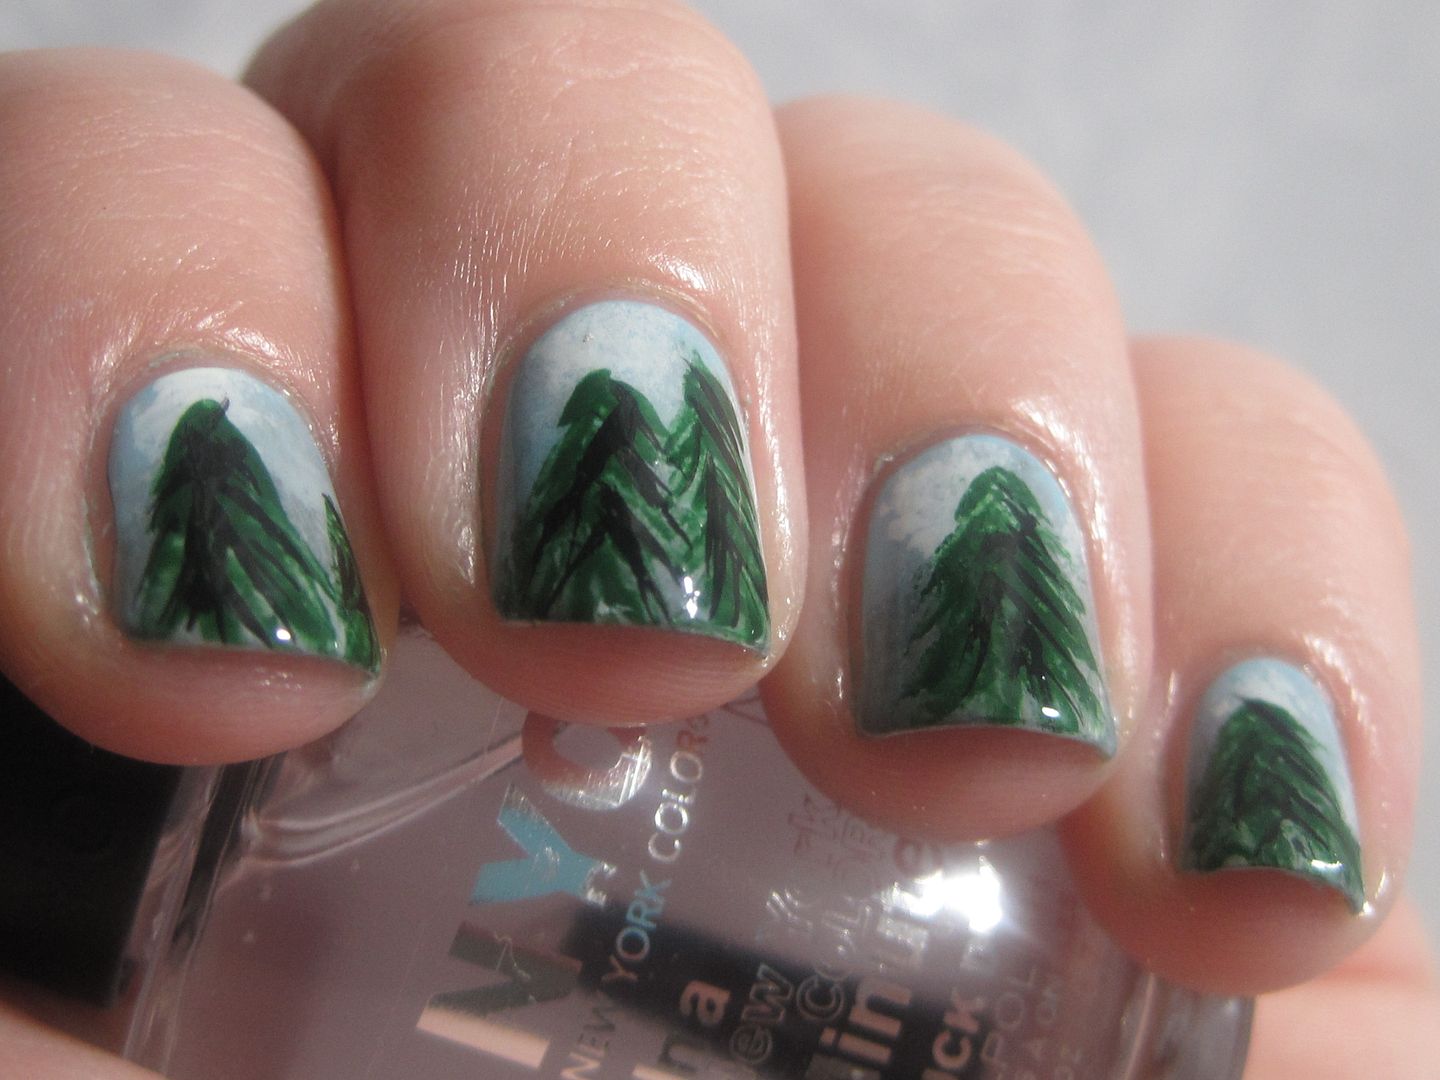
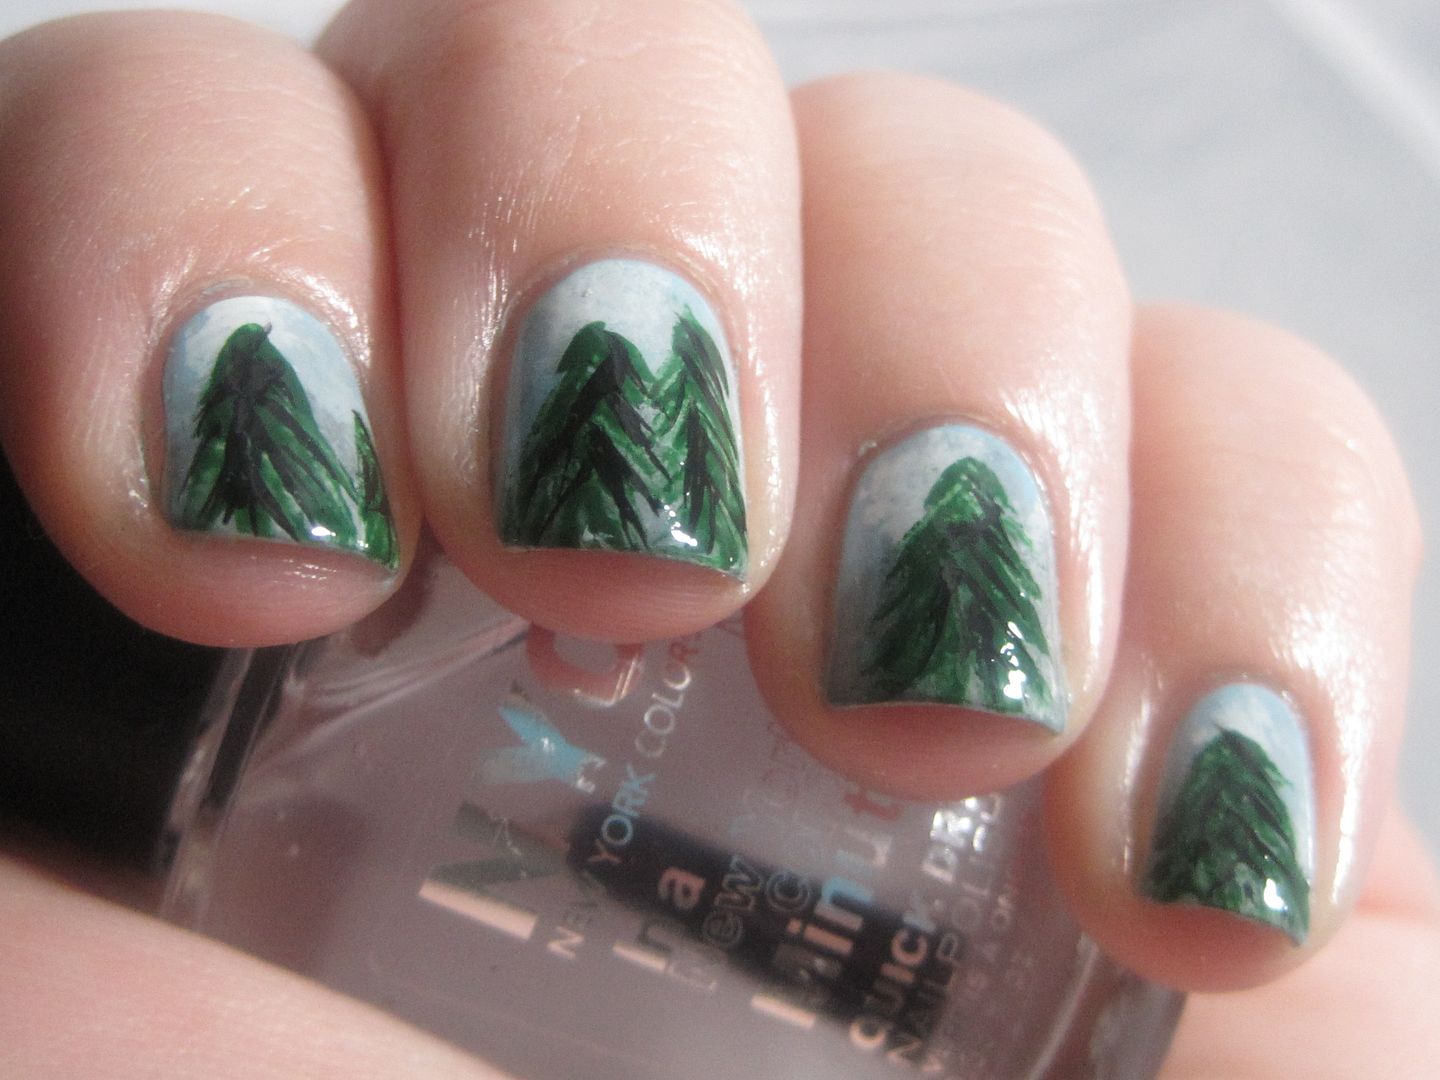
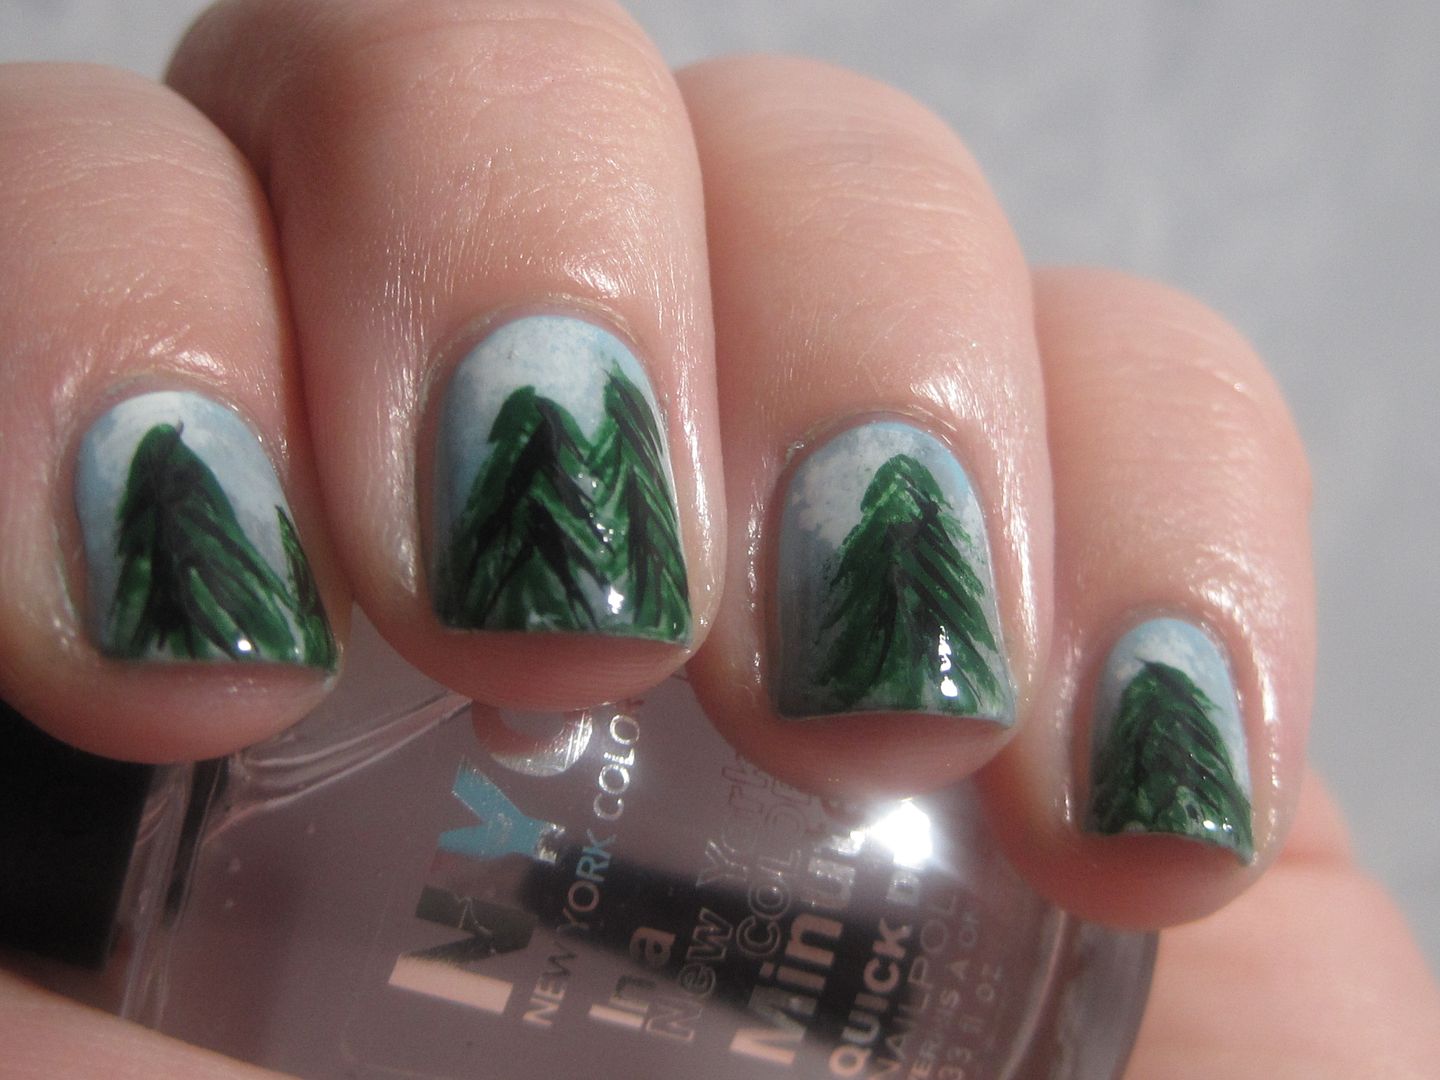
Here is a step by step of what I did:
1) Paint base with sky blue creme (I use OPI What's With the Cattitude)
2) Use a mix of a mid toned grey and white and a piece of make-up sponge to sponge on "the mountains" at the tips of your nails (this isn't exact...just something to create interest in the background)
3) Use white sponged on with a make up sponge randomly at the nail bed to create clouds.
4) Using a dark green creme (I used China Glaze Jolly Holly) and a thin paint brush with a flat top, use a back and forth dabbing motion to create a "piney look". Your strokes should look like this--> / \ . Once you create the basic tree shape, you can fill in with more brush strokes. It doesn't have to be perfect. It is supposed to look natural.
5) You can make your trees as tall or short, or as slim or wide as you want. Put one or two trees on each nail. Make it look varied and not all perfectly centered. The idea is for it to look like a forest.
6) Come back in with a striper brush or fine detail brush and add some random strokes of black to give the trees some depth. If you wanted to, you could use white to highlight it as well to look like snow. Or of course, you could use a dotting tool to add ornaments for a Christmas tree!
7) Topcoat it and you are done!
I do think Bob Ross would approve of this mani. ;) I hope you enjoy my little ventures into nail art. They are never too difficult...so you should give it a try! Thanks for looking!
No comments:
Post a Comment