Hi everyone! I am so honored to be selected to participate in the
piCture pOlish Blog Fest 2013, which features bloggers from all over the world. A year ago, I never would have thought I would be selected to take part, so I'm very excited! This year's theme was
"Year of the Blogger", which focuses on celebrating bloggers and what we do best. We were challenged to create our "most amazing nail art manicure ever" using 3 different
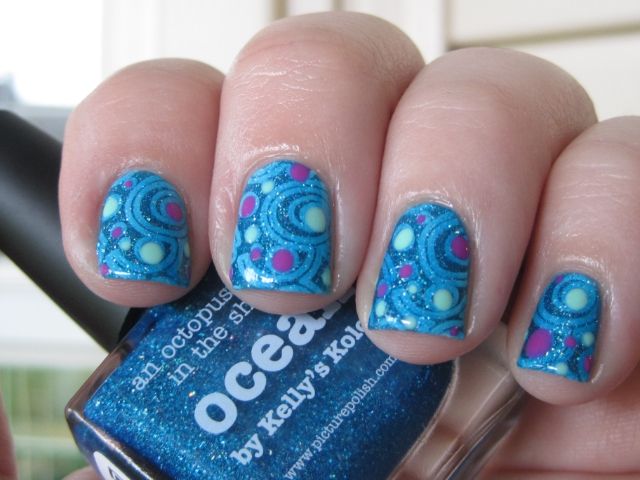
piCture pOlish shades. I feel like simple, yet bold designs are what I do best, so I have one here for you today!
Oh and guess what...there are awards! How exciting! All of the participants in Blog Fest 2013 will go into the running to win the chance to create a Collaboration Shade with
piCture pOlish to be released in 2014! There will be 3 awards chosen based on voting. You can view the entries on a special pin board on
Pinterest created for the Blog Fest, and then cast your vote on piCture pOlish's website in the
Blog Fest 2013 Zone. You have a chance to win free polish when you cast your vote as well! The awards are as follows:
1 x award as voted by piCture pOlish friends and fans
1 x award as voted by the participants of Blog Fest 2013
1 x award as voted by Jules and Megs of piCture pOlish
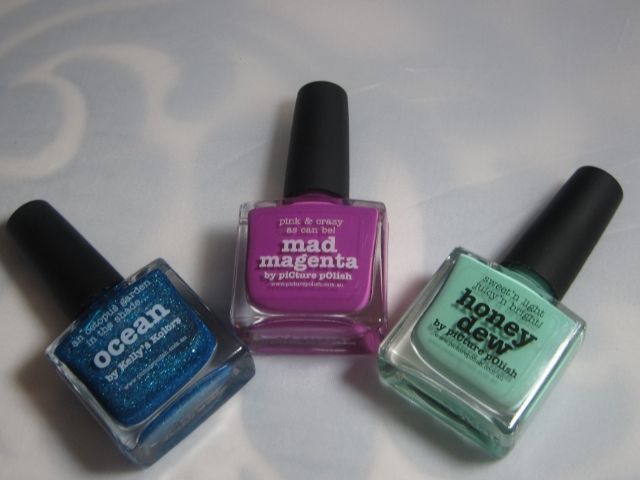
piCture pOlish sent me 3 shades to use in my mani:
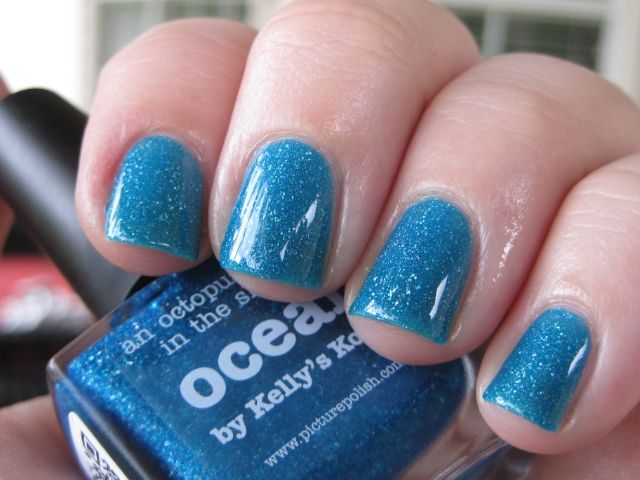
Ocean (turquoise blue jelly with scattered holo shards),
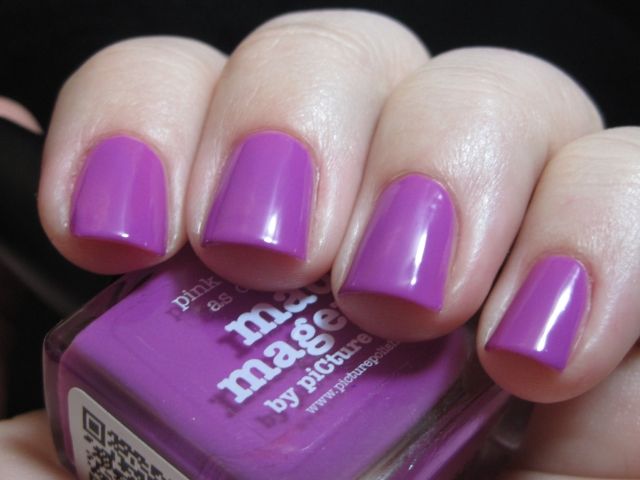
Mad Magenta (hot pink/magenta crème), and
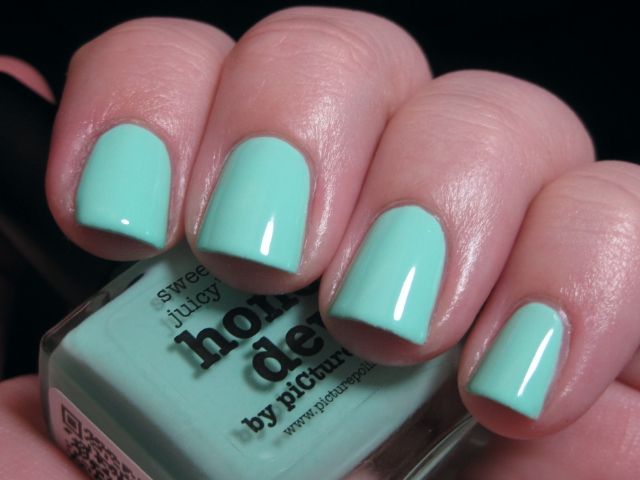
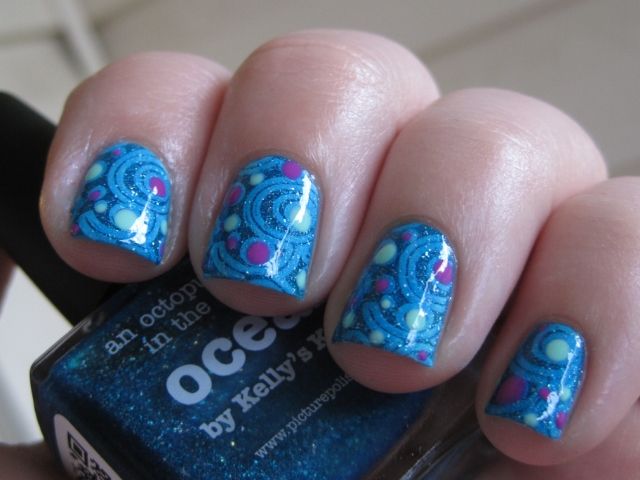
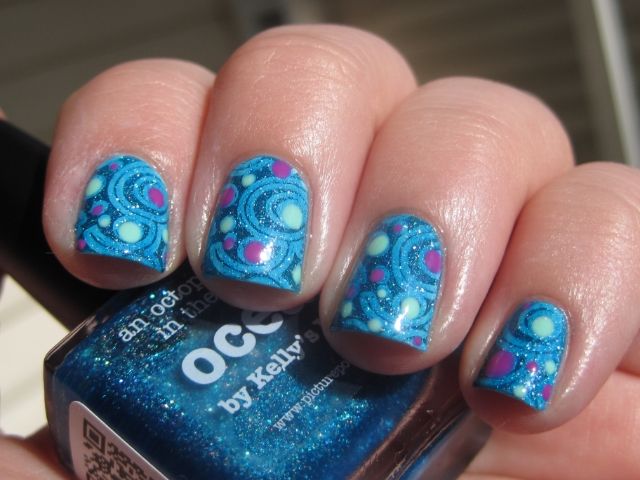
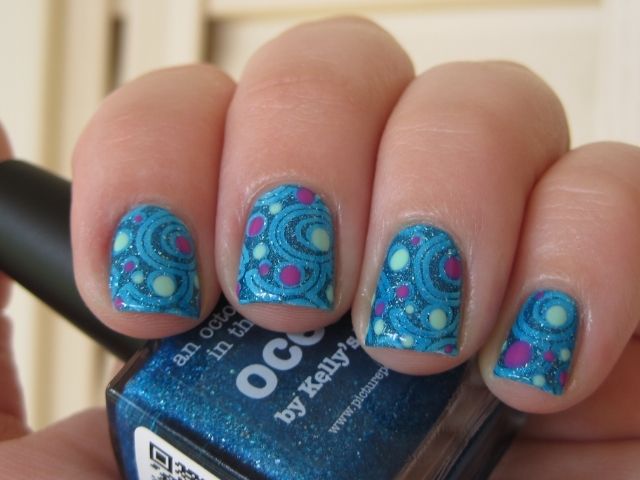
Honey Dew (soft mint green crème). We were allowed to use the 3 shades that we were given as well as black and/or white as accents in our manicures. After much deliberation, I decided that I really wanted to play on the jelly quality of Ocean with my nail art and chose to use it in a stamped jelly sandwich with dotted accents. For those of you who are unfamiliar with jelly sandwiches (at least the nail variety), it is a technique in which you "sandwich" glitter between layers of a jelly polish so that the glitter peeks through due to the sheer nature of the jelly. In this case, I am using a stamped design instead of glitter.
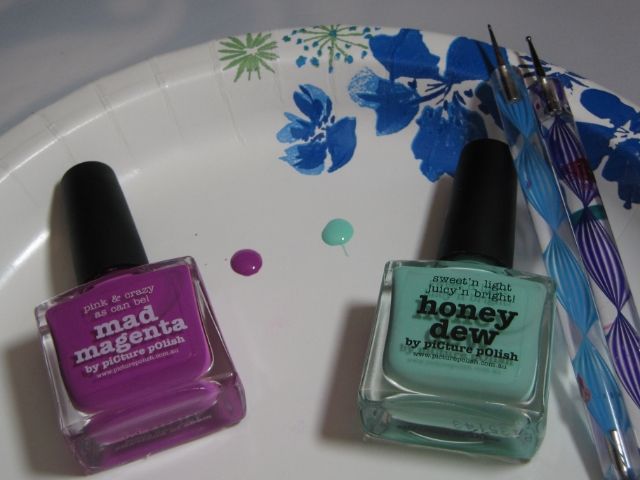
Here are some quick swatches of Mad Magenta and Honey Dew before we get started.
Mad Magenta (2 coats) - this one wanted to lean more purple in pictures than in real life
Honey Dew (3 coats) - It did not give me lobster hands in real life, but mints seem to do that in pics
Here is a step-by step tutorial on how to achieve this look. As you will see, it is quite simple.
1. I started off with a base of
Ocean (2 coats). If I was going to wear it on its own, I would probably use 3 coats because there is still a bit of visible nail line, but for the purposes of the jelly sandwich, I just used 2 because I am going to add more coats. Allow to dry completely before going to step 2.
As you see,
Ocean has those lovely holo shards (NOT glitter) that
piCture pOlish does so well.
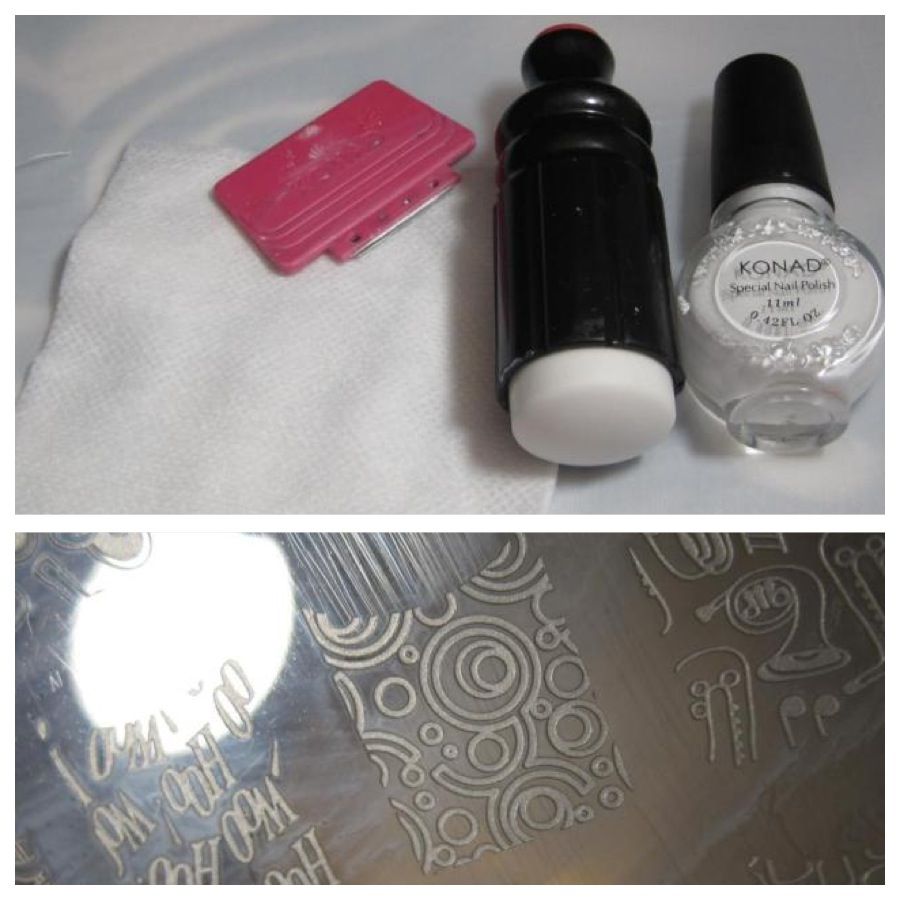
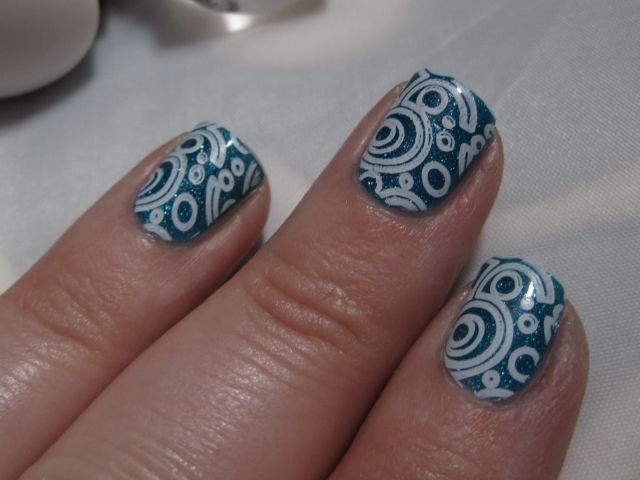
2. Using the Cheeky XL Musical Nails stamping plate and Konad White polish, I stamped a design over
Ocean. You could use pretty much any design you wanted with white and it would work equally as well with this manicure, I would just choose one with a bold pattern. Also, something that has recently been a big help with stamping is my discovery of gauze squares (found in the first aid section of your local pharmacy). They are lint free and thus don't leave you with fuzzies on your stamper and plate when cleaning up like cotton pads do.
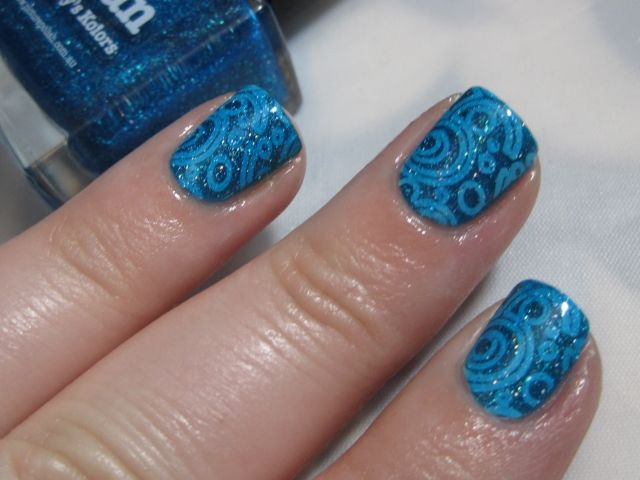
3. Next, I layered 1 additional coat of Ocean over the stamped design. Doesn't this look awesome? I have done this with regular jellies before, but the holo shards in Ocean make this look sparkly and magical!
4. Finally I used Honey Dew and Mad Magenta to add dots to my design. I used a paper plate to dab little pools of polish to dip my dotting tools in. As you can see, the design I chose has some logical places to add dots (the circles) but if your design doesn't have circles, you can certainly still add dots to liven it up it. When I did the dots, I did not do them all the same size but instead used several different sizes of dots to give the design more of a random, unstructured feel. Wait about 10 minutes or so before adding topcoat to complete your design to avoid smearing the dots.
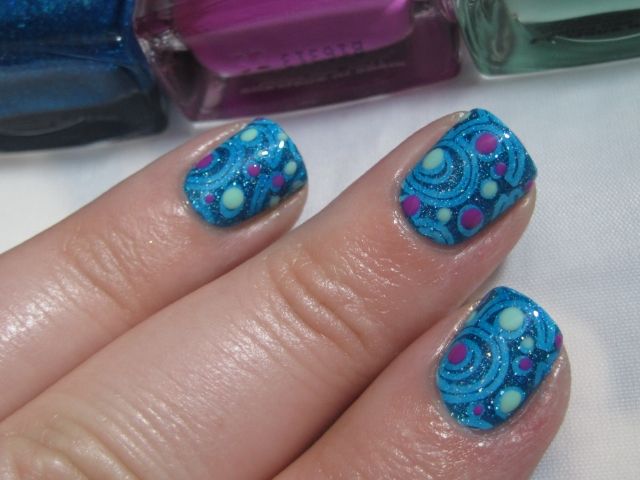
So that's it! The completed look is very striking, but the process to achieve it is quite simple. I hope that it will be easy for anyone to reproduce using the pattern of your choice. It reminds me a bit of a psychedelic Starry Night painting or planets of some sort. And if you are scared of stamping, DON'T BE! Get yourself one of those squishy stampers (like the one I have pictured above) and it makes the process SO much easier.
piCture pOlish products are available from their
website based out of Australia. They do ship internationally and details about their shipping policies are available on their
shipping page.
piCture pOlish also has international stockists located all over the world. I have personally ordered from
Llarowe,
Overall Beauty, and
Harlow & Co., but a complete list of stockists is located on
piCture pOlish's network page. Also, be sure to check out their
Everyday Deals section to score awesome deals on polishes!
I hope you guys have enjoyed my contribution to
piCture pOlish Blog Fest 2013! Please be sure to check out all of the other participants today and see the amazing nail art they have created (and vote (for me!) on
Pinterest once the contest is up and running!). You can also find pictures on Instagram using
#ppblogfest2013. Thanks for looking everyone!