*Press Samples*
Hi everyone! Today I have two different nail art looks to share with you that utilized some of KBShimmer's newest nail vinyl additions. Along with their new spring collection and spring decals, KBShimmer released two new sets of everyday nail decals including a set of thick and thin connected line vinyls and swirl vinyls. These are available now for purchase now on KBShimmer's website. I will also be doing some nail art very soon with the spring vinyls, so stay tuned for those!
Showing posts with label Nail Vinyls. Show all posts
Thursday, March 5, 2015
Monday, October 27, 2014
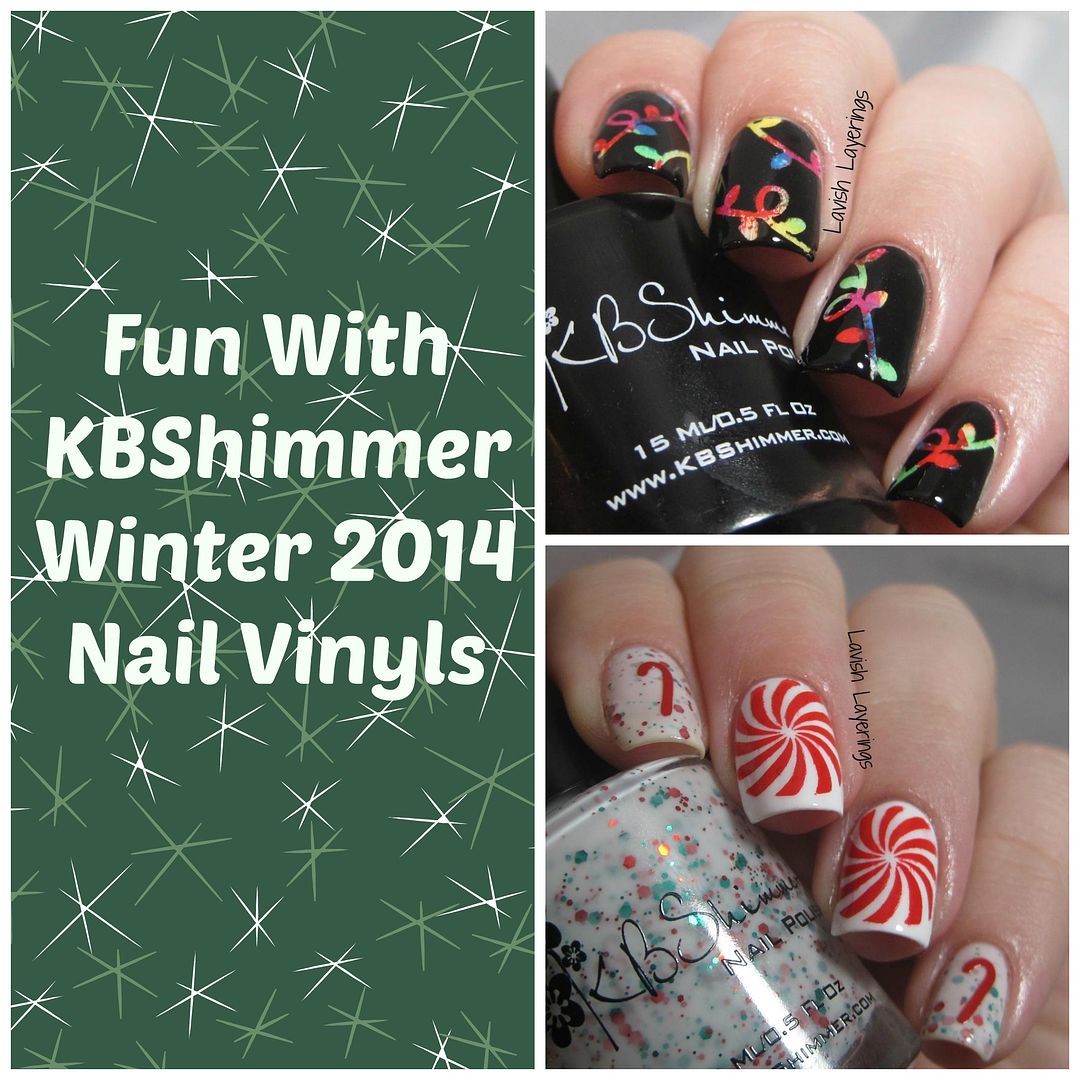
Fun with New KBShimmer Winter Nail Vinyls
*Press Sample*
Hi everyone! Today I have some more nail art, but it is quite a departure from the Halloween manis that are abundant right now (I will have more of those starting tomorrow!). Along with the beautiful polishes and new cuticle oil scents, KBShimmer will be launching some Winter/Holiday themed nail vinyls with their new collection that is releasing on November 1st. I have two fun looks to share with you today that I was so sad to take off, but I figured people would look at me funny if I had Christmas nails for Halloween. :)
Sunday, June 22, 2014
Fun With KBShimmer Nail Vinyls
*Press Samples*
Hi everyone! Today I have two manicures to share with you that I created using KBShimmer's new line of nail vinyls. I received samples of several of the designs, but today I am sharing two of them with you.
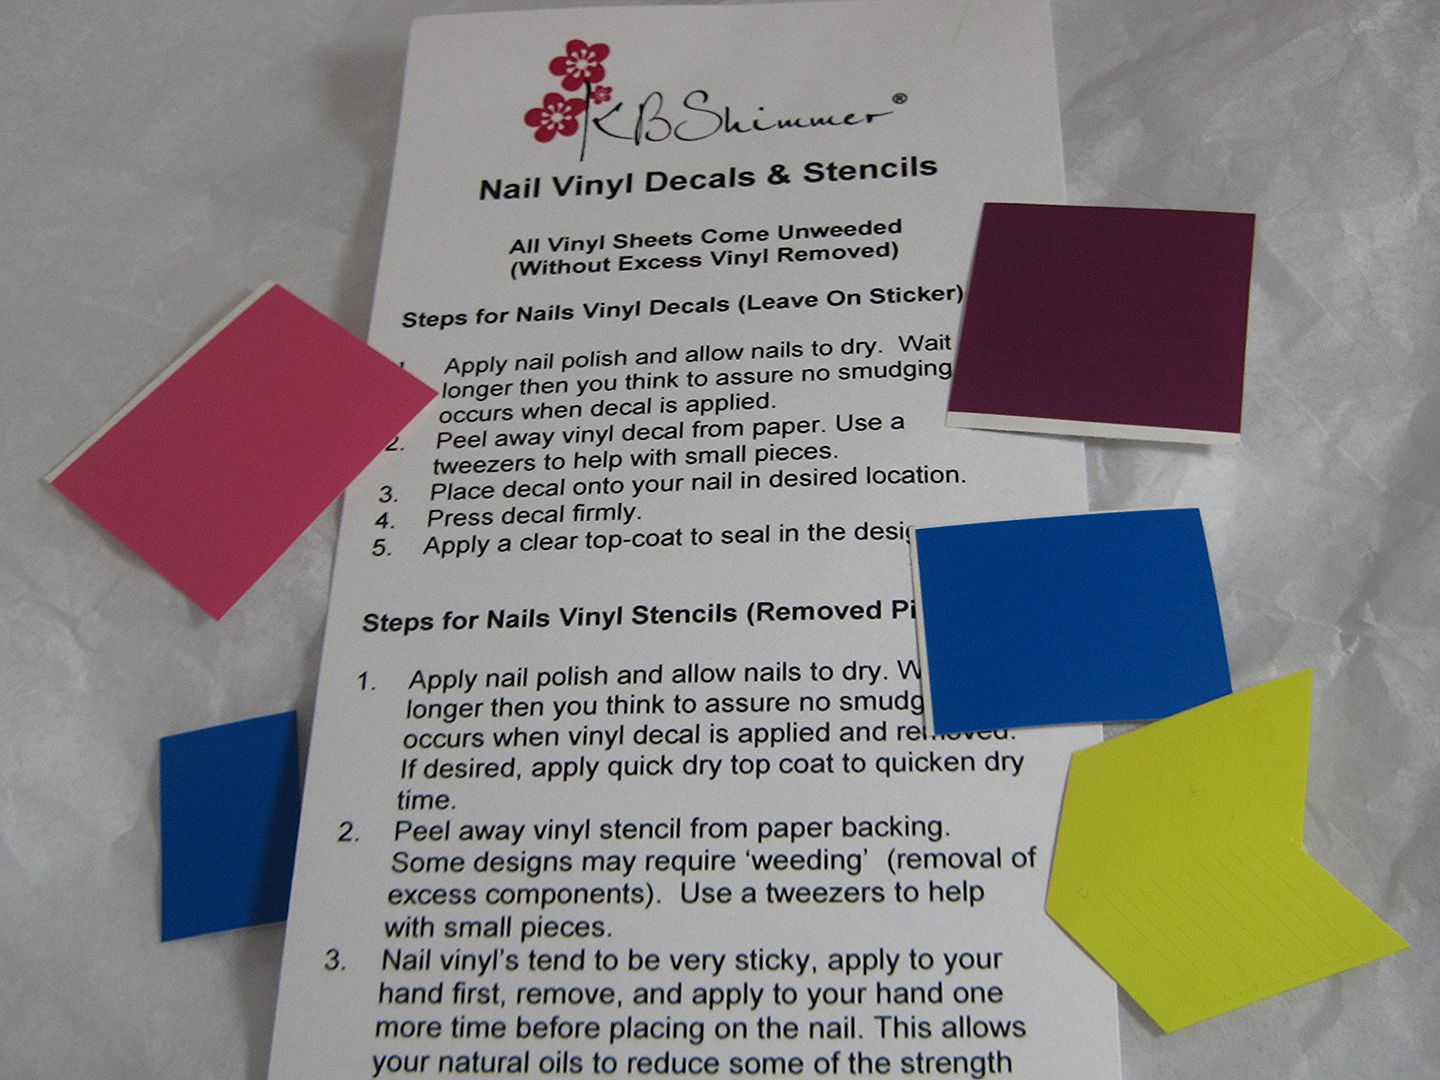
They came with a sheet with a full set of instructions how how to use the decals to make nail designs, whether you are going to just stick them on your nails or whether you are going to use them with nail polish to stencil.
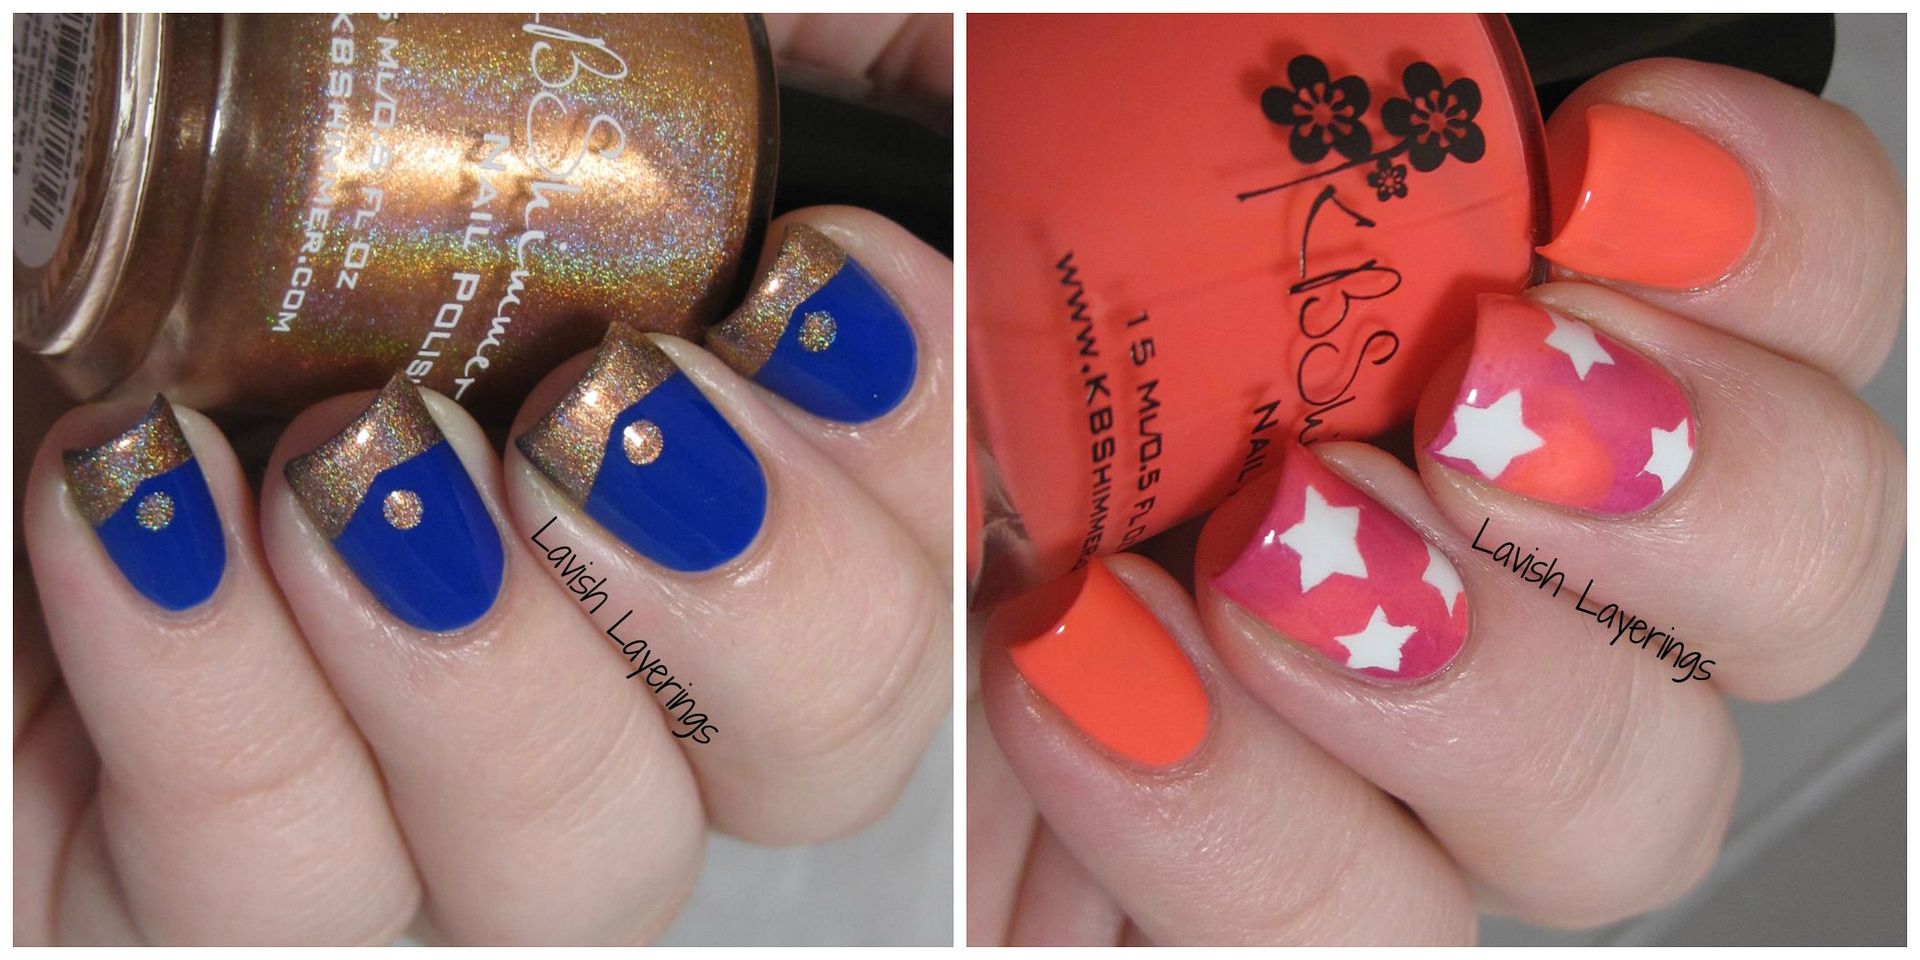
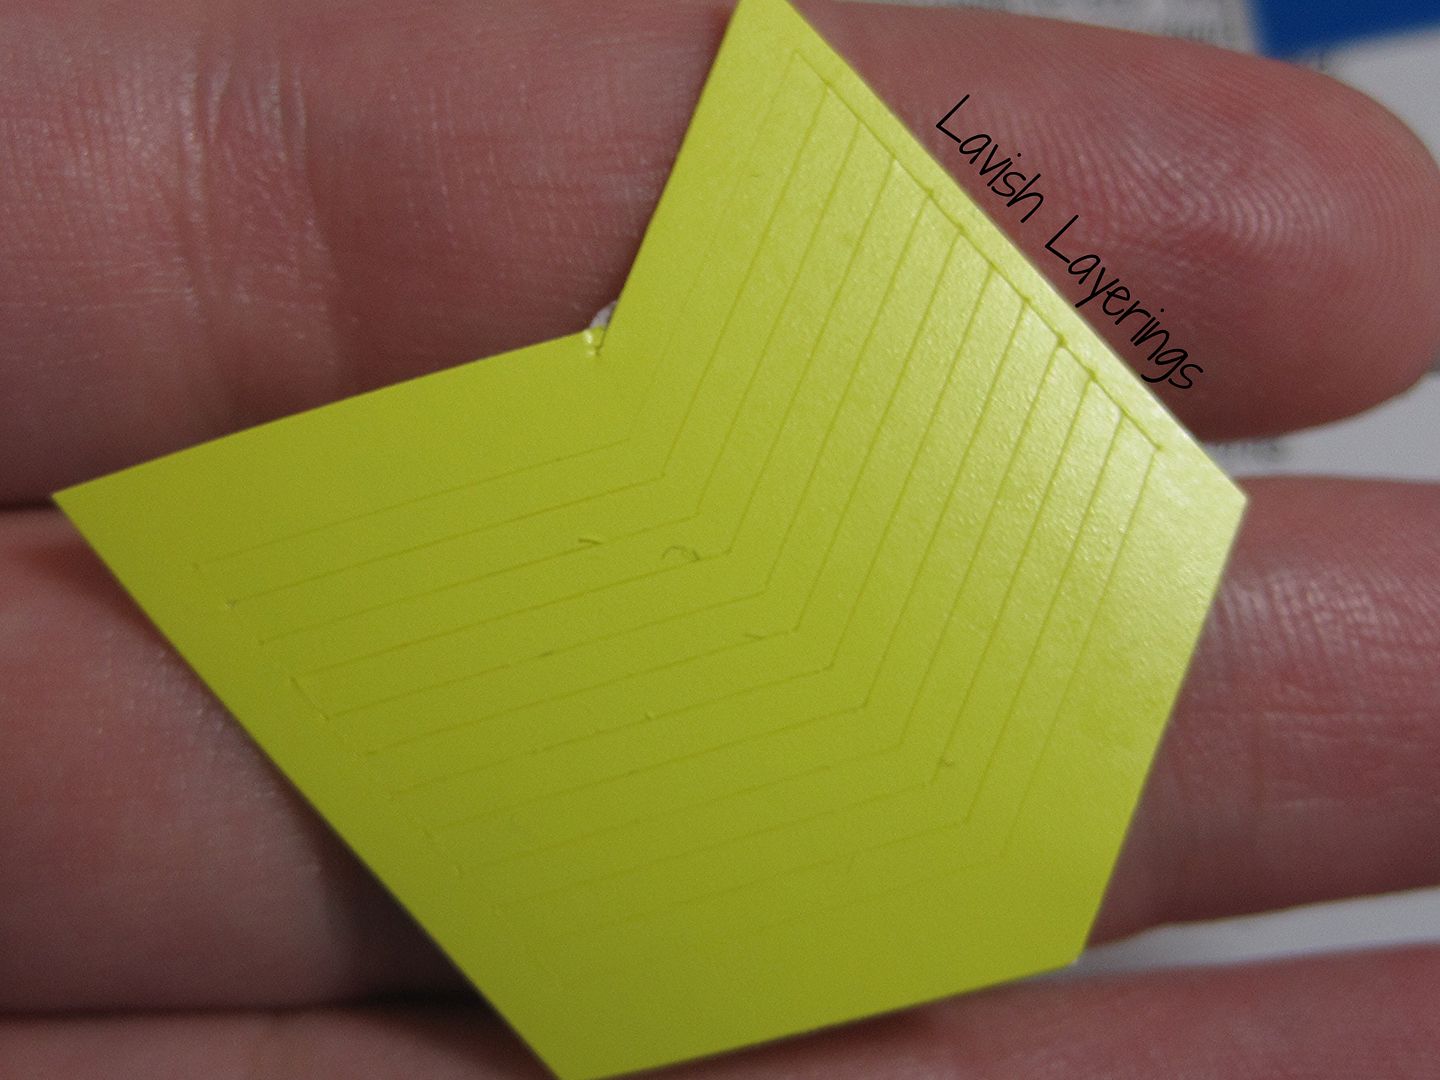
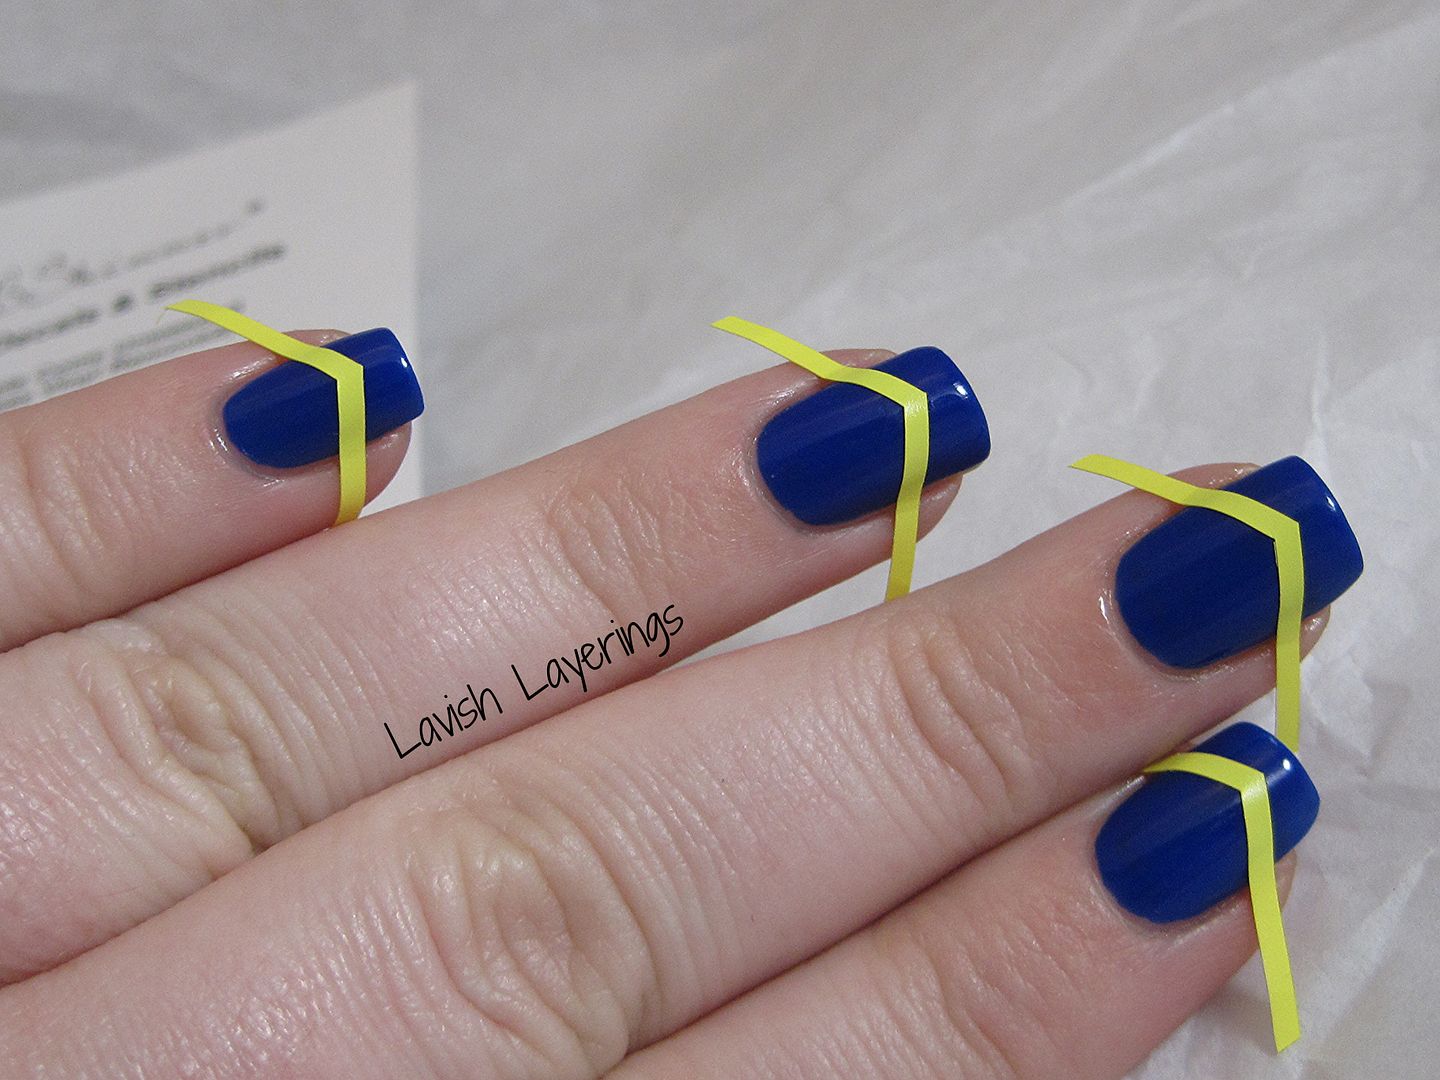
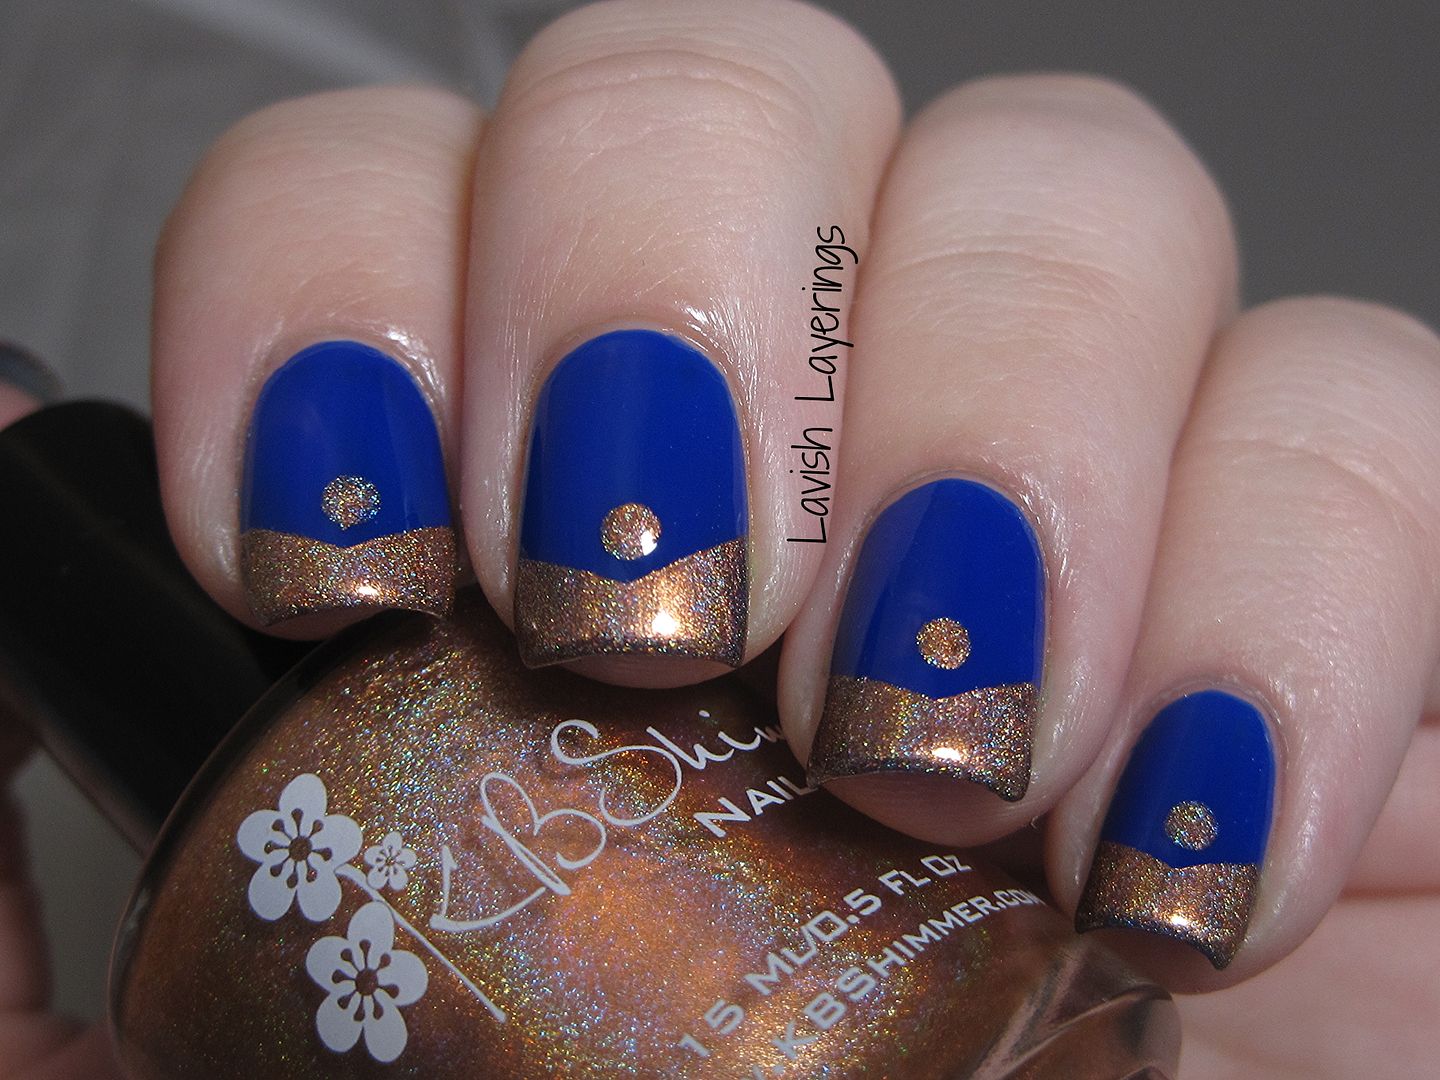
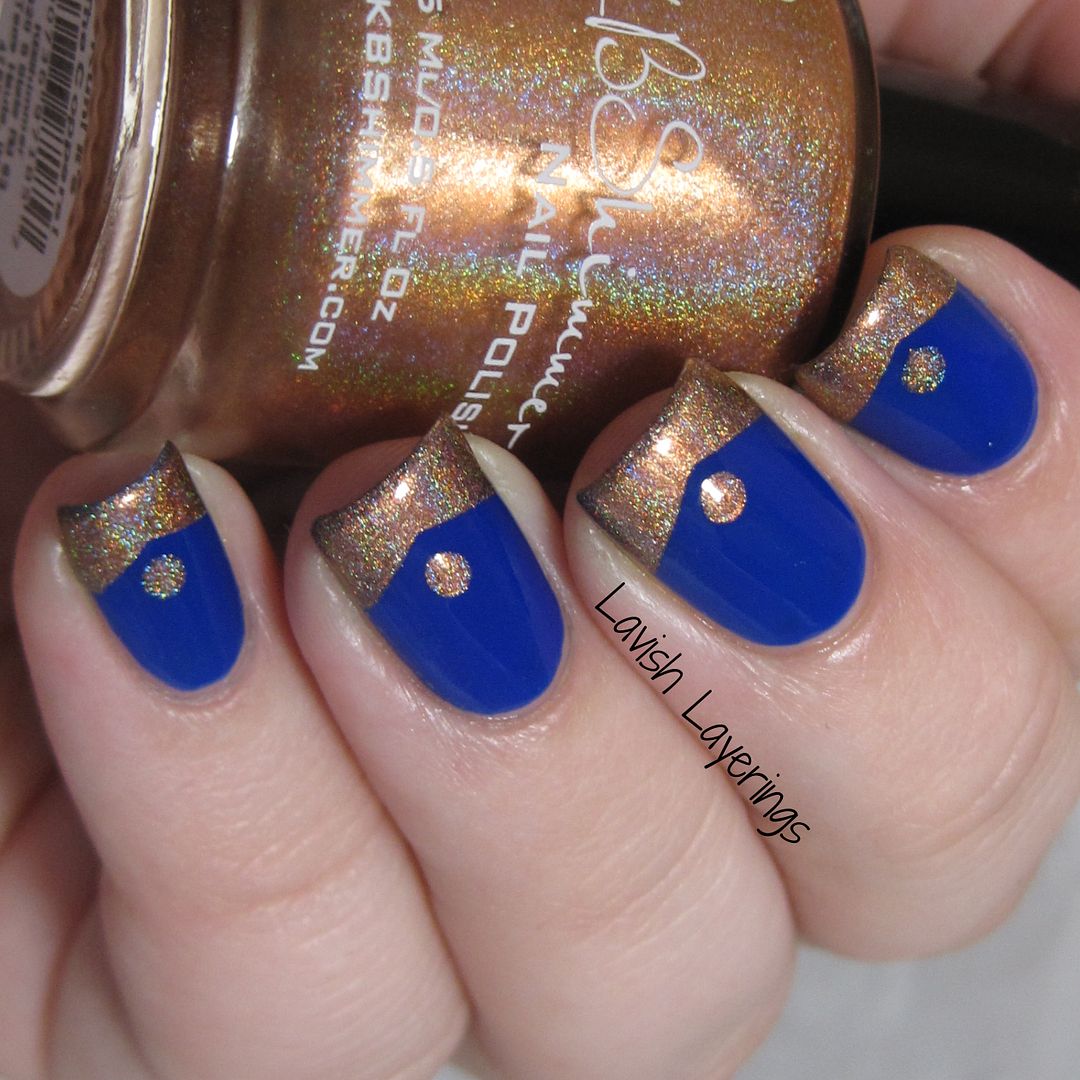
First up, I used the single chevron decals to create a Funky French manicure.
I started off with a base of KBShimmer Low and Be Bold and allowed it to dry completely. This is important when using these decals. Even when using a quick dry topcoat, I would wait at least 30 minutes to an hour before using them or you will pull off your base color.
Then I used KBShimmer Run! It's the Coppers! for the design. Be sure to pull off the nail vinyls while the polish is still wet to get clean edges for your designs. For a finishing touch, I added a single dot on each nail with a dotting tool. I love blue and copper together, and I thought this design looked really cool.
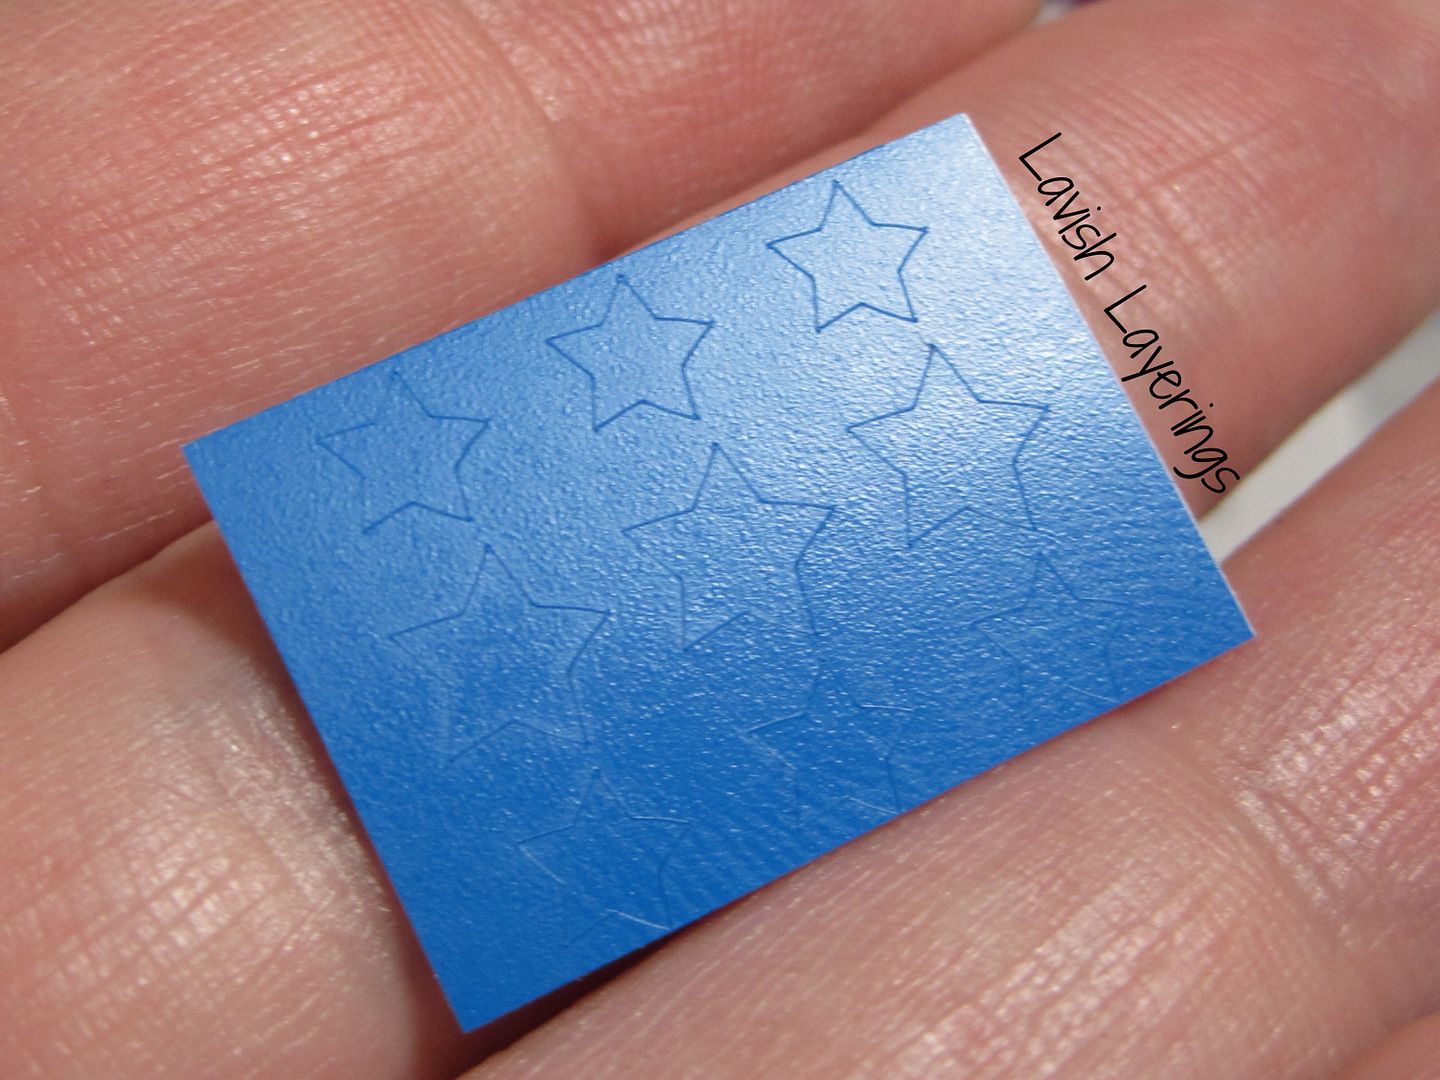
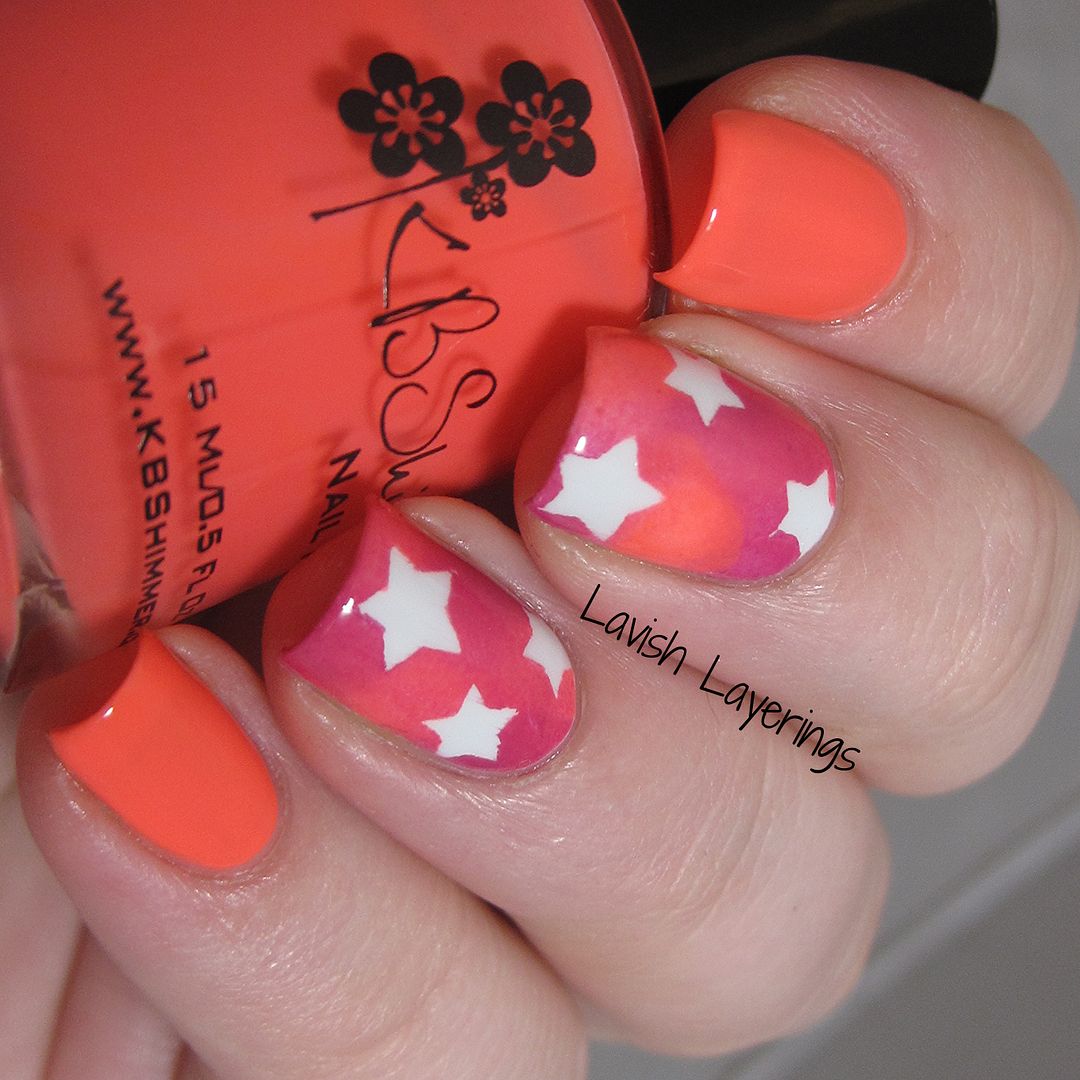
Next I used the star decals from the Stars and Stripes set to create a summery star manicure.
So there ya go! Two nail art manicures that couldn't be simpler with the help of KBShimmer's nail vinyls! I've got a few more to try out and I will do some manicures with those soon!
KBShimmer products are available from their website as well as from Harlow & Co. (Canada). Be sure to follow them on Facebook and Instagram for updates on new collections and to see swatches of all of their polishes.
Hi everyone! Today I have two manicures to share with you that I created using KBShimmer's new line of nail vinyls. I received samples of several of the designs, but today I am sharing two of them with you.
They came with a sheet with a full set of instructions how how to use the decals to make nail designs, whether you are going to just stick them on your nails or whether you are going to use them with nail polish to stencil.
First up, I used the single chevron decals to create a Funky French manicure.
I started off with a base of KBShimmer Low and Be Bold and allowed it to dry completely. This is important when using these decals. Even when using a quick dry topcoat, I would wait at least 30 minutes to an hour before using them or you will pull off your base color.
Then I used KBShimmer Run! It's the Coppers! for the design. Be sure to pull off the nail vinyls while the polish is still wet to get clean edges for your designs. For a finishing touch, I added a single dot on each nail with a dotting tool. I love blue and copper together, and I thought this design looked really cool.
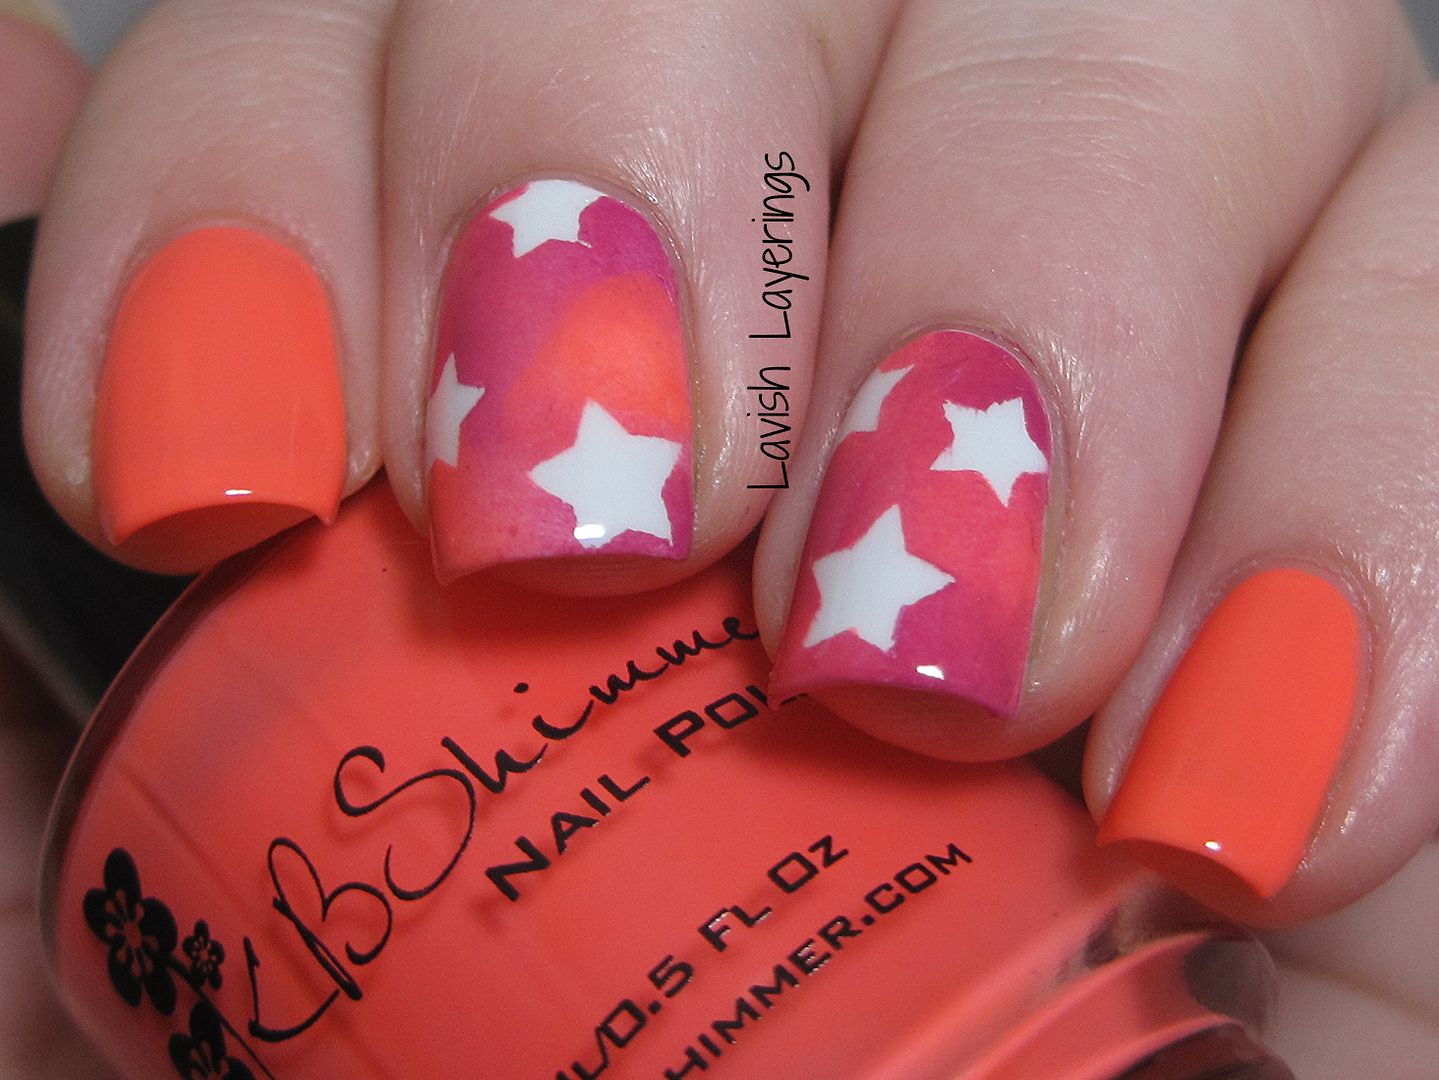
Next I used the star decals from the Stars and Stripes set to create a summery star manicure.
I started off with a white base on my middle two nails and allowed it to dry completely. Next I placed the star decals randomly on those nails. Then, I used a make-up sponge to dab on KBShimmer You're So Shellfish and Life Rose On in a random pattern over the decals to give it sort of a watercolor look. I used tweezers to remove the star decals to help prevent smudging the polish. I finished with You're So Shellfish on my other nails.
So there ya go! Two nail art manicures that couldn't be simpler with the help of KBShimmer's nail vinyls! I've got a few more to try out and I will do some manicures with those soon!
KBShimmer products are available from their website as well as from Harlow & Co. (Canada). Be sure to follow them on Facebook and Instagram for updates on new collections and to see swatches of all of their polishes.
Monday, February 17, 2014
Nail Art Featuring Girly Bits and Nail Vinyls
Hi everyone! Today I have two amazing Girly Bits polishes to show you as well as my first adventure with Nail Vinyls. If you haven't heard about Nail Vinyls, they are pre-cut vinyl stickers that can be used to make different nail designs. Take a look in their shop for all of the designs that are offered to get an idea of what all can be done with them. Also, there is a very detailed guide on how to use Nail Vinyls in their FAQs.
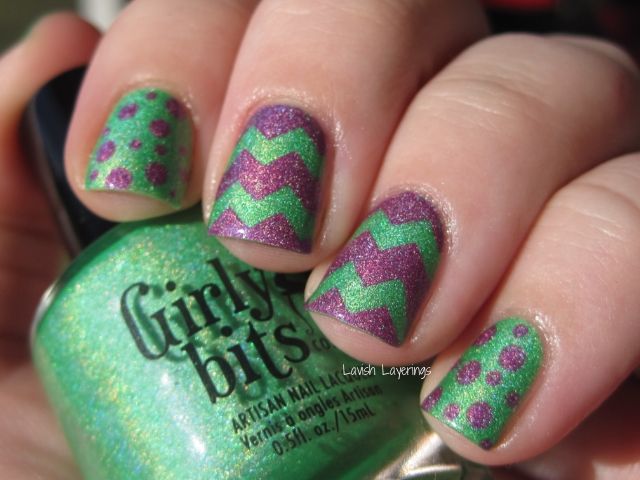
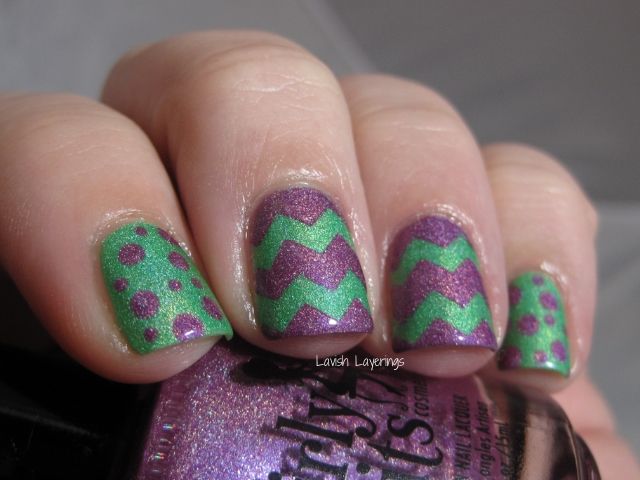
For this mani, I used the original chevron design. I started with a base of Girly Bits What the Deuce? and let it dry completely. Then I placed 2 of the chevron Nail Vinyls across both my middle and ring finger nails and applied Girly Bits Ho-Ho-Hope. I used tweezers to pull off the Nail Vinyls while the polish was still wet and viola, awesome chevron nails! You want to let the polish dry completely before adding topcoat to avoid smearing. To finish off my mani, I used my dotting tool to place random large and small dots on all of my other nails for a fun look. Everyone keeps telling me my nails look like Easter eggs, and I guess I can see that. I'm definitely going to do a similar look in pastels for Easter.
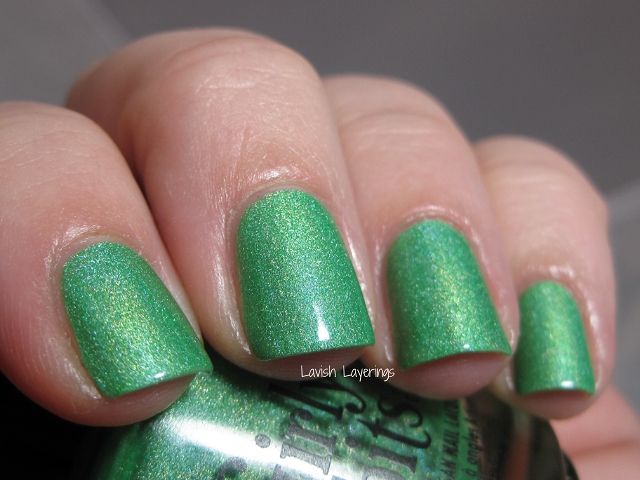
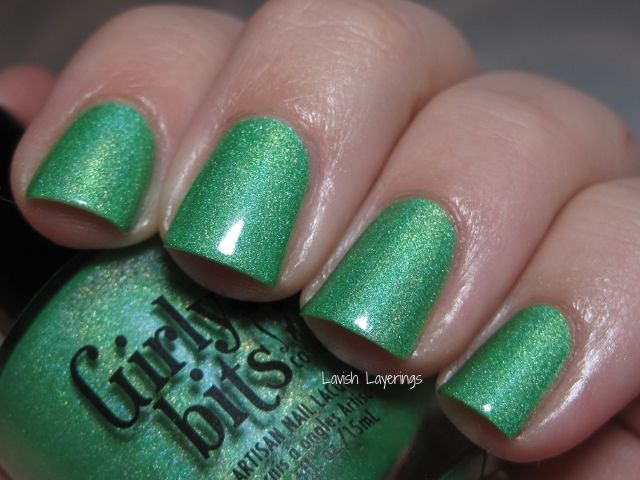
Here is What the Deuce? on its own. It is SO AWESOME!! I've been wanting this polish for ages and I'm so glad I finally ordered it. The color is so bright and fun. Formula is amazing (perfect in 2 coats) and the subtle glowing holographic effect is gorgeous.
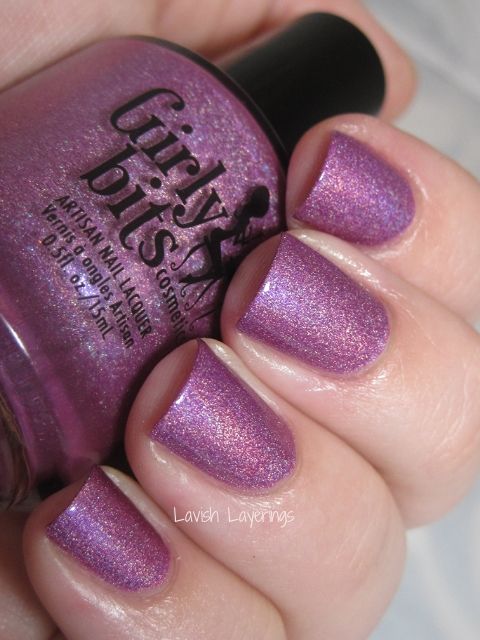
And here is Ho-Ho-Hope on its own. It is described as a violet/magenta holo and it definitely toes the line between pink and purple. I would say it is a tiny bit more pink in real life than it wants to appear in pictures. The color is rich and beautiful though. Formula was fantastic just like What the Deuce? on this one. I used 2 coats of Ho-Ho-Hope for my swatch here.
You can purchase Nail Vinyls in their StoreEnvy shop. Be sure to follow them on Facebook and follow @teismom on Instagram for updates on shop restocks and new design releases.
For this mani, I used the original chevron design. I started with a base of Girly Bits What the Deuce? and let it dry completely. Then I placed 2 of the chevron Nail Vinyls across both my middle and ring finger nails and applied Girly Bits Ho-Ho-Hope. I used tweezers to pull off the Nail Vinyls while the polish was still wet and viola, awesome chevron nails! You want to let the polish dry completely before adding topcoat to avoid smearing. To finish off my mani, I used my dotting tool to place random large and small dots on all of my other nails for a fun look. Everyone keeps telling me my nails look like Easter eggs, and I guess I can see that. I'm definitely going to do a similar look in pastels for Easter.
You can purchase Nail Vinyls in their StoreEnvy shop. Be sure to follow them on Facebook and follow @teismom on Instagram for updates on shop restocks and new design releases.
Girly Bits Cosmetics' polishes are available from creator Pam's online shop as well as from
e-tailers around the world including: Llarowe (US), Overall Beauty (US), Mei Mei's Signatures (Singapore),Harlow and Co. (Canada), Femme Fatale Cosmetics (Australia), Foxy Fingertips (Denmark), and Maria Gastadeira (Brazil). Be sure to follow Girly Bits on Facebook and Instagram for news about restocks and new collections. Thanks for looking everyone!
*Products purchased by me*
Subscribe to:
Posts (Atom)