*Nothing to Disclose*
Hi everyone! Today I have a piCture pOlish beauty to share with you!
Rose is a beautiful pink-toned red filled with holo flakes. The formula spread smoothly and easily and I used 2 coats for full coverage. I have always had a great love for piCture pOlish's holo flake polishes, and this one is no exception. The formula on Rose is more creamy vs jelly so it has more opaque coverage while still having a slightly squishy finish. It's a classic shade with a fun twist...it would be an elegant addition to anyone's polish collection. This shade was a collaboration shade with Cotton Coney, who does some of the most amazing free-hand nail art (check her out on Instagram too)
Showing posts with label piCture pOlish. Show all posts
Tuesday, June 20, 2017
Tuesday, September 13, 2016
31DC2016 - Stripes - Freehand Vertical Stripes
*Nothing to Disclose*
Hi everyone! I'm still playing catch-up and here is the Stripes prompt from yesterday in the 31 Day Challenge. I've been seeing some amazing freehand stripes and I decided to be brave and give them a try in the spirit of stripe day! Let's see how I did.
Monday, May 9, 2016
piCture pOlish Spring Shades
*Press Samples*
Hi everyone! Today I have piCture pOlish's gorgeous Spring shades to share with you! I've long been a huge piCture pOlish fan and these beauties caught my eye as soon as they were released. Let me tell you, I was even more impressed once I saw them in person! These shades are all available now direct from piCture pOlish and from their US distributor, Color4Nails.
Wednesday, September 23, 2015
Indie Inlinkz: Favorite Fall Color
*Some Press Samples Included*
Hi everyone! Today I'm doing a link-up with the ladies of Indie Inlinkz, a group of lovely bloggers who do a monthly link-up featuring indie polishes. For this month's prompt, we are exploring our favorite fall color! It's no secret that I'm an orange lover (yes that's me...sitting in the corner by myself), and I've amassed quite a collection of orange indies that are perfect for fall. Whether it be more burnt oranges or bright Halloween oranges, I don't discriminate. I have way more fabulous oranges than this in my collection (MANY that are more summer appropriate), but I picked out 8 great ones to share today that I think are fall appropriate. I'm sure I probably left out some that I love, but this is all my brain could come up with in the wee hours of the morning when I was putting this post together (just being real). These photos were taken anytime from last week to over a year and a half ago, so they are all over the place when it comes to poses, lighting, etc.. so just bear with me! Also I few of them are no longer available, so I apologize for that, but I just had to share them because they are favorites of mine!
Friday, January 30, 2015
Stained Glass Stamping Decals featuring piCture pOlish and Mo-You London
*Nothing to Disclose*
Hi everyone! Today I have my first adventures with stamping decals to share with you! I've been wanting to try this for awhile, and I've seen so many cute ones lately that I just decided to go for it! I'm really not sure who started the trend of making stamping decals, but I've seen a ton of ladies make such gorgeous manis with this technique. Here is a link to a super helpful video tutorial by Lucy's Stash if you are interested in trying it.
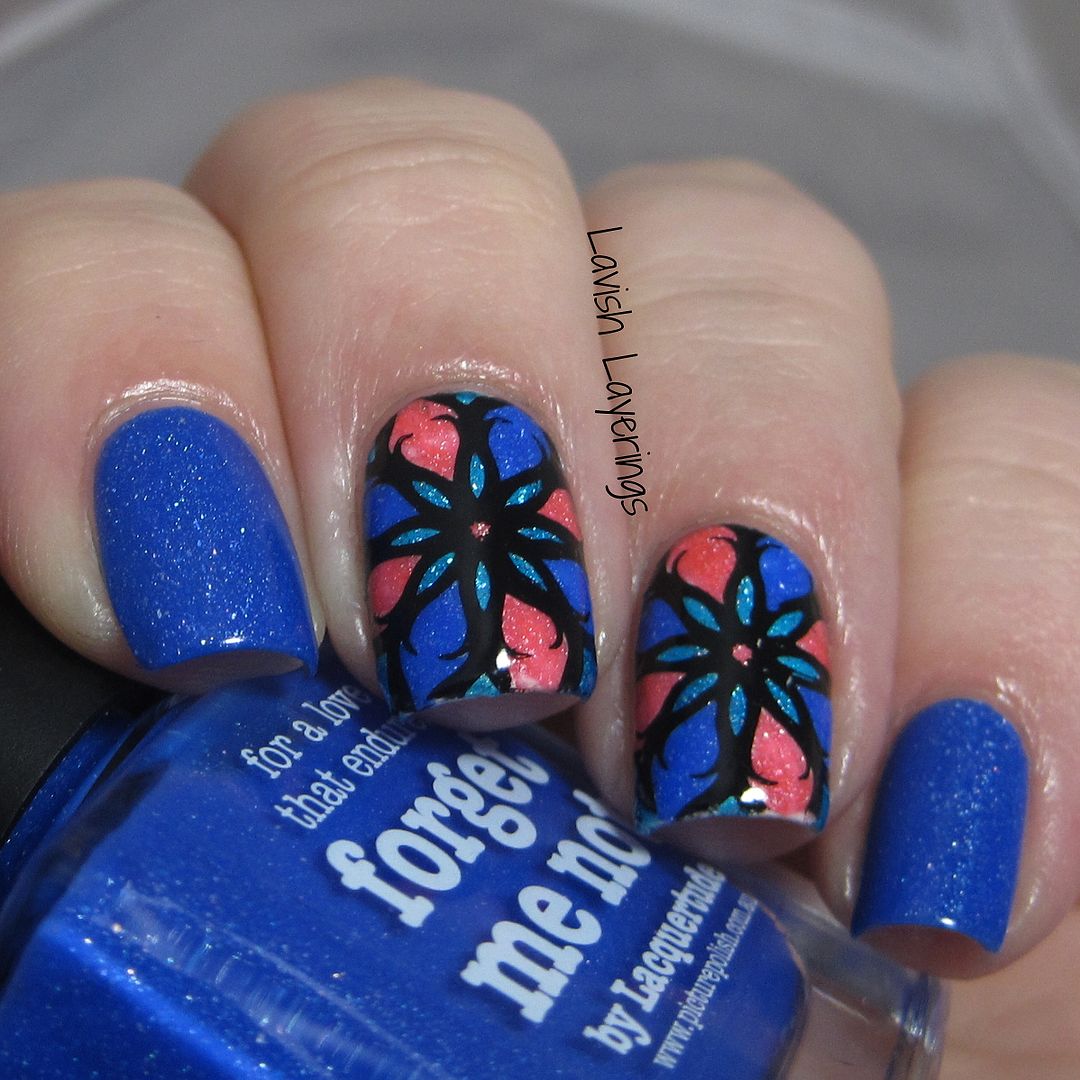
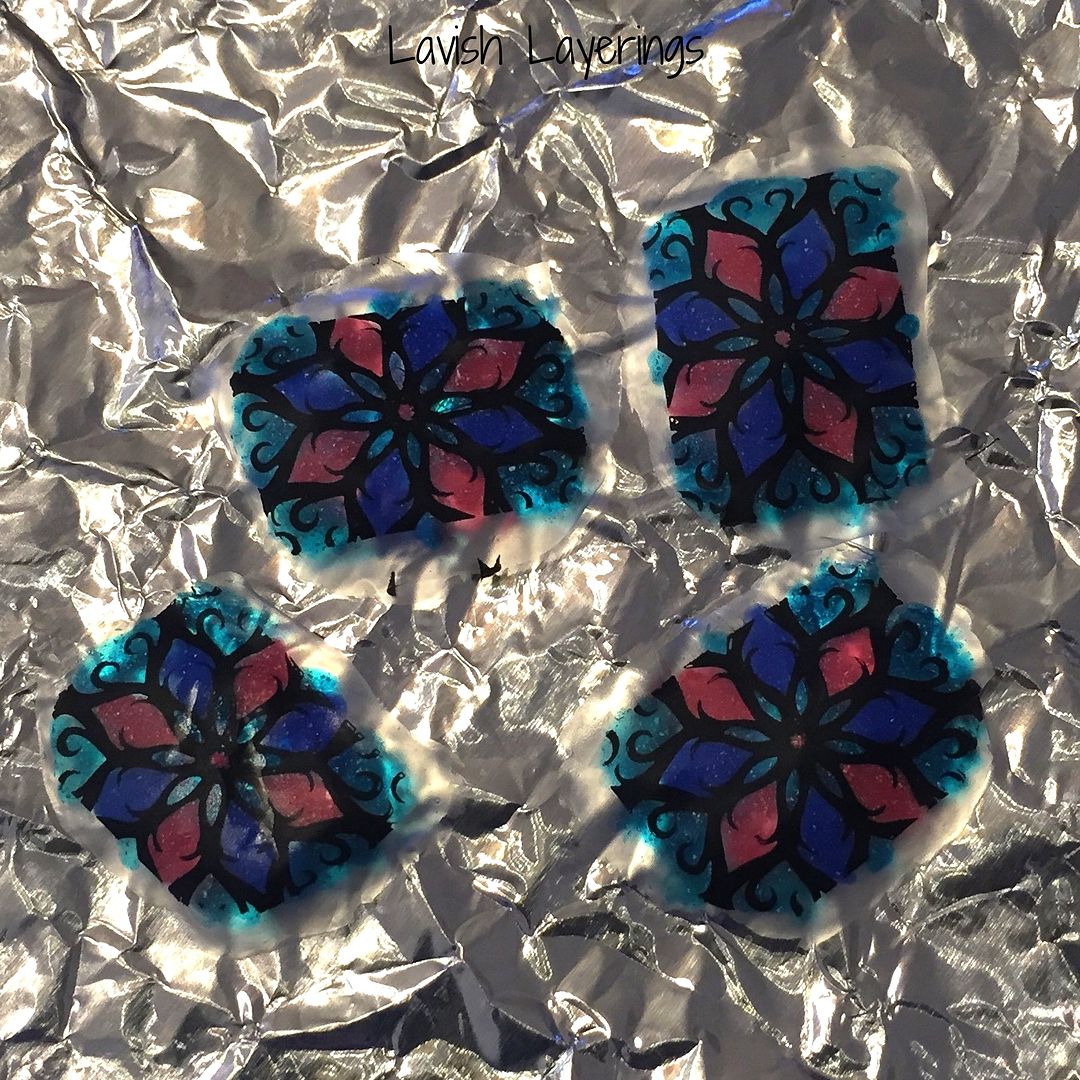
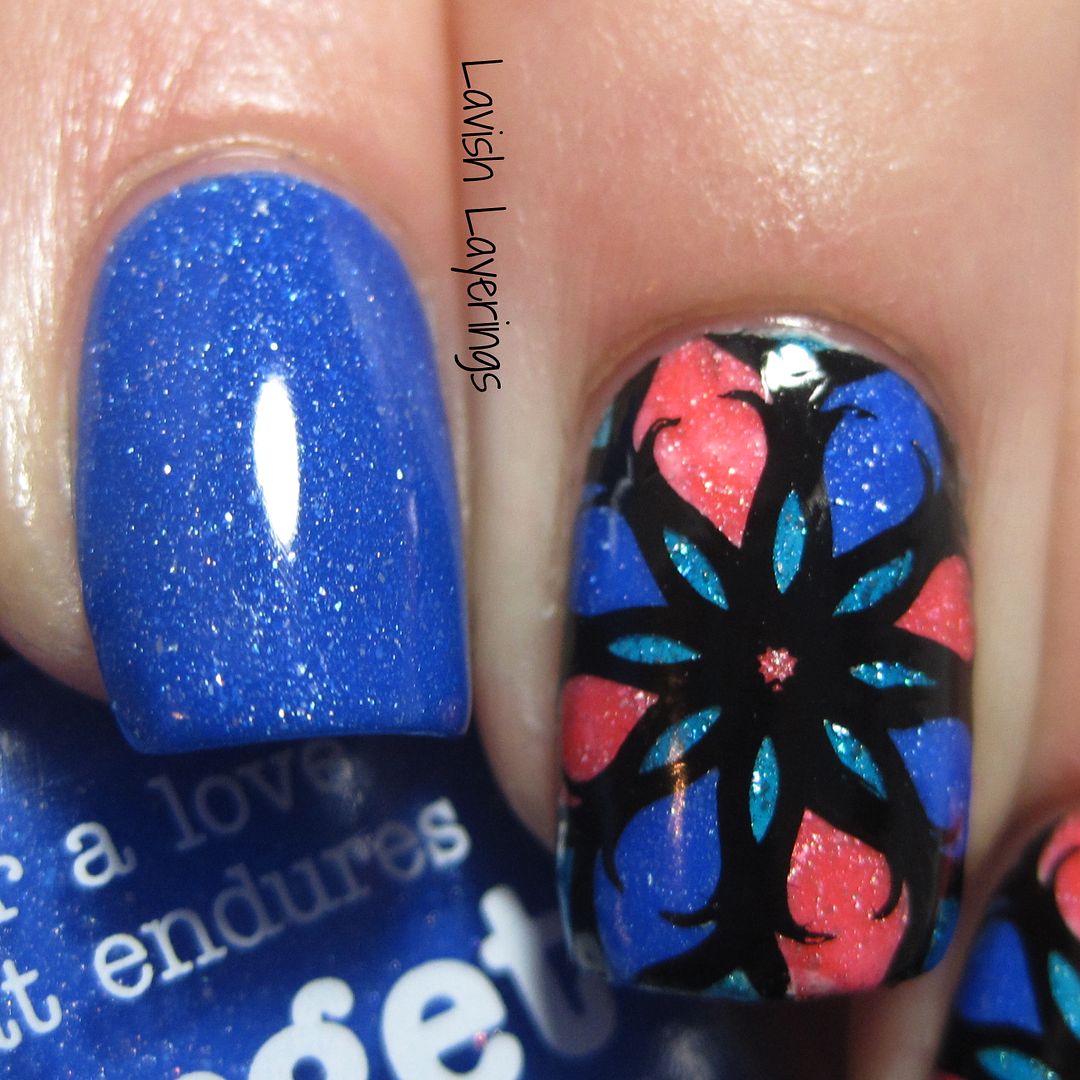
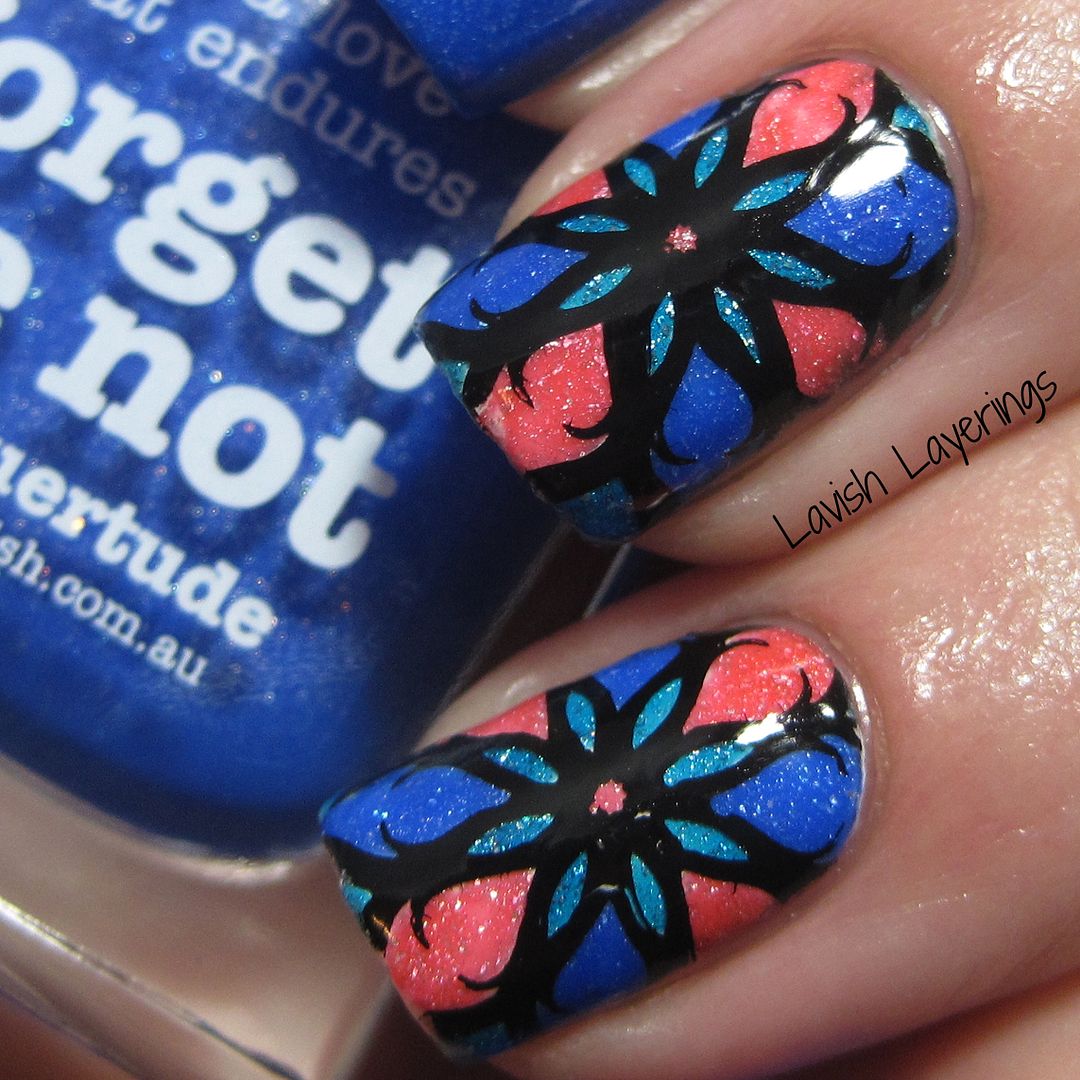
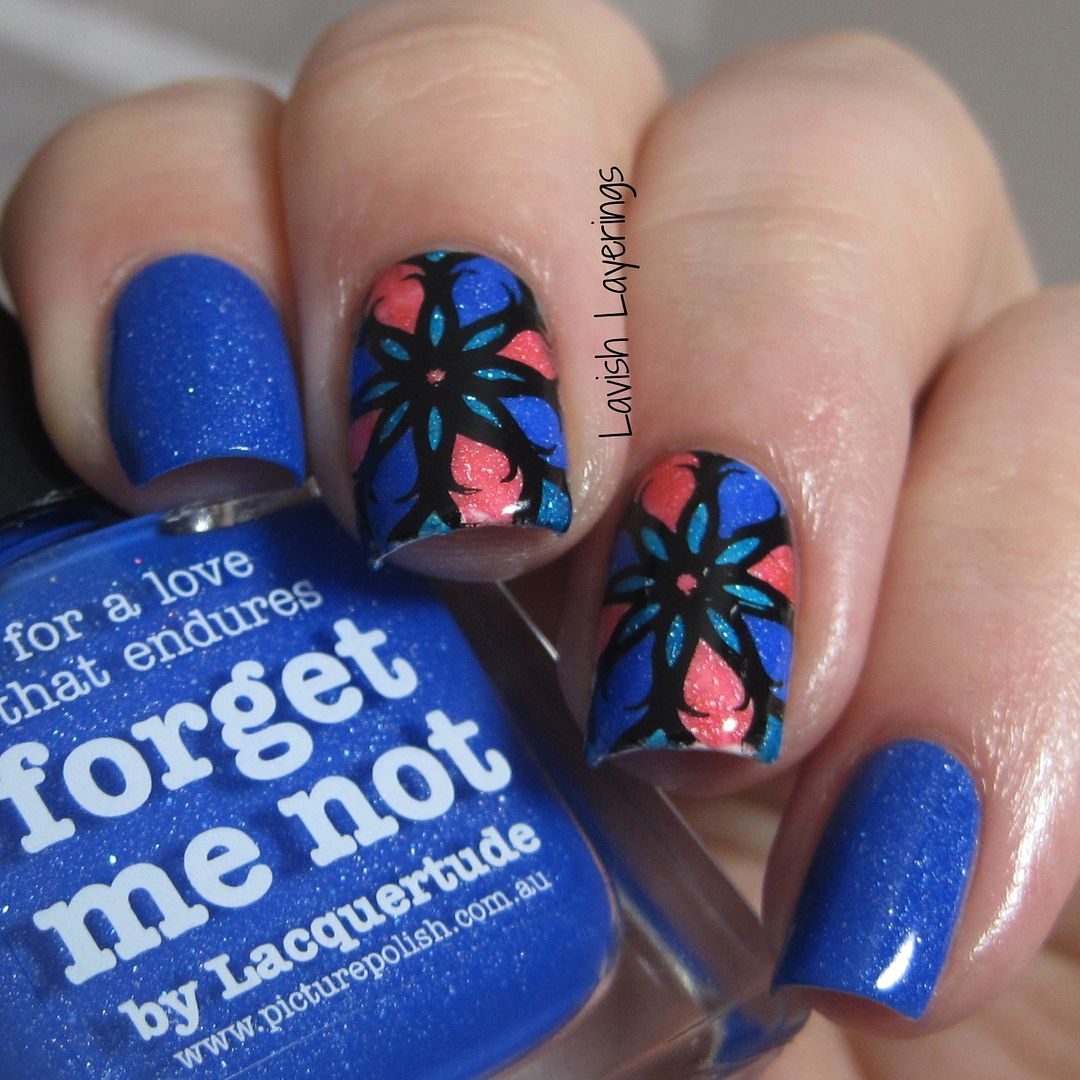
For my mani, I chose to just do accents of the stamped decals because they are a little time consuming. I used an image from the MoYou-London Kaleidoscope plate 06. That plate has a bunch of wonderful designs that are just perfect for this technique, and I think they give a stained glass effect when different colors are used like this. I stamped the image onto my stamper (I used Mundo de Unas Black for my stamping polish.) Then I used piCture pOlish Ocean, Paris, and Forget Me Not and filled in the image using a small brush. Next I painted on a coat of quick dry topcoat and allowed the image to dry completely, and then peeled off the entire decal with tweezers (seen below).
For the nails that I was applying my decals to, I started off with a white creme base and let it dry completely. This step might not be necessary for all polishes, but since the ones I used were jelly-ish in nature, I thought the white would help to make the colors pop if they were a bit thin in some areas. I trimmed the decals down as much as I could to fit my nail before application. This is really something you want to do (especially with a larger decal like this one) to avoid having to do excessive clean-up. I then painted on a coat of quick dry topcoat over the white polish and pressed the decal onto the nail, smoothing it out with my fingers. I then used my brush dipped in acetone to go around and clean up the excess around the edges. This not only works to clean up excess polish, but also helps to seal the decal around the edges. Finally, I finished off with two coats of topcoat. to make it smooth and glassy. On the nails that I didn't apply the decals to, I used piCture pOlish Forget Me Not on its own (which...holy gorgeous! I'm so glad I got that one finally!)
Hi everyone! Today I have my first adventures with stamping decals to share with you! I've been wanting to try this for awhile, and I've seen so many cute ones lately that I just decided to go for it! I'm really not sure who started the trend of making stamping decals, but I've seen a ton of ladies make such gorgeous manis with this technique. Here is a link to a super helpful video tutorial by Lucy's Stash if you are interested in trying it.
For my mani, I chose to just do accents of the stamped decals because they are a little time consuming. I used an image from the MoYou-London Kaleidoscope plate 06. That plate has a bunch of wonderful designs that are just perfect for this technique, and I think they give a stained glass effect when different colors are used like this. I stamped the image onto my stamper (I used Mundo de Unas Black for my stamping polish.) Then I used piCture pOlish Ocean, Paris, and Forget Me Not and filled in the image using a small brush. Next I painted on a coat of quick dry topcoat and allowed the image to dry completely, and then peeled off the entire decal with tweezers (seen below).
For the nails that I was applying my decals to, I started off with a white creme base and let it dry completely. This step might not be necessary for all polishes, but since the ones I used were jelly-ish in nature, I thought the white would help to make the colors pop if they were a bit thin in some areas. I trimmed the decals down as much as I could to fit my nail before application. This is really something you want to do (especially with a larger decal like this one) to avoid having to do excessive clean-up. I then painted on a coat of quick dry topcoat over the white polish and pressed the decal onto the nail, smoothing it out with my fingers. I then used my brush dipped in acetone to go around and clean up the excess around the edges. This not only works to clean up excess polish, but also helps to seal the decal around the edges. Finally, I finished off with two coats of topcoat. to make it smooth and glassy. On the nails that I didn't apply the decals to, I used piCture pOlish Forget Me Not on its own (which...holy gorgeous! I'm so glad I got that one finally!)
piCture pOlish products are available from their website based out of Australia. They do ship internationally and details about their shipping policies are available on their shipping page. piCture pOlish also has international stockists located all over the world. I usually order mine from Llarowe and Color4Nails, but a complete list of stockists is located on piCture pOlish's network page.
MoYou London stamping plates are available from their website. They have tons of gorgeous plates to choose from, so check them out! They are also now offering free shipping to the US, so that is awesome!
So what do you think of these nail decals? Have you tried them before? I think they are really fun, but I would only want to do them for accents most likely since they do take a good bit of time. Thanks for looking everyone!
Tuesday, September 16, 2014
Pirate Nail Art Challenge: Oceans
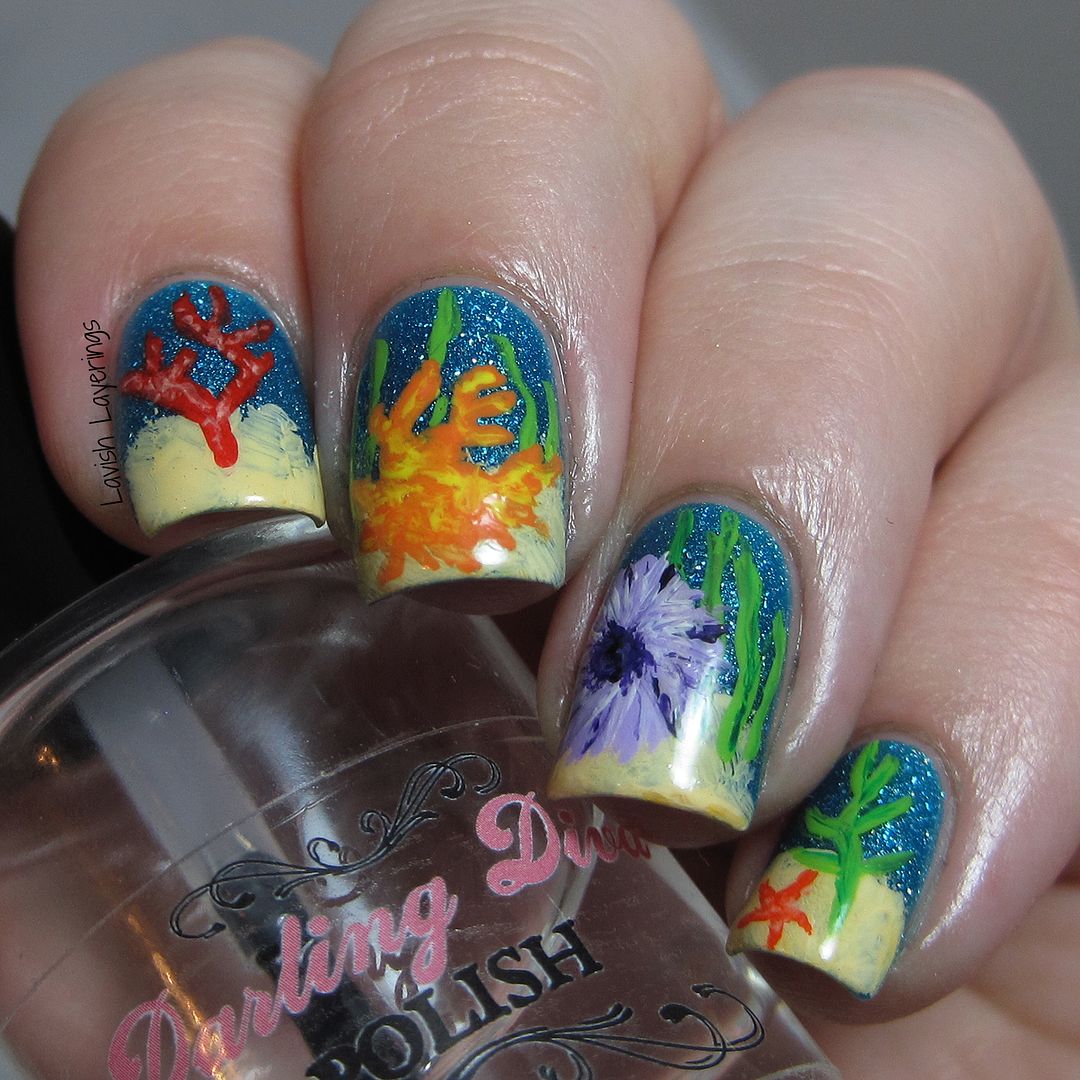
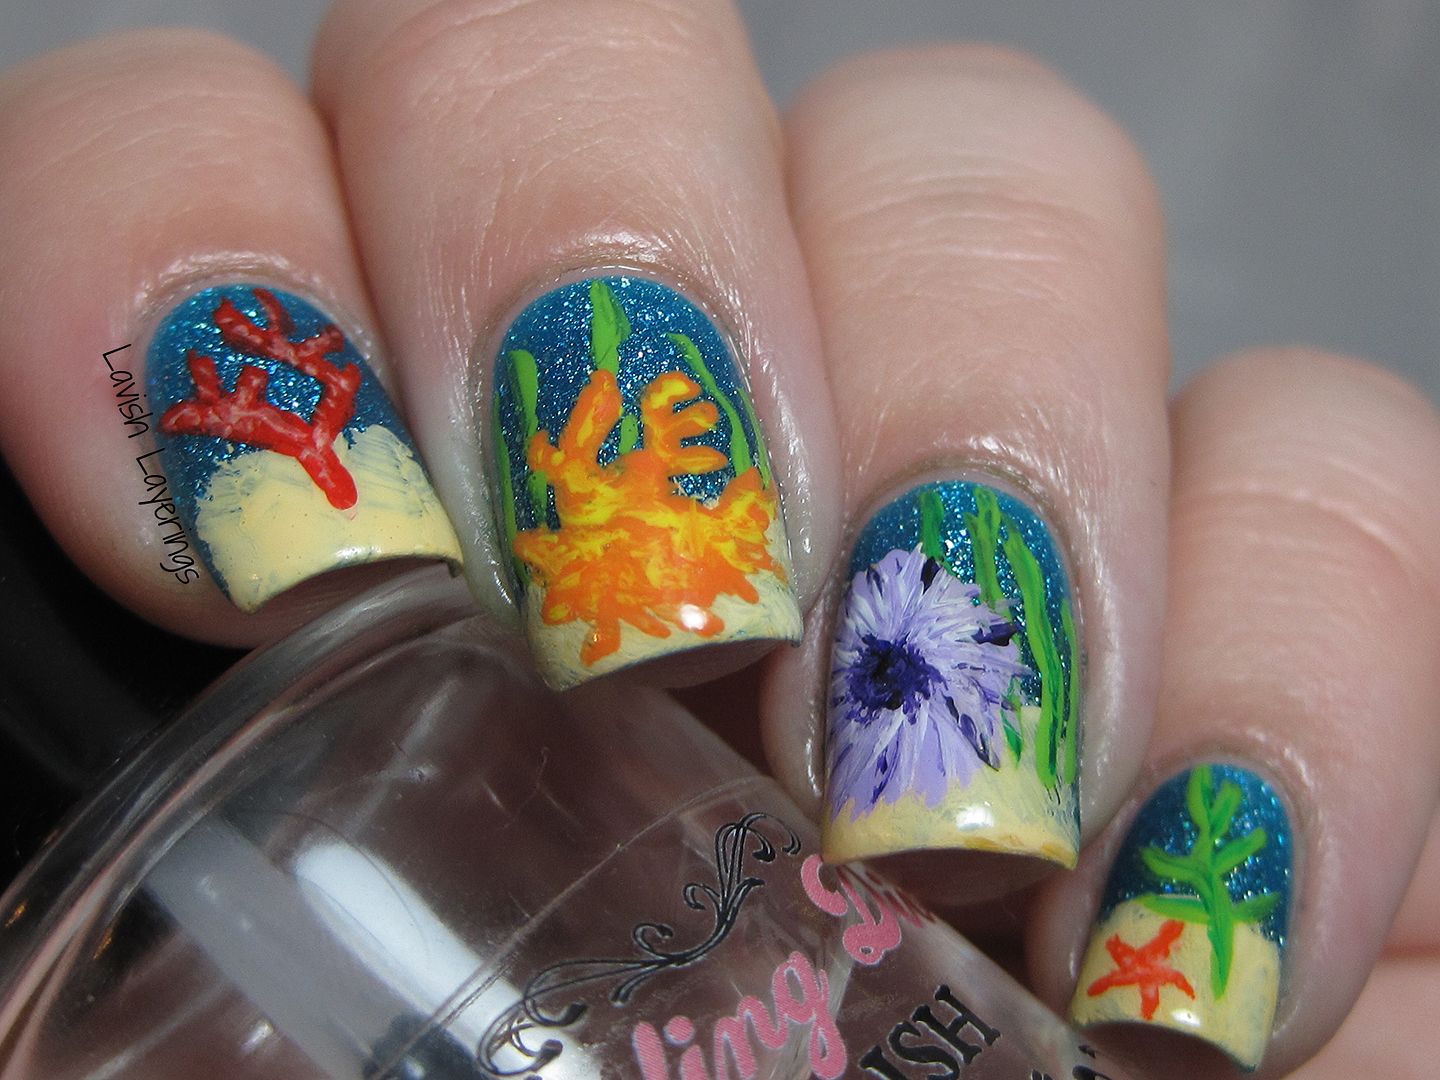
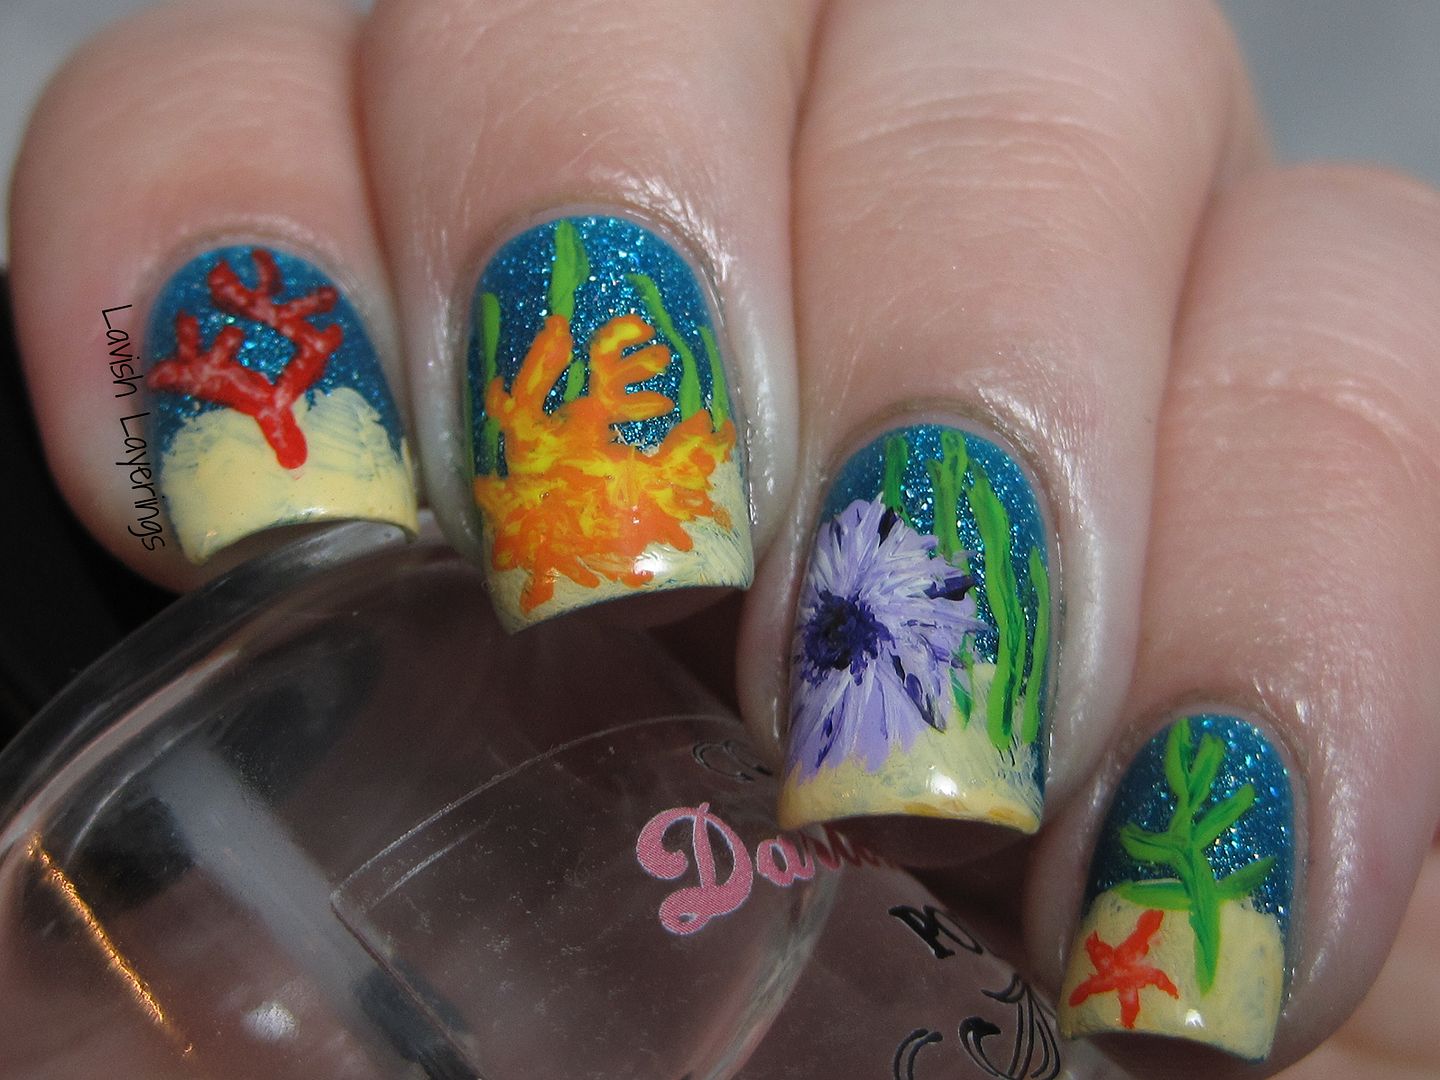
Hi everyone! Today for the Pirate Nail Art Challenge from Challenge Your Nail Art, the manis all must be ocean-inspired. I decided to do a coral reef design after seeing this fabulous mani from Nail Polish Society, so naturally I took a ton of inspiration from her work. For this mani, I started out with a base of piCture pOlish Ocean, and then used acrylic paints for the sand, anemone, seaweed, corals, and starfish. I've always wanted to do a coral reef themed mani, and adored the way this turned out!
What do you think of this ocean-inspired look? Be sure to check out what all of the other ladies have in store for today's challenge! Thanks for looking everyone!
Friday, June 13, 2014
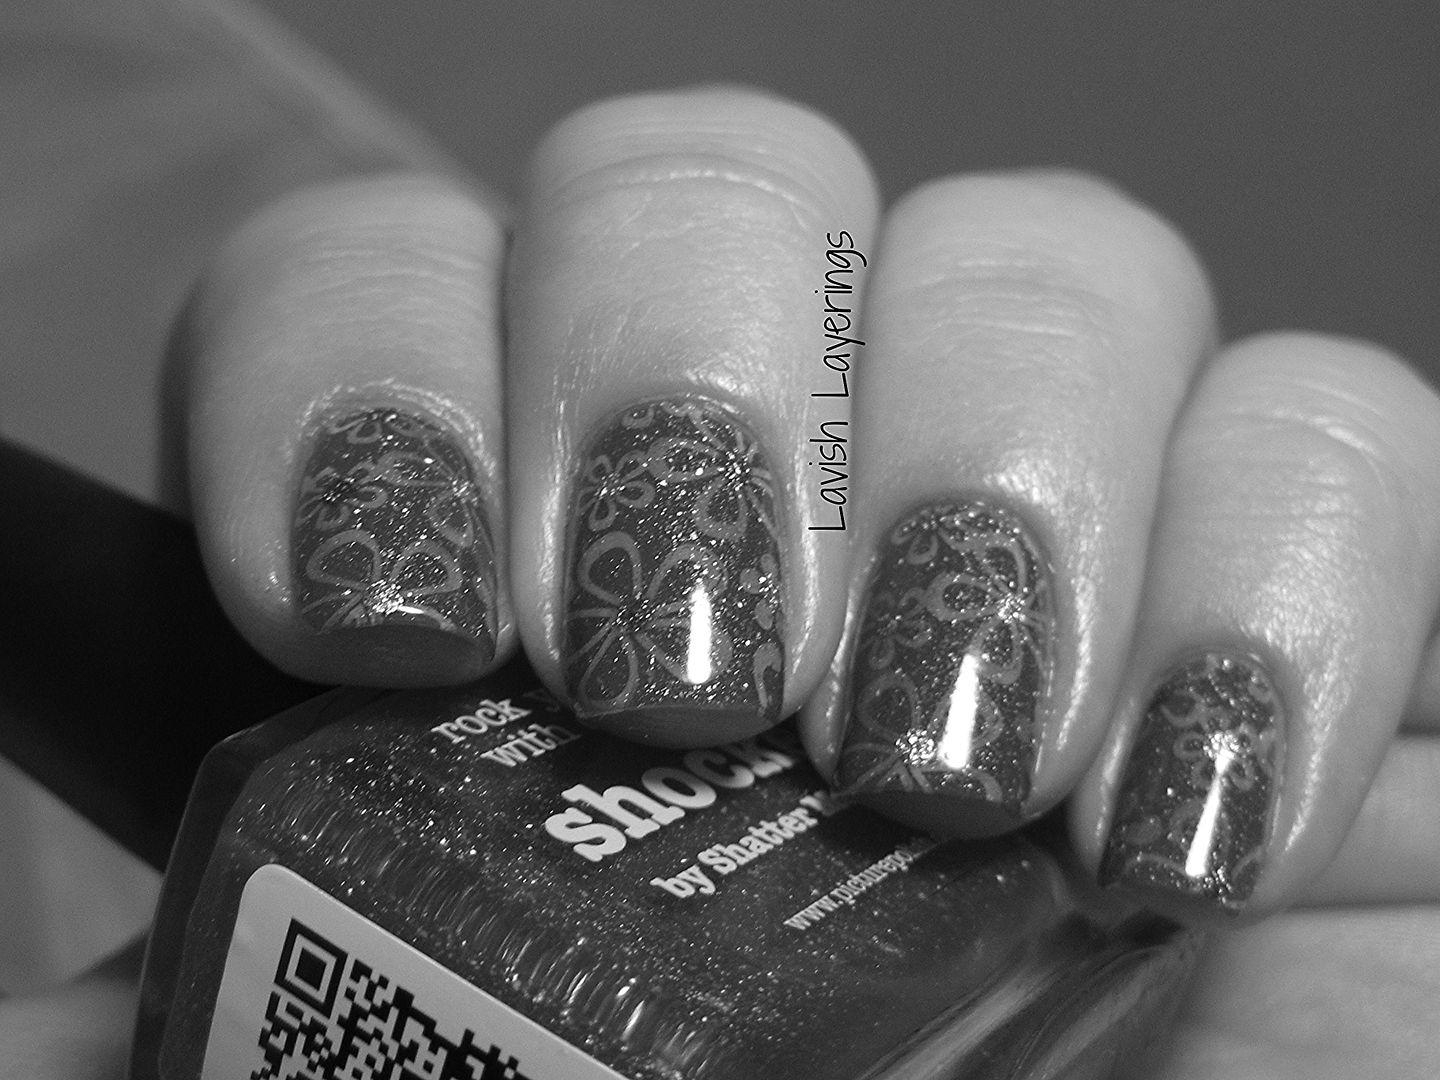
Guest Post on Shatter Me Claire!
Hi everyone! Be sure to check out my guest post over at Shatter Me Claire! He blog is 3 years old and she is having several guest posts this month, so be sure to follow her so that you can see all of the fun things she has planned!
Here is a black and white sneak peek! Be sure to view the post for full details!
Thanks for looking everyone!
Here is a black and white sneak peek! Be sure to view the post for full details!
Thanks for looking everyone!
Thursday, May 1, 2014
Pink for Mean Girls! piCture pOlish Electric Dream
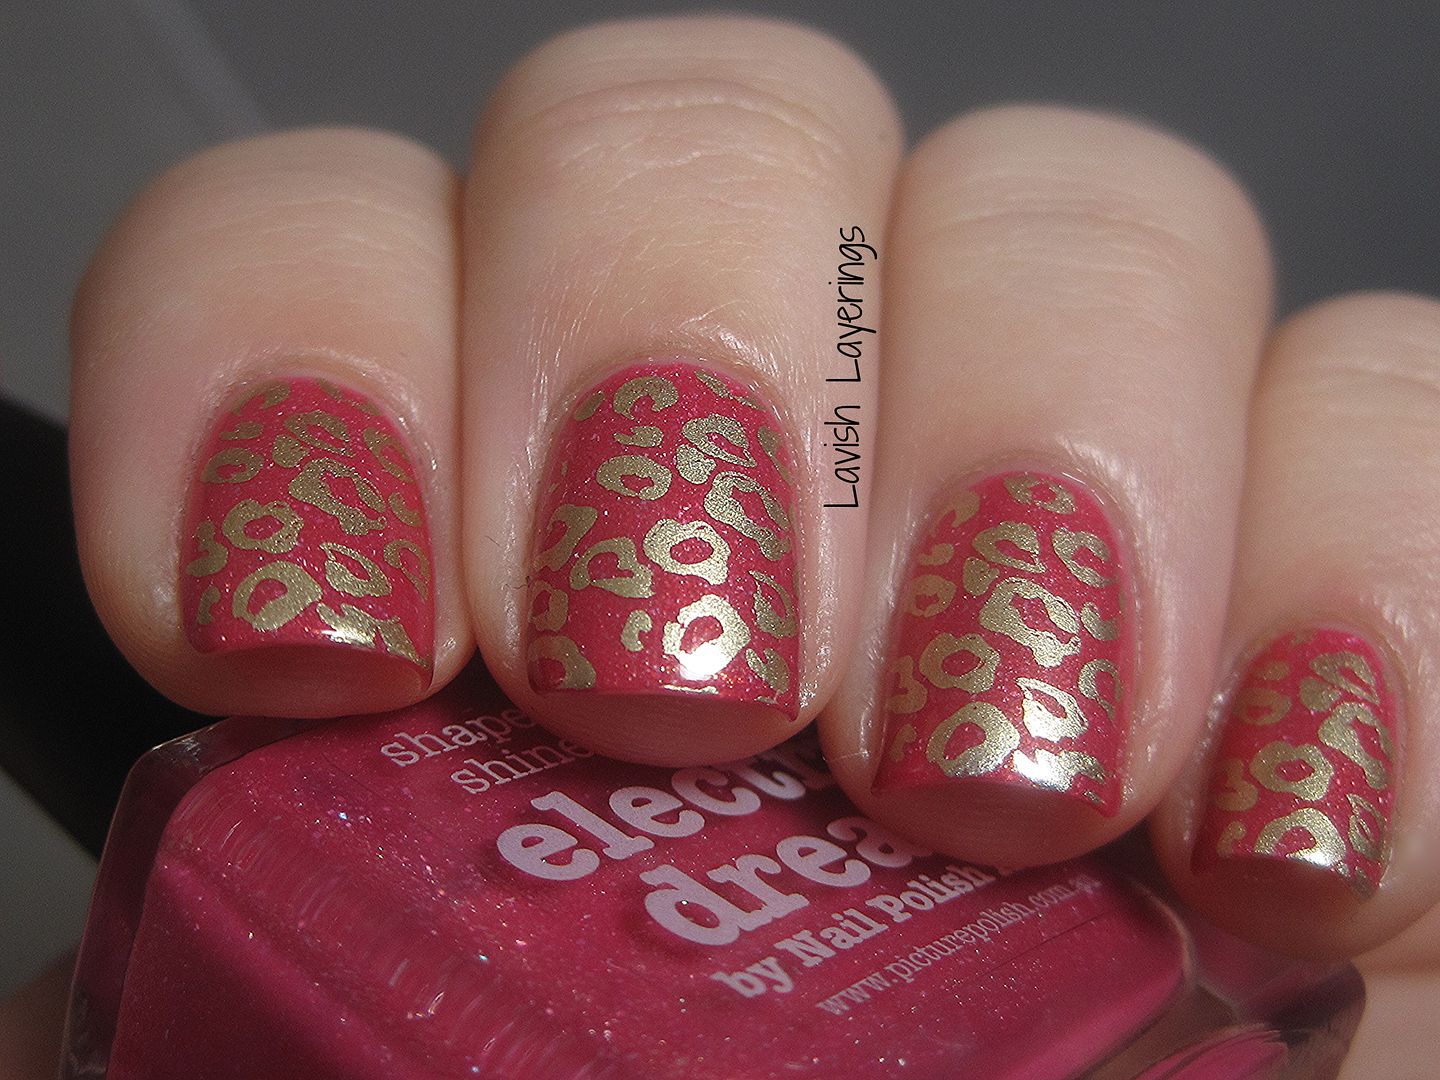
Hi everyone! I just had to do something for the 10th anniversary of Mean Girls since it is one of the greatest movies EVER! I actually did this yesterday on the proper anniversary, but I didn't have time to get it posted. For my mani, I started off with a base of piCture pOlish Electric Dream. To make it even more fun and girly (and worthy of The Plastics) I stamped on a gold leopard print design using Bundle Monster plate BM-221 and a gold chrome from The Face Shop.
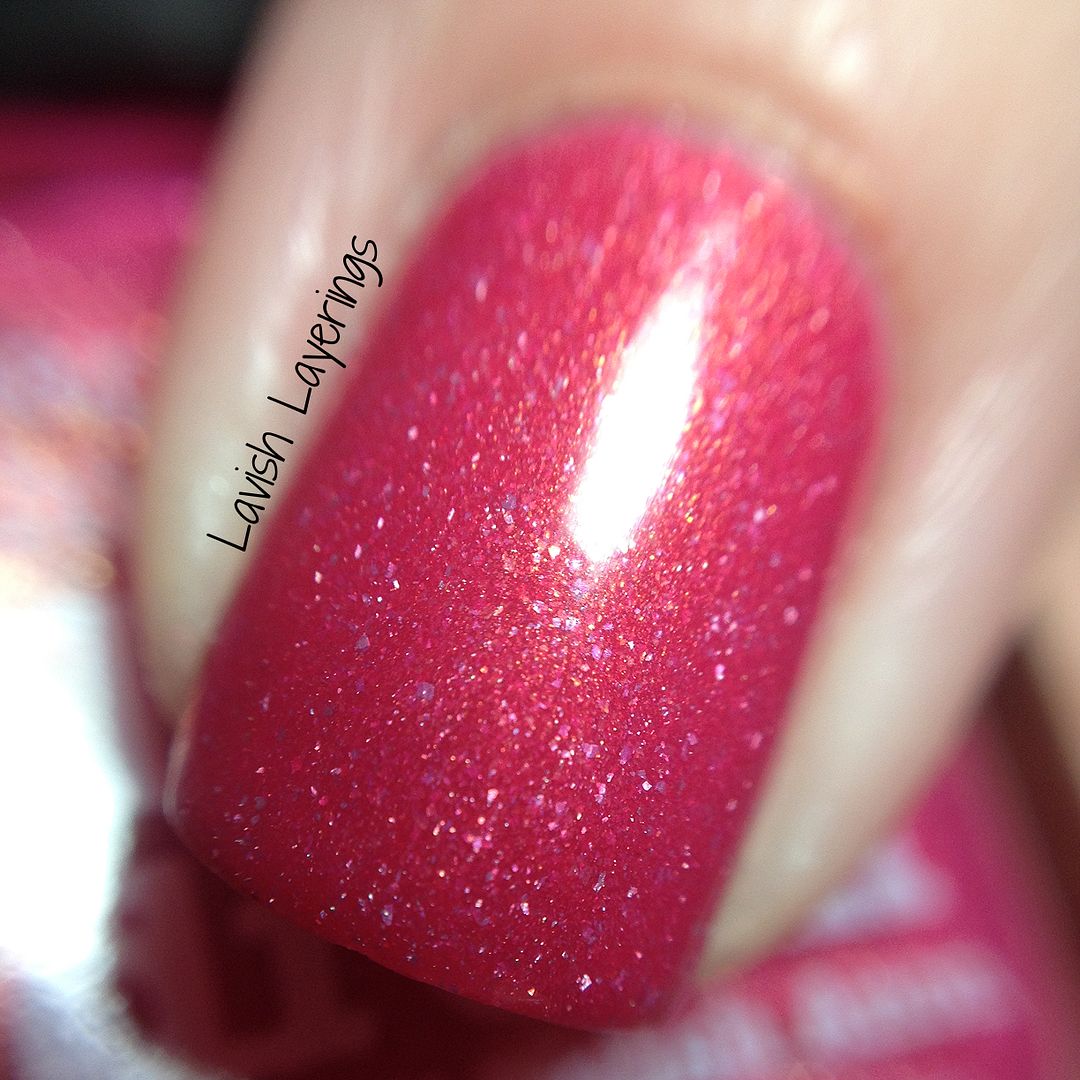
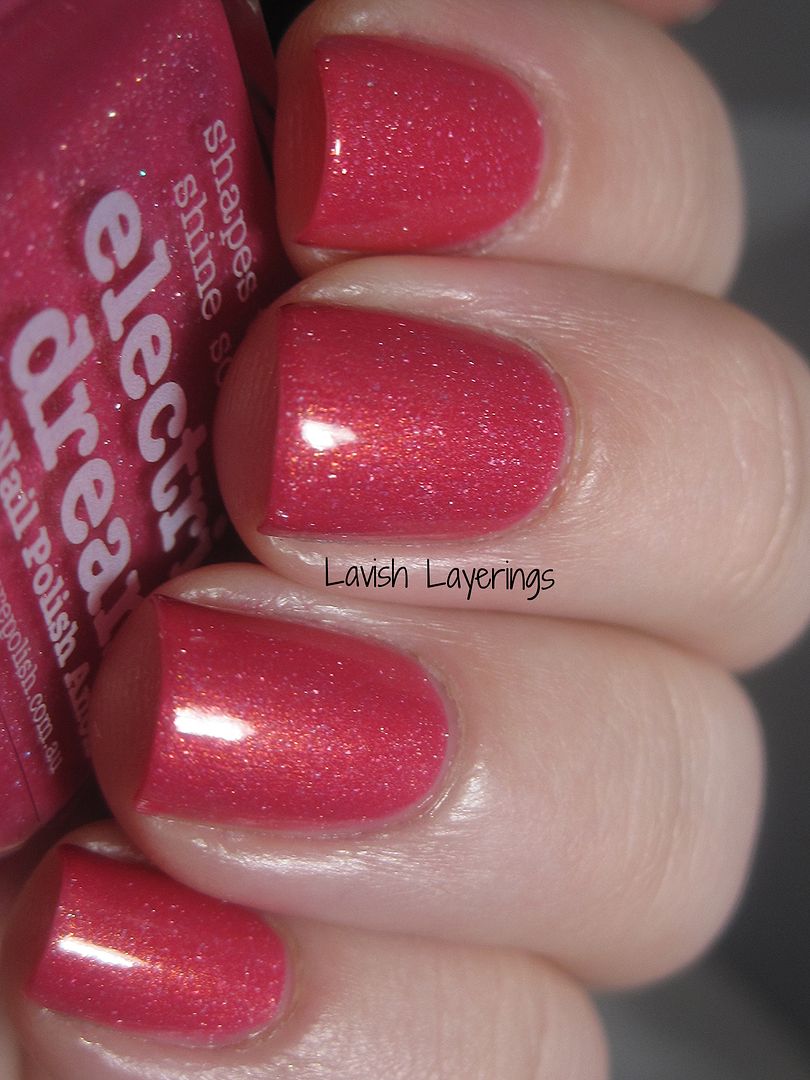
Here is piCture pOlish Electric Dream on its own. It is a corally pink jelly with golden shimmer and holo shards. The formula is just perfect and is completely opaque in 2 coats. I haven't found a piCture pOlish with these holo bits that I don't love.
piCture pOlish products are available from their website based out of Australia. They do ship internationally and details about their shipping policies are available on their shipping page. piCture pOlish also has international stockists located all over the world. I have personally ordered from Llarowe, Overall Beauty, and Harlow & Co., but a complete list of stockists is located on piCture pOlish's network page. Also, be sure to check out their Everyday Deals section to score awesome deals on polishes!
Tuesday, March 11, 2014
piCture pOlish Super Styling
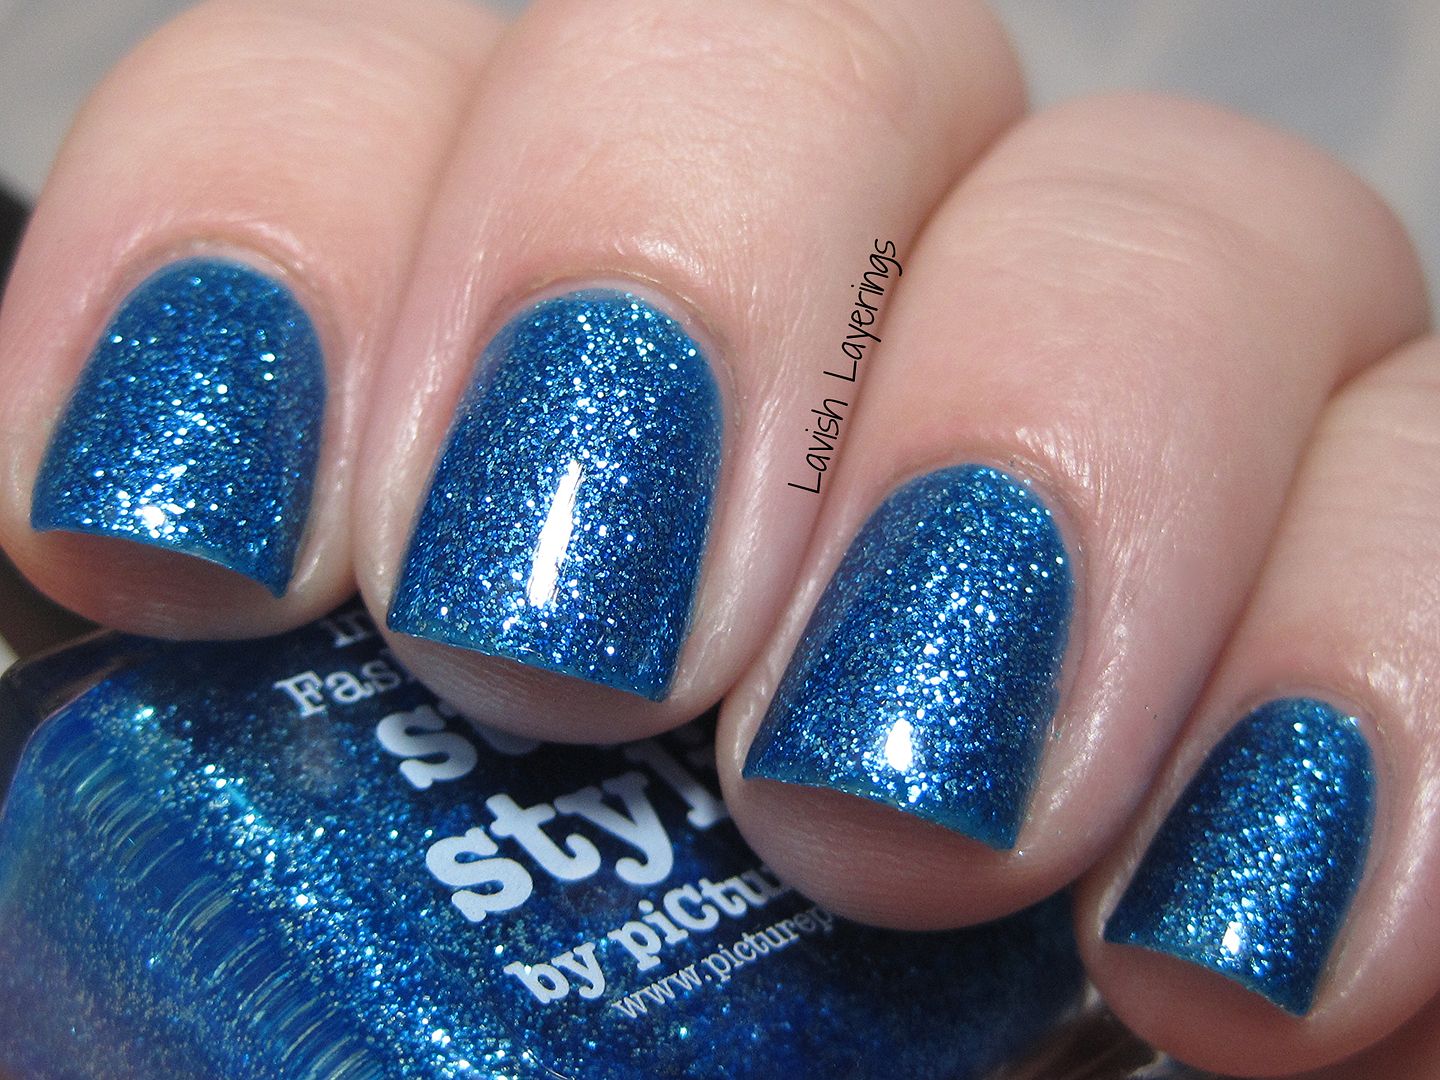
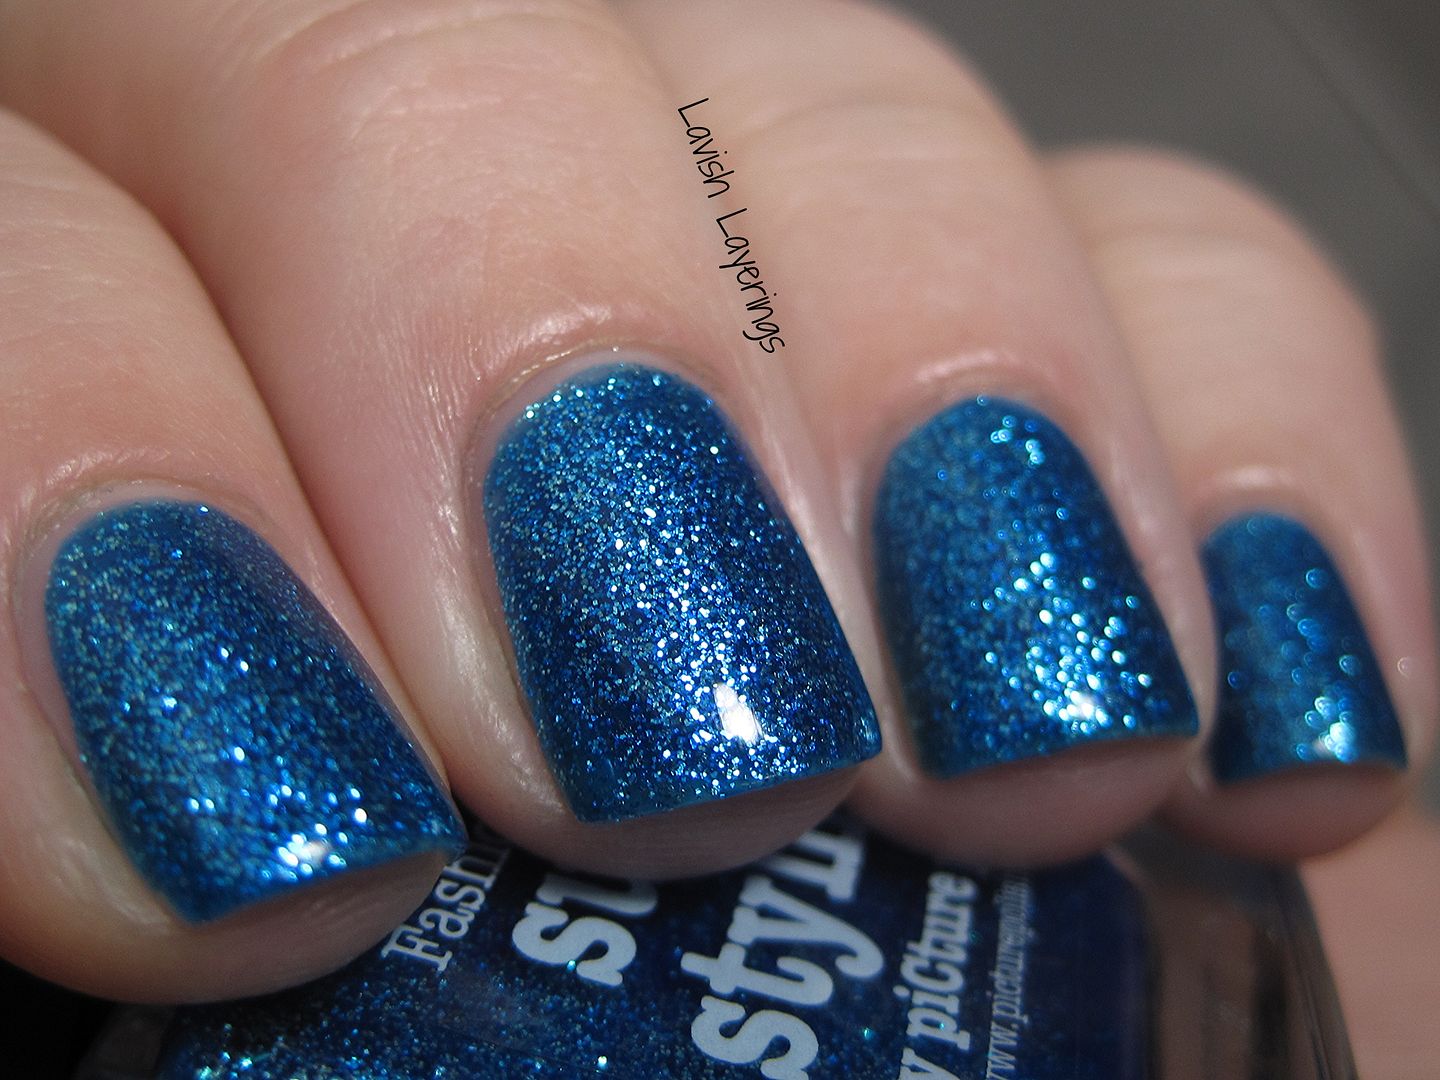
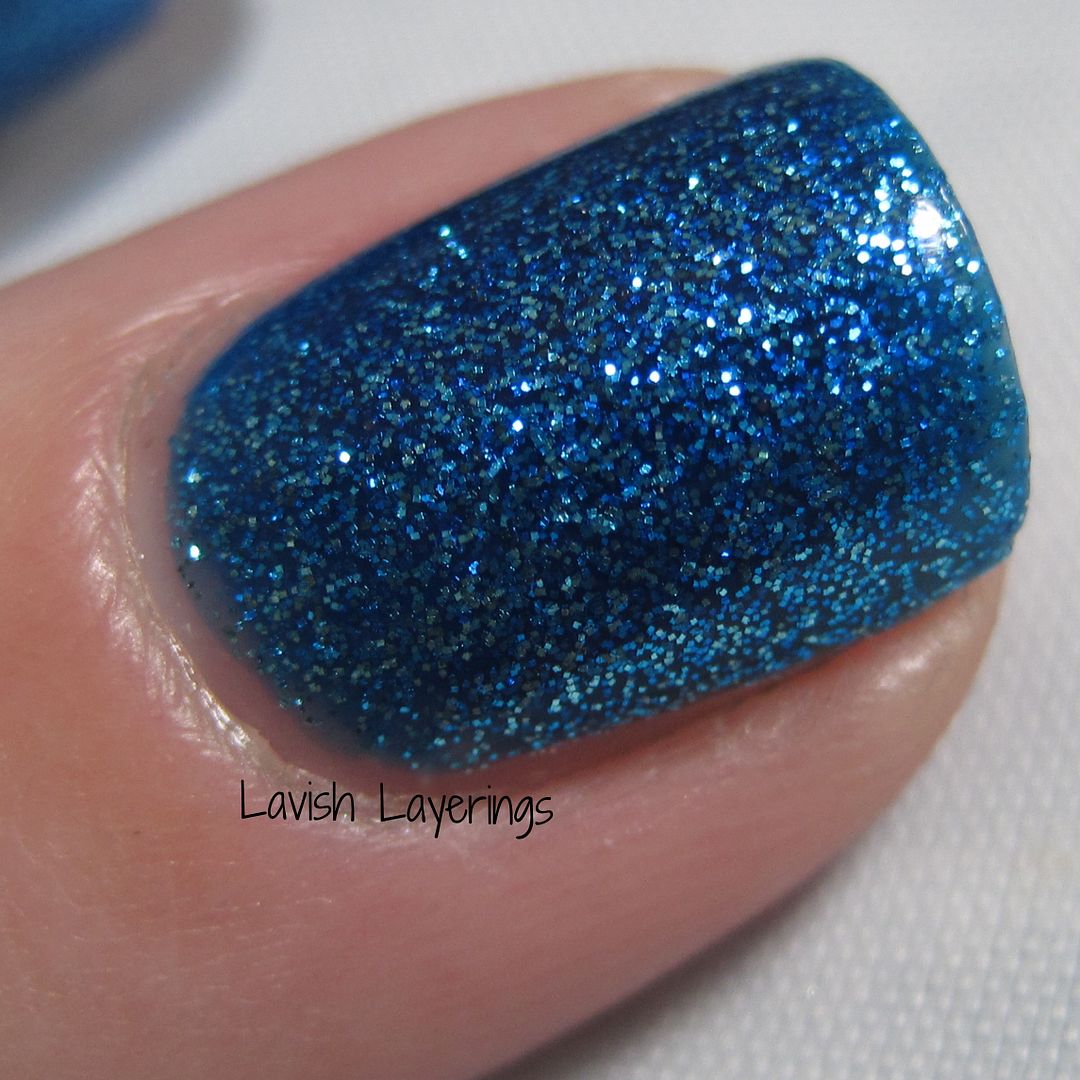
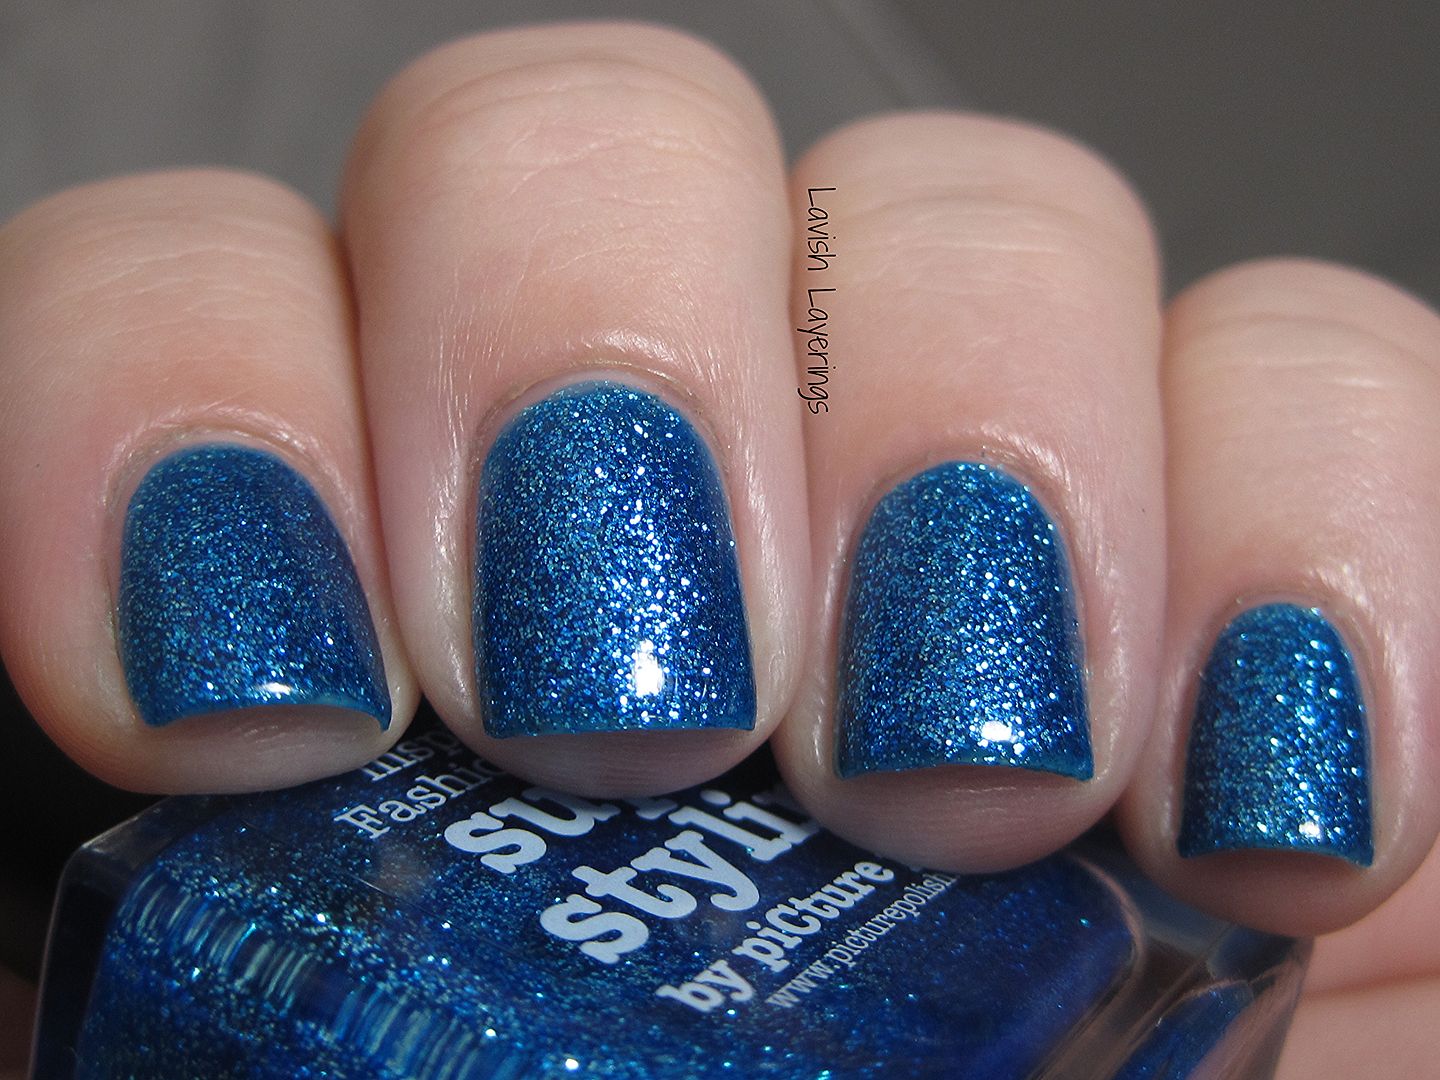
Hi everyone! Today I have a pretty blue polish from piCture pOlish to share with you. Super Styling is a medium blue jelly base filled with silver glitter. It is a very simple polish, so I wasn't expecting to be wowed by it. I have actually be hemming and hawing about ordering it for ages just for that reason, but something kept pushing me to do it. I guess sparkly simplicity is just the ticket sometimes because I really enjoyed wearing this. The formula was a great consistency (not to thick or thin) and it had good coverage. It would have been fine at 2 coats, but I did 3 thin coats just for added depth. If you like sparkly blues, then you can't go wrong with Super Styling.
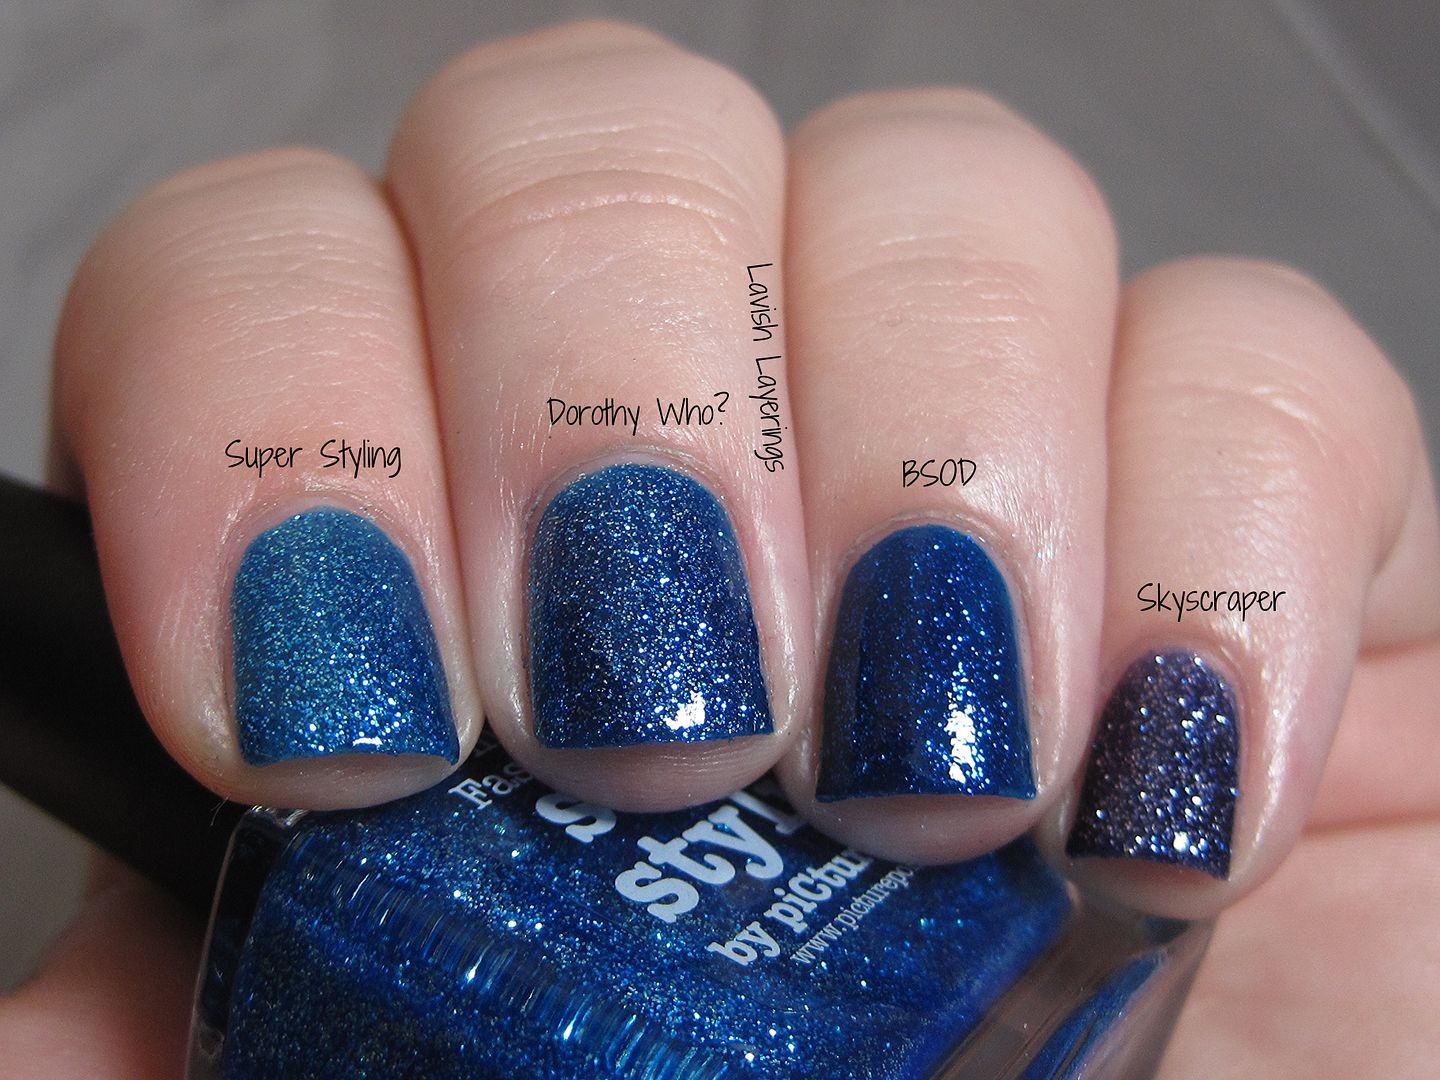
I wanted to see how it compared to some other blue jelly + glitter polishes in my stash, so here is a quick comparison.
L-R: piCture pOlish Super Styling, China Glaze Dorothy Who?, Pretty Serious BSOD, China Glaze Skyscraper
As you can see, Super Styling is closest to China Glaze Dorothy Who? but it is a bit lighter and brighter of a blue. Pretty Serious BSOD has a deeper blue base and blue glitters instead of silver and China Glaze Skyscraper has silver glitter, but it more indigo in comparison to the other blues.
To keep up with all of the new happenings at piCture pOlish, be sure to follow them on Facebook,Pinterest, Instagram, Twitter, Google+, and You Tube.
I wanted to see how it compared to some other blue jelly + glitter polishes in my stash, so here is a quick comparison.
L-R: piCture pOlish Super Styling, China Glaze Dorothy Who?, Pretty Serious BSOD, China Glaze Skyscraper
As you can see, Super Styling is closest to China Glaze Dorothy Who? but it is a bit lighter and brighter of a blue. Pretty Serious BSOD has a deeper blue base and blue glitters instead of silver and China Glaze Skyscraper has silver glitter, but it more indigo in comparison to the other blues.
piCture pOlish products are available from their website based out of Australia. They do ship internationally and details about their shipping policies are available on their shipping page. piCture pOlish also has international stockists located all over the world. I have personally ordered from Llarowe, Overall Beauty, and Harlow & Co., but a complete list of stockists is located on piCture pOlish's network page. Also, be sure to check out their Everyday Deals section to score awesome deals on polishes!
To keep up with all of the new happenings at piCture pOlish, be sure to follow them on Facebook,Pinterest, Instagram, Twitter, Google+, and You Tube.
Thanks for looking everyone!
Friday, December 20, 2013
Darling Diva Polish Holiday over piCture pOlish Kryptonite
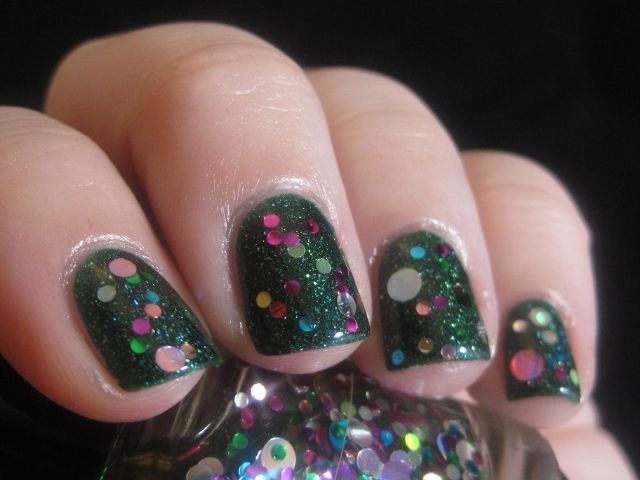
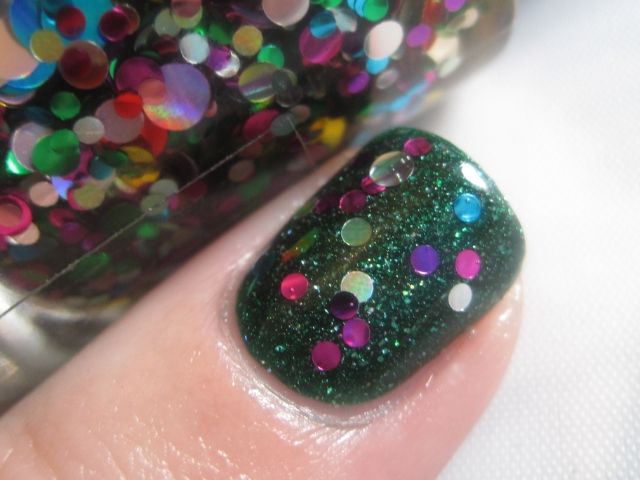
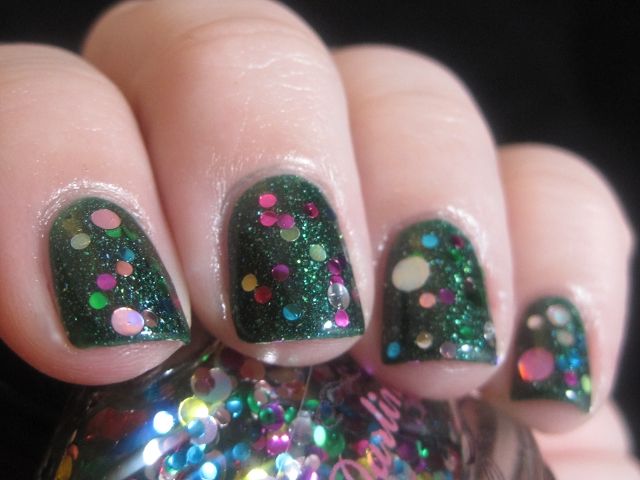
Hi everyone! Today I have some festive glittery nails to share with you featuring Darling Diva Polish and piCture pOlish. The idea behind this mani to utilize circle glitters to look like ornaments on a Christmas tree. So in the end...it's sort of like nail art without actually doing art.
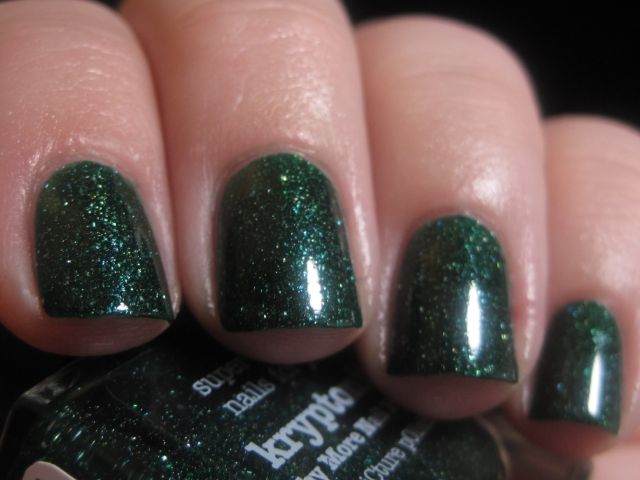
Darling Diva Polish Holiday is part of the Madonna collection that was released earlier this year, but it is perfect for Christmas. It is a clear based glitter topper consists of all various colors and sizes of circle glitters (including some very blingy holo ones). I used piCture pOlish Kryptonite for the base of my mani (I used 1 dabbed coat of Holiday on top). The circle glitters came out very easily and spread pretty well. I did a little "dab and place" to get a few where I wanted them, but all in all it was very easy to use for a glitterbomb. I have been avoiding glitterbombs this season for some reason (just one of my phases) but this mani really got me in the glitter mood because it is so fun and eye-catching.
Darling Diva Polish is available from creator Carrie's Big Cartel Shop as well as from Llarowe. Follow Darling Diva Polish on Facebook for updates on new collections and restock news.
piCture pOlish products are available from their website based out of Australia. They do ship internationally and details about their shipping policies are available on their shipping page. piCture pOlish also has international stockists located all over the world. I have personally ordered from Llarowe, Overall Beauty, and Harlow & Co., but a complete list of stockists is located on piCture pOlish's network page. Also, be sure to check out their Everyday Deals section to score awesome deals on polishes!
Thursday, November 21, 2013
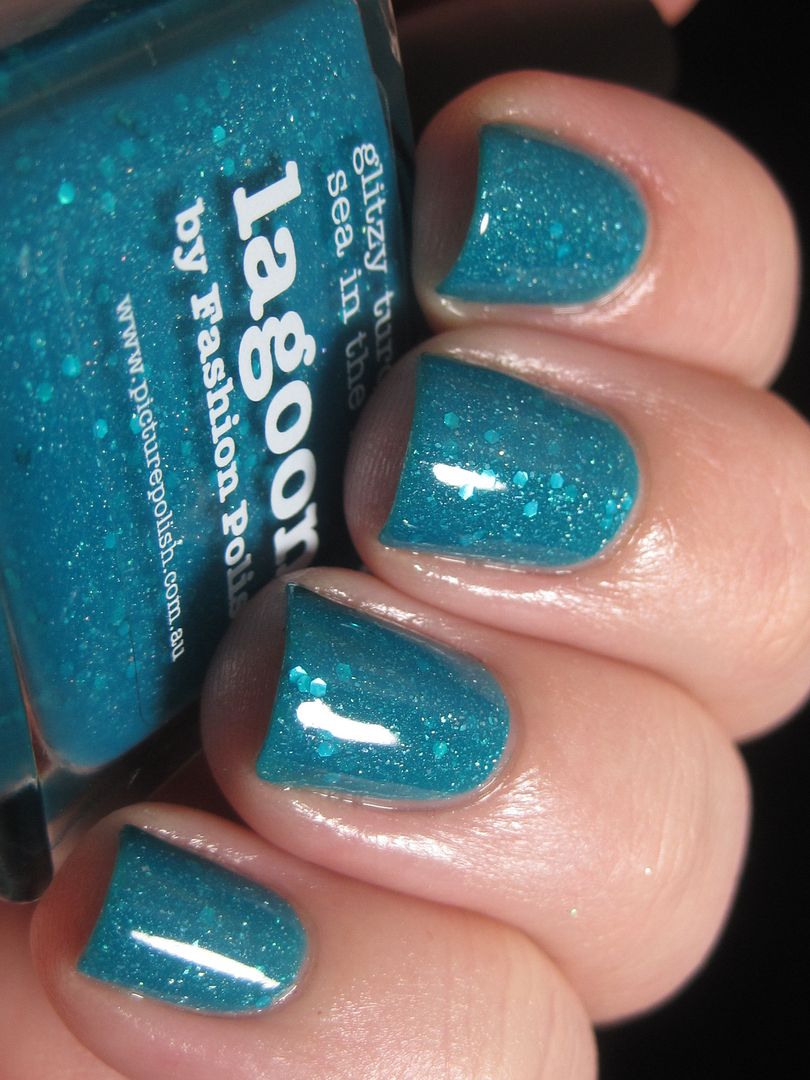
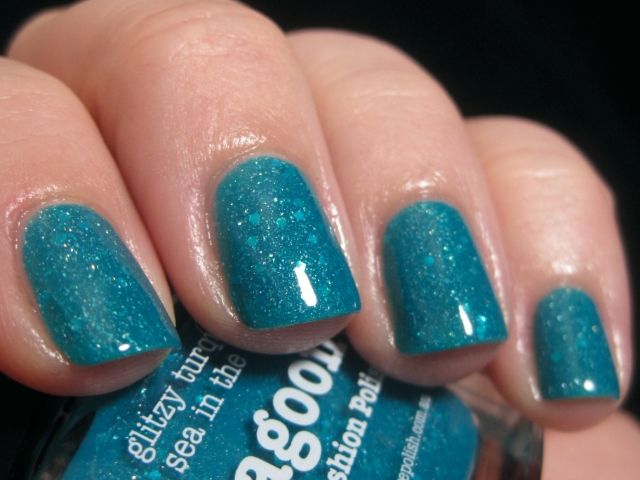
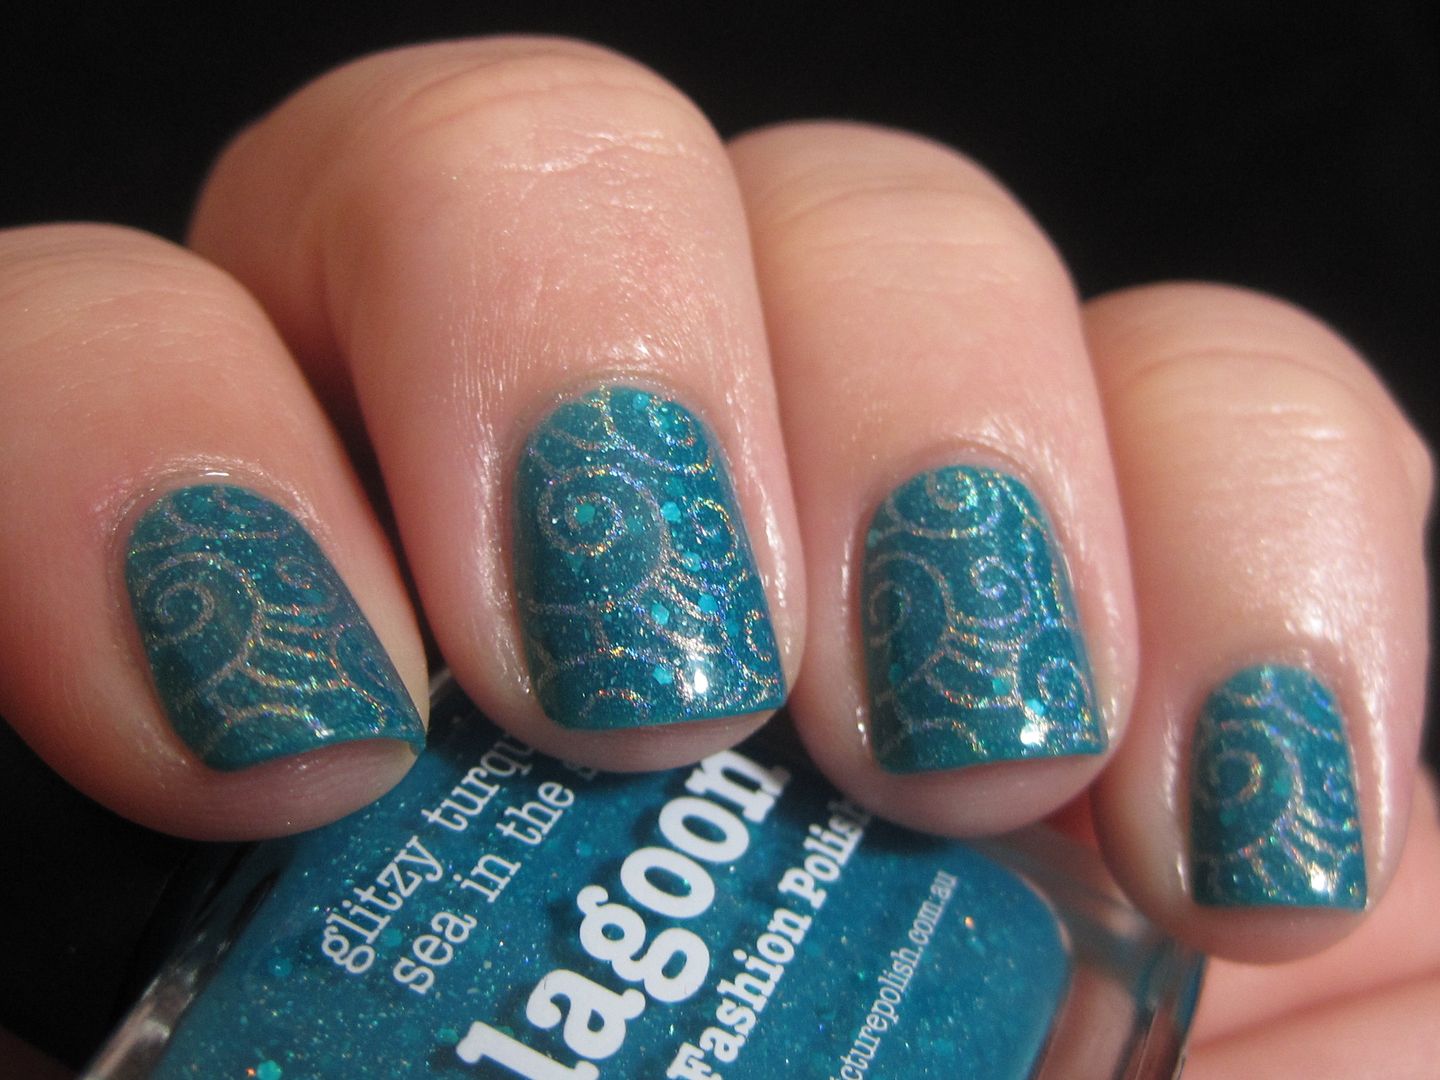
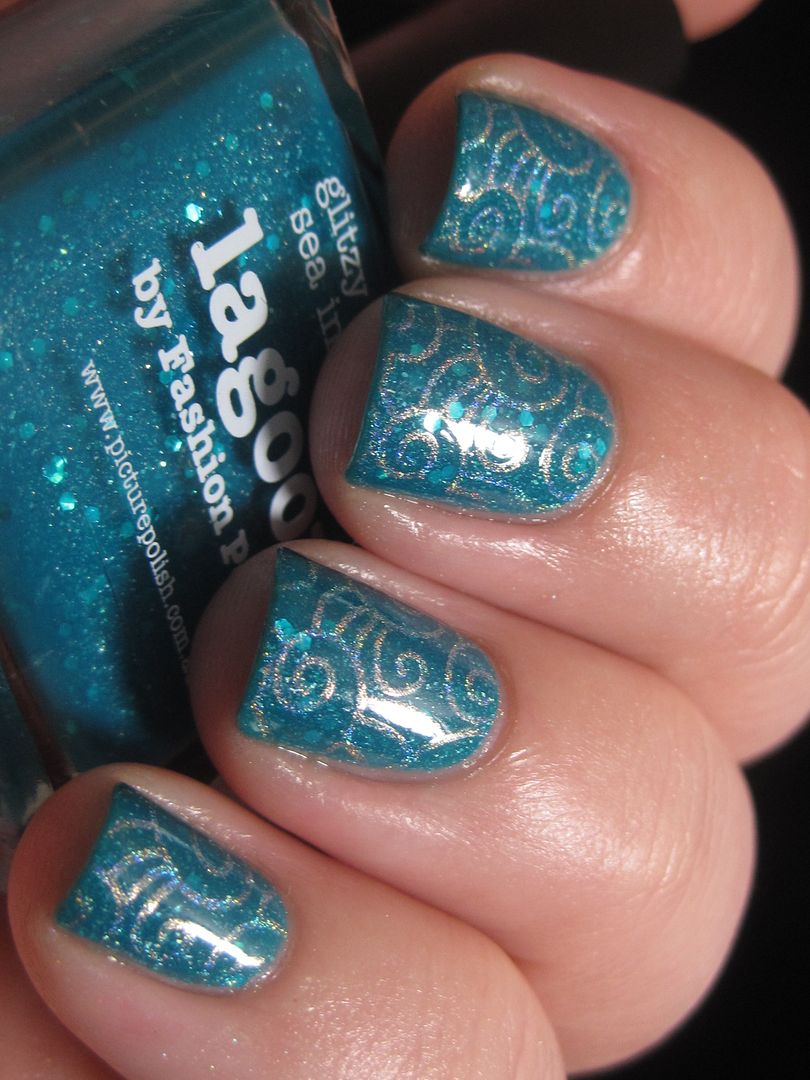
piCture pOlish Lagoon
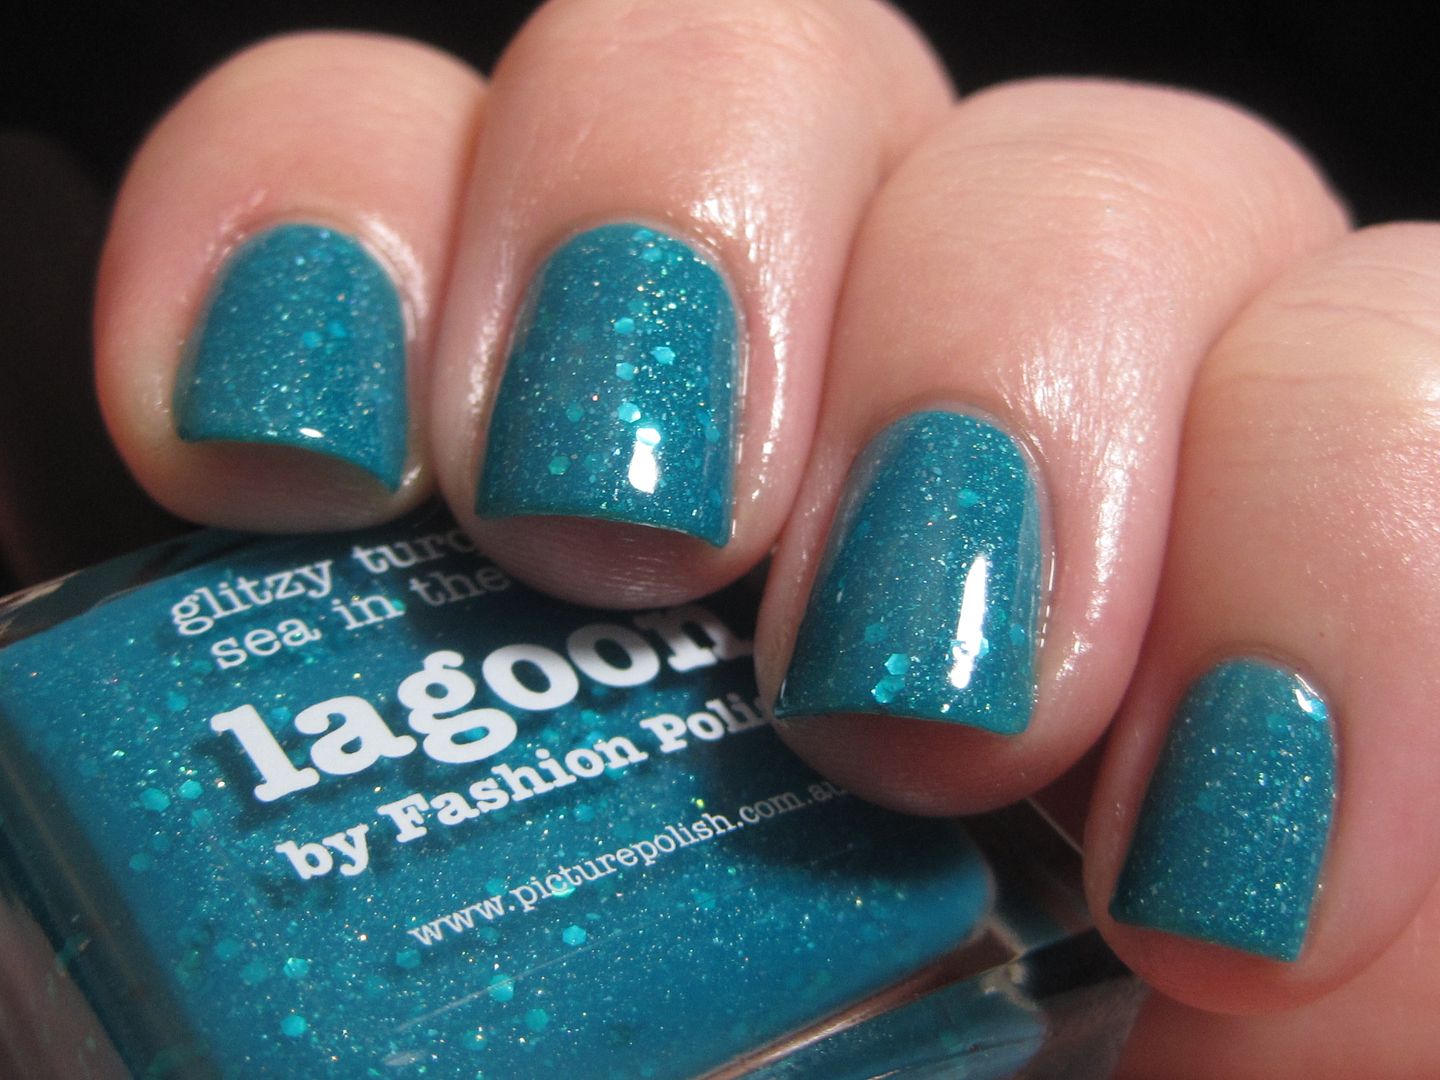
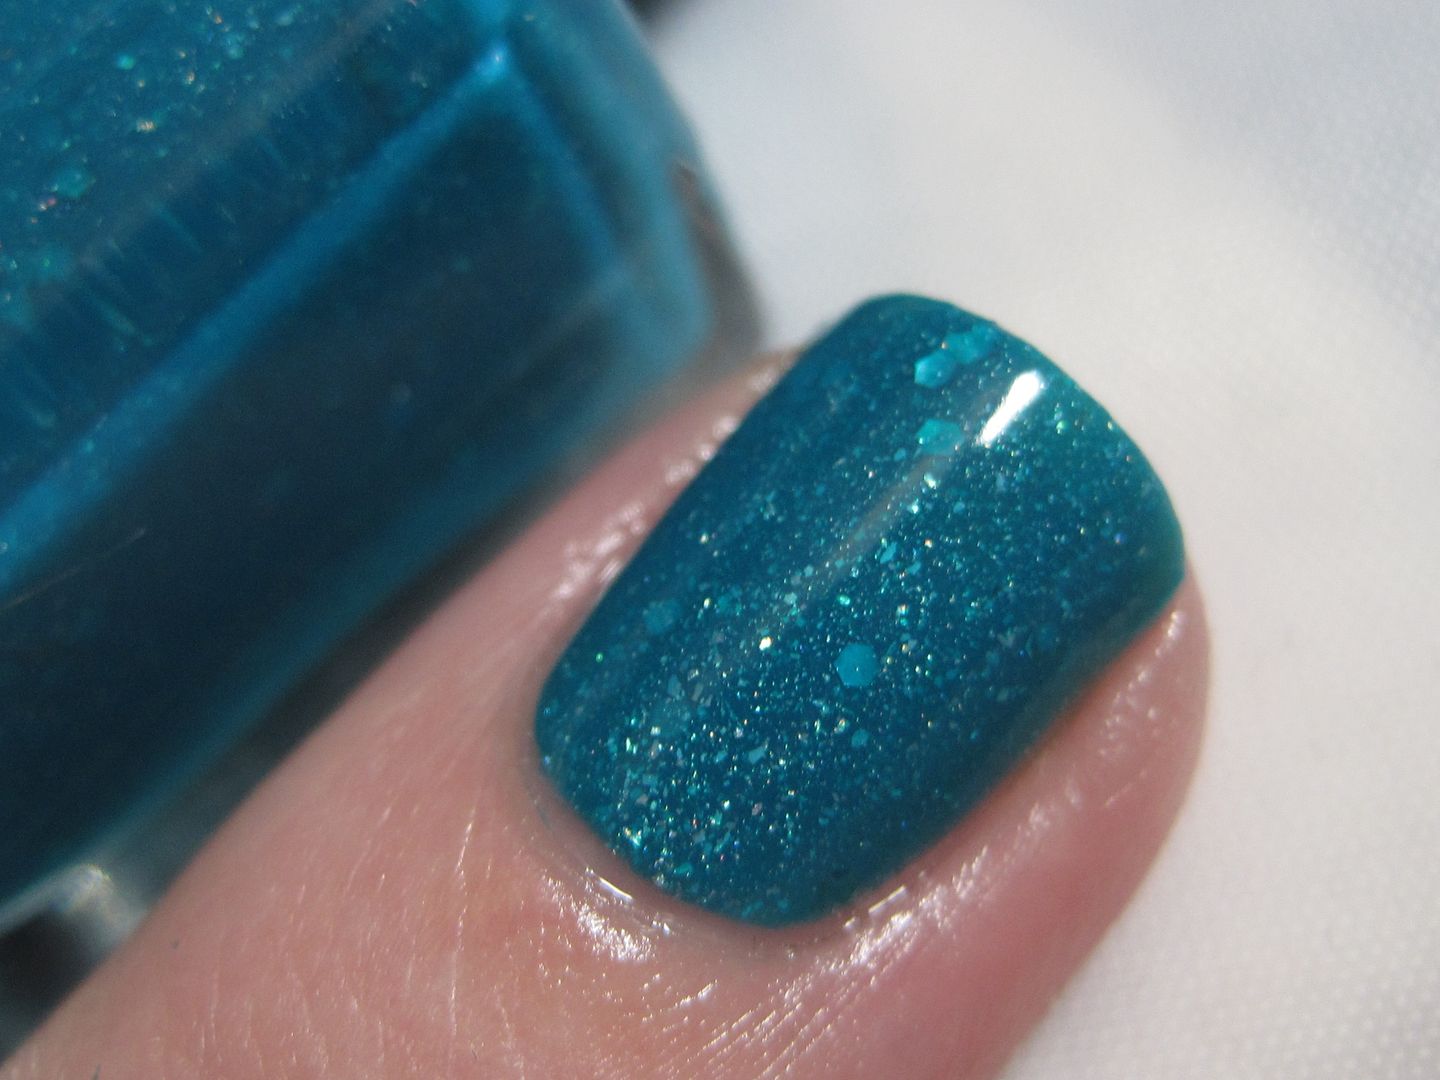
Hi everyone! I have another gorgeous piCture pOlish to share with you today. I wanted Lagoon from the time it was released, but I kept missing it when it was restocked at Llarowe. I even started trying to reason with myself that I didn't need it, but I was WRONG! It far exceeded my expectations when it arrived. The color is absolutely stunning and I love the addition of the glitters in base that is filled with the famous holo shards that piCture pOlish does so well. Here is 2 easy coats of piCture pOlish Lagoon.
Then I decided to do a little holographic stamping over Lagoon. I used Color Club Angel Kiss and Nailz Craze plate 02. This mani was so pretty in real life...I didn't want to take it off!
piCture pOlish products are available from their website based out of Australia. They do ship internationally and details about their shipping policies are available on their shipping page. piCture pOlish also has international stockists located all over the world. I have personally ordered from Llarowe, Overall Beauty, and Harlow & Co., but a complete list of stockists is located on piCture pOlish's network page. Also, be sure to check out their Everyday Deals section to score awesome deals on polishes!
Tuesday, November 12, 2013
piCture pOlish Imperial + Stamping
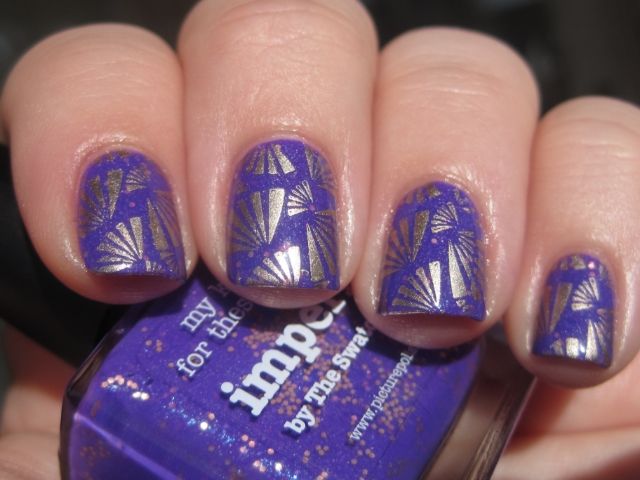
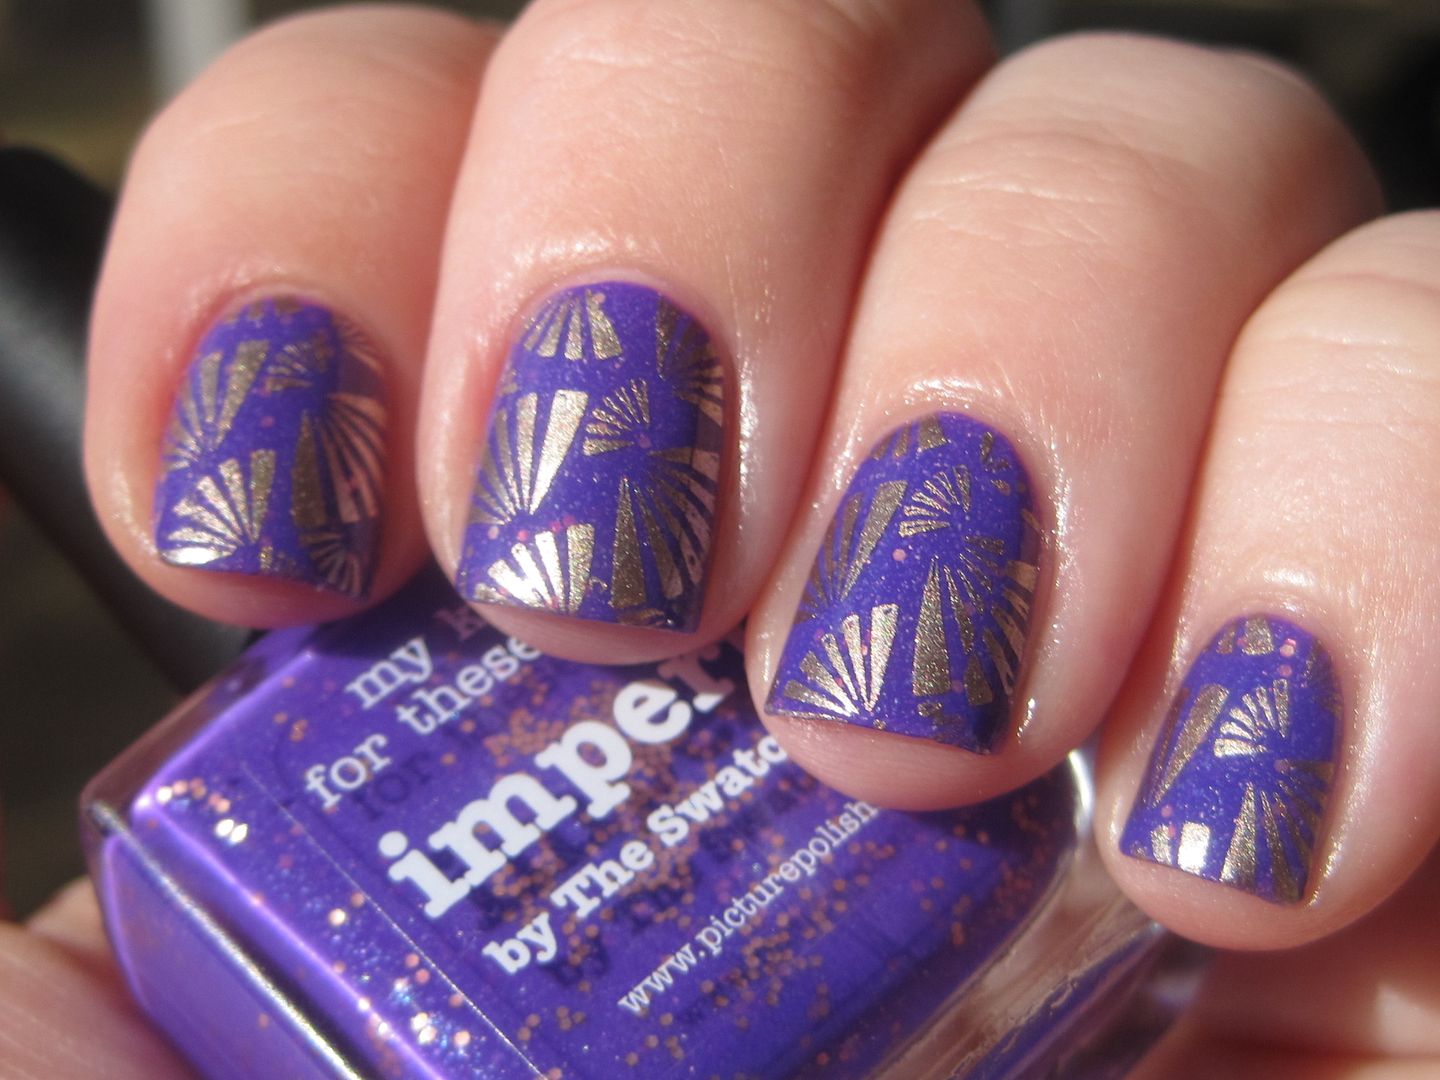
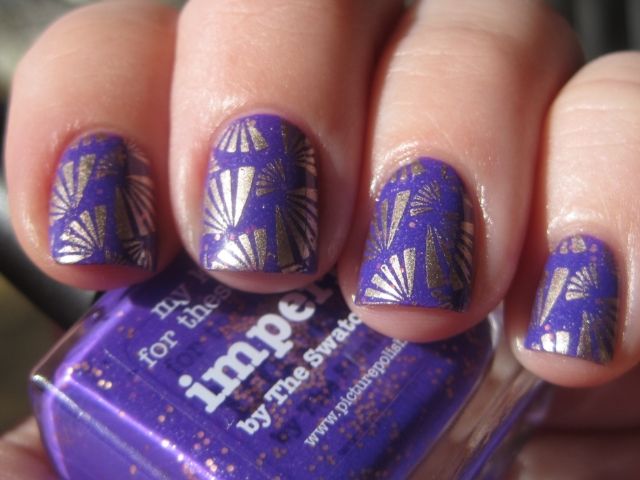
Hi everyone! I have a beautiful mani for you today featuring piCture pOlish Imperial. I used Bundle Monster plate 215 and China Glaze 2030 to do the stamp. I thought the fan design was so regal looking over Imperial.
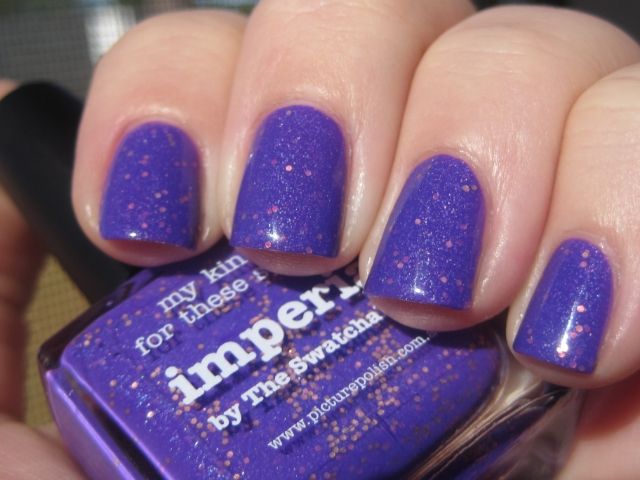
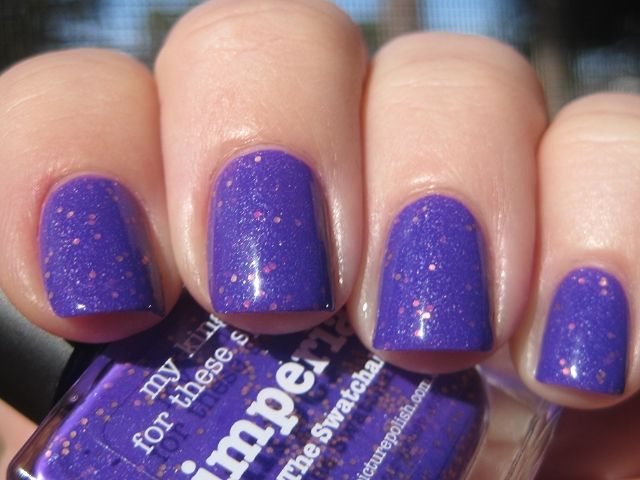
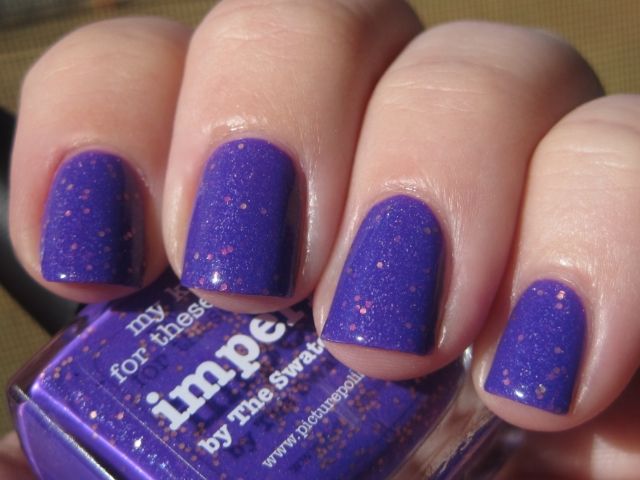
Here is piCture pOlish Imperial by itself. It is so gorgeous! It has a shimmering purple base with some neon qualities (it reminds me, in a way, of Illamasqua Poke) with gold glitter sprinkled throughout. The formula was excellent and provided full coverage with two coats. The glitter was very smooth in the formula and didn't require anything beyond my normal topcoat to be completely smooth.
piCture pOlish products are available from their website based out of Australia. They do ship internationally and details about their shipping policies are available on their shipping page. piCture pOlish also has international stockists located all over the world. I have personally ordered from Llarowe, Overall Beauty, and Harlow & Co., but a complete list of stockists is located on piCture pOlish's network page. Also, be sure to check out their Everyday Deals section to score awesome deals on polishes!
Here is piCture pOlish Imperial by itself. It is so gorgeous! It has a shimmering purple base with some neon qualities (it reminds me, in a way, of Illamasqua Poke) with gold glitter sprinkled throughout. The formula was excellent and provided full coverage with two coats. The glitter was very smooth in the formula and didn't require anything beyond my normal topcoat to be completely smooth.
piCture pOlish products are available from their website based out of Australia. They do ship internationally and details about their shipping policies are available on their shipping page. piCture pOlish also has international stockists located all over the world. I have personally ordered from Llarowe, Overall Beauty, and Harlow & Co., but a complete list of stockists is located on piCture pOlish's network page. Also, be sure to check out their Everyday Deals section to score awesome deals on polishes!
Friday, October 18, 2013
Lynnderella Glass Houses over piCture pOlish Monroe
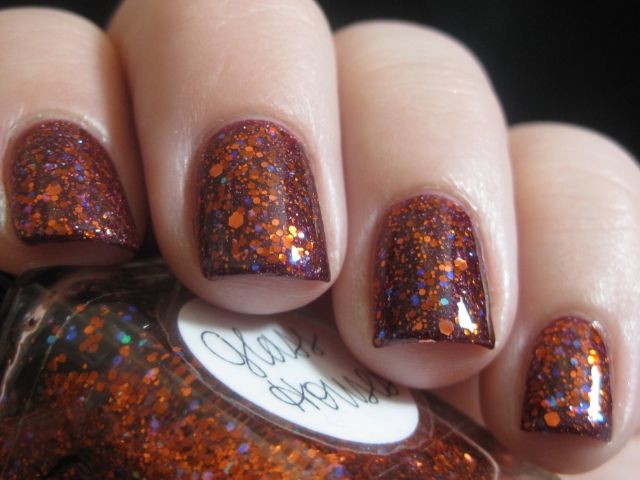
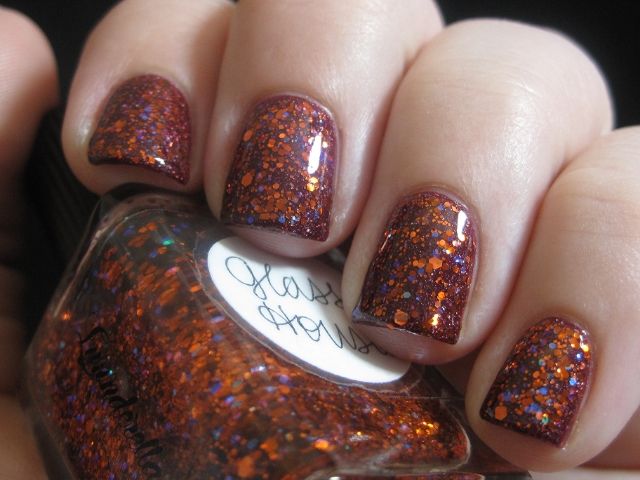
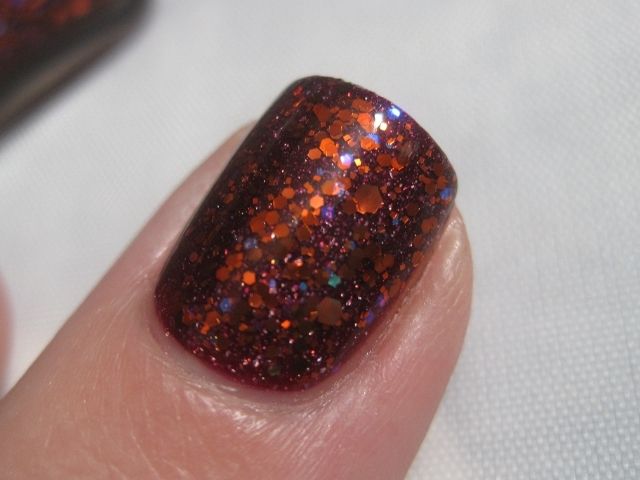
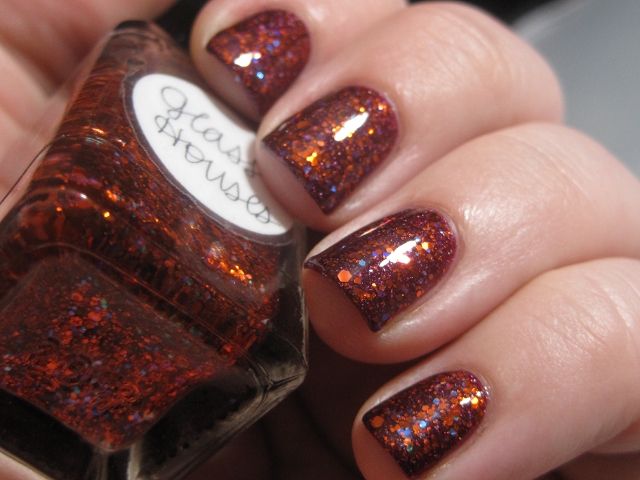
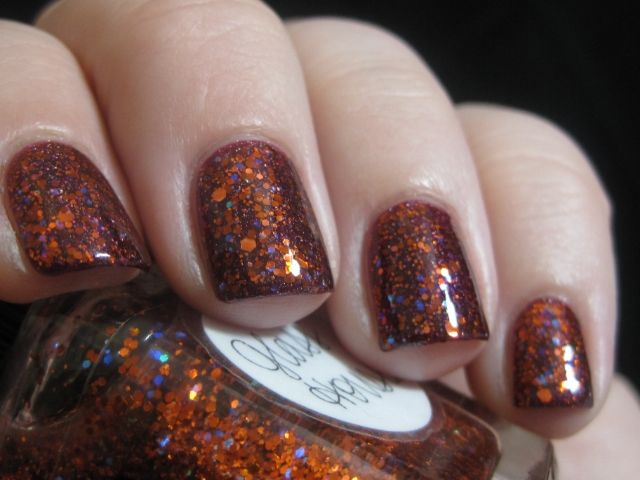
Hi everyone! I posted my piCture pOlish Monroe mani here a few days ago, and after I wore it alone for a day I started thinking about how much I love layering glitters over scattered holos like that. So I started thinking about my stash and what would look nice over Monroe. Somehow, Lynnderella Glass Houses popped into my head. Glass Houses is a mixture of various sizes of orange glitters with tiny disco glitters throughout. I actually had this one in the swap/sell bin, but now it is back safely in my drawer. I thought this combination was so pretty and perfect for fall. So this is 1 coat of Lynnderella Glass Houses over piCture pOlish Monroe.
Lynnderella polishes can be found in her eBay store. I'm not sure if Glass Houses has been discontinued (I thought I saw somewhere that it was going to be discontinued soon) but you if are wanting to buy it, you can probably inquire as to whether it will be restocked in the store. Thanks for looking everyone!
Thursday, October 10, 2013
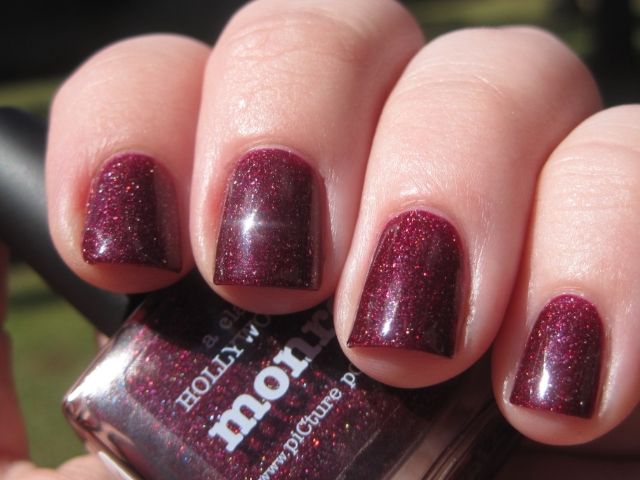
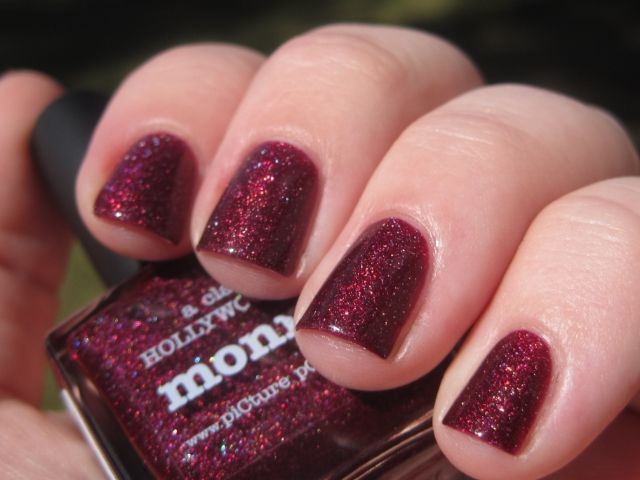
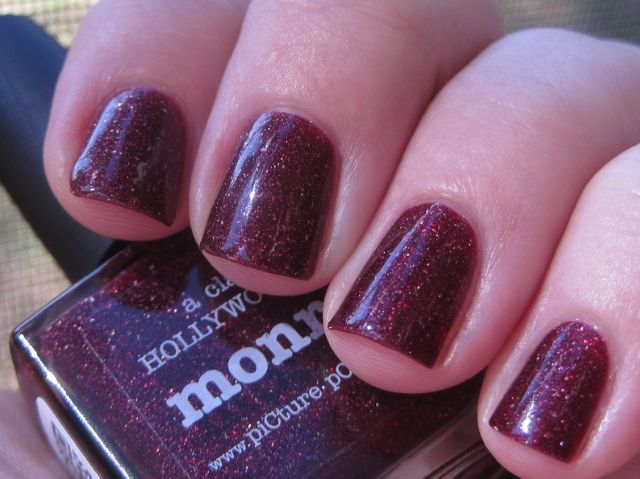
piCture pOlish Monroe
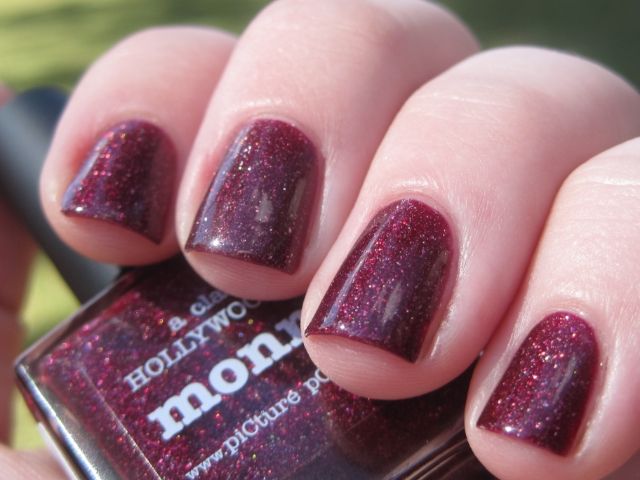
Hi everyone! Today I have a beauty from piCture pOlish that I have had for ages and it has been sitting there sad and untried. I have admired my nails all day today, so I really wish I had tried it sooner. piCture pOlish Monroe is a vampy maroon color (leans really purple) with piCture pOlish's stunning scattered holographic shards throughout. It really glows in the sun. I used 3 coats for this mani. It would have probably been ok at 2, but I liked the additional depth that 3 coats gave. I have the original version of Monroe as well and they are very different. The holo in it is much finer. I will try to wear it soon to compare the two.
piCture pOlish products are available from their website based out of Australia. They do ship internationally and details about their shipping policies are available on their shipping page. piCture pOlish also has international stockists located all over the world. I have personally ordered fromLlarowe, Overall Beauty, and Harlow & Co., but a complete list of stockists is located on piCture pOlish's network page. Also, be sure to check out their Everyday Deals section to score awesome deals on polishes!
Monday, July 29, 2013
piCture pOlish Blog Fest 2013: Year of the Blogger
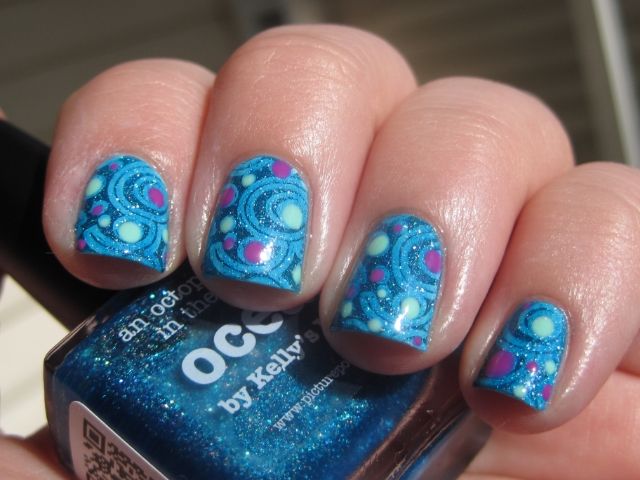
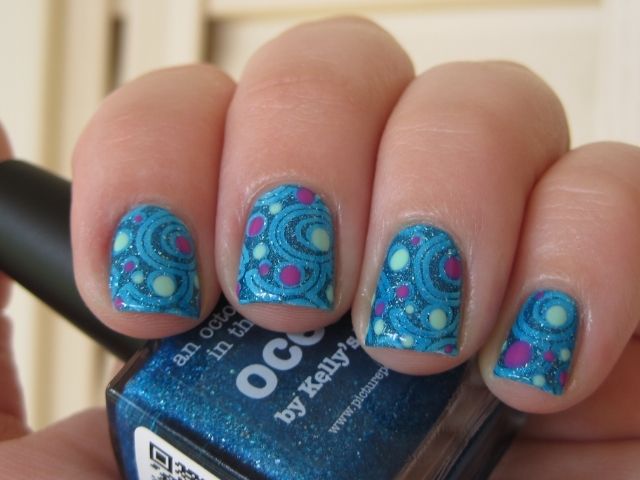
Hi everyone! I am so honored to be selected to participate in the piCture pOlish Blog Fest 2013, which features bloggers from all over the world. A year ago, I never would have thought I would be selected to take part, so I'm very excited! This year's theme was "Year of the Blogger", which focuses on celebrating bloggers and what we do best. We were challenged to create our "most amazing nail art manicure ever" using 3 different piCture pOlish shades. I feel like simple, yet bold designs are what I do best, so I have one here for you today!
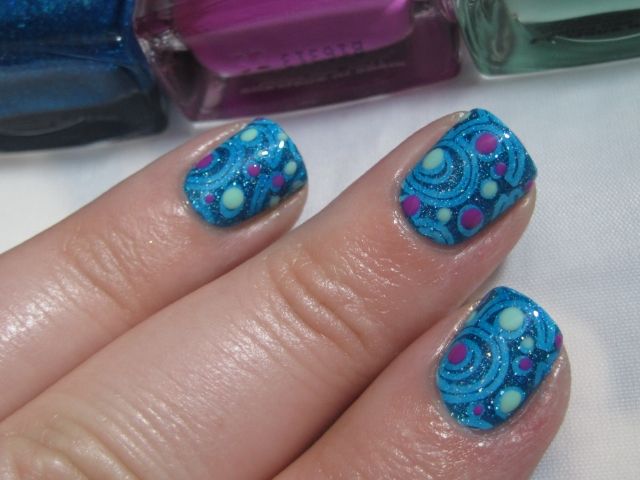
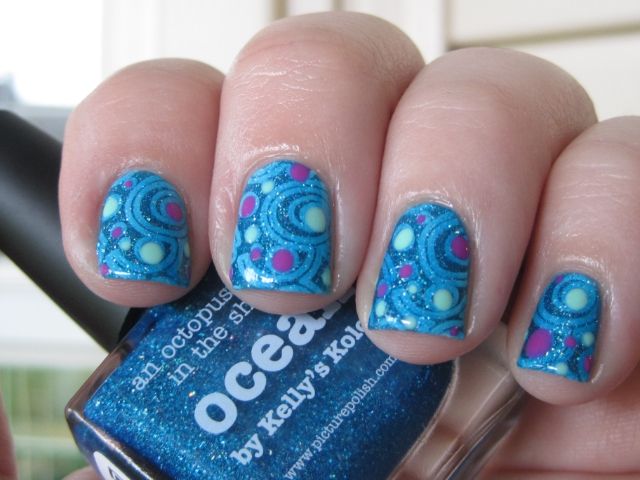
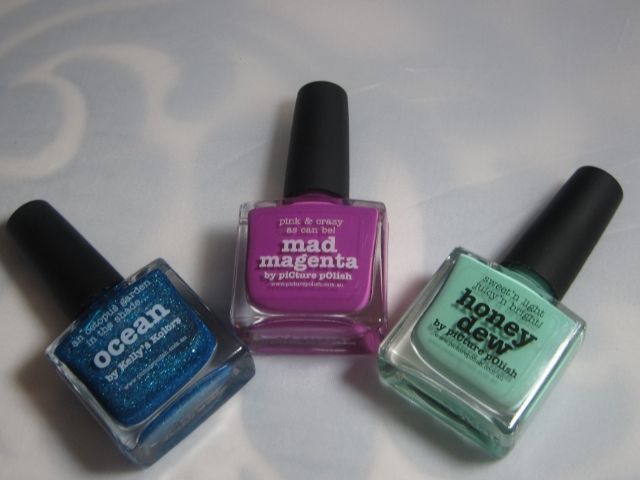
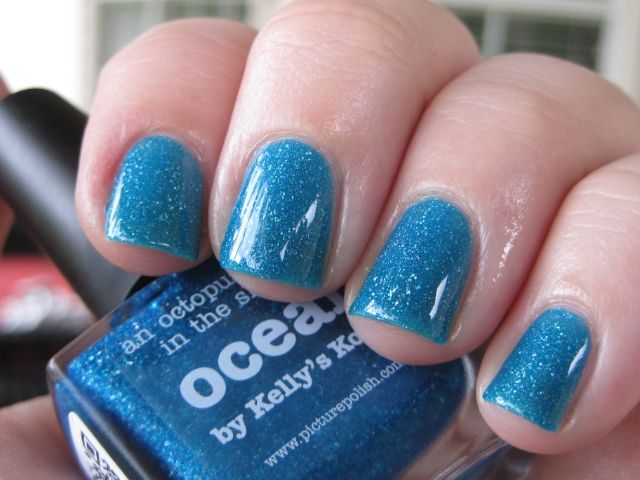
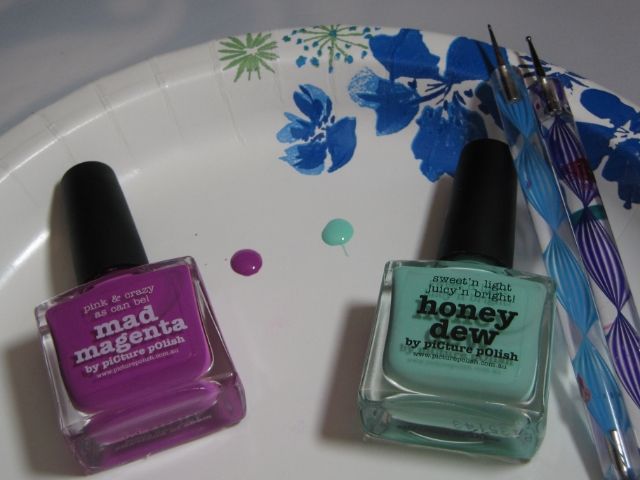
piCture pOlish sent me 3 shades to use in my mani: Ocean (turquoise blue jelly with scattered holo shards), Mad Magenta (hot pink/magenta crème), and Honey Dew (soft mint green crème). We were allowed to use the 3 shades that we were given as well as black and/or white as accents in our manicures. After much deliberation, I decided that I really wanted to play on the jelly quality of Ocean with my nail art and chose to use it in a stamped jelly sandwich with dotted accents. For those of you who are unfamiliar with jelly sandwiches (at least the nail variety), it is a technique in which you "sandwich" glitter between layers of a jelly polish so that the glitter peeks through due to the sheer nature of the jelly. In this case, I am using a stamped design instead of glitter.
Here is a step-by step tutorial on how to achieve this look. As you will see, it is quite simple.
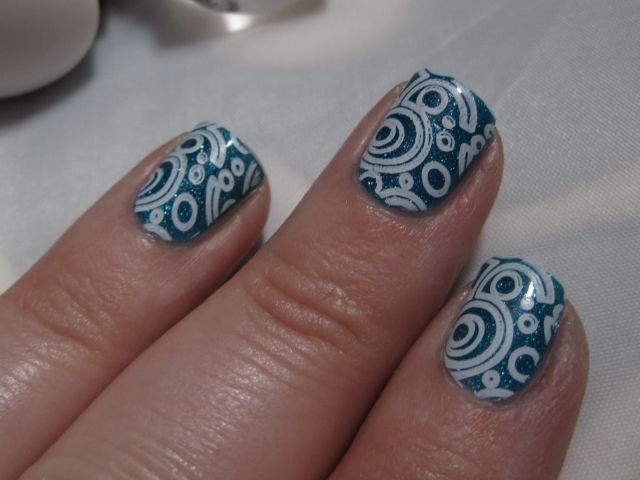
1. I started off with a base of Ocean (2 coats). If I was going to wear it on its own, I would probably use 3 coats because there is still a bit of visible nail line, but for the purposes of the jelly sandwich, I just used 2 because I am going to add more coats. Allow to dry completely before going to step 2.
As you see, Ocean has those lovely holo shards (NOT glitter) that piCture pOlish does so well.
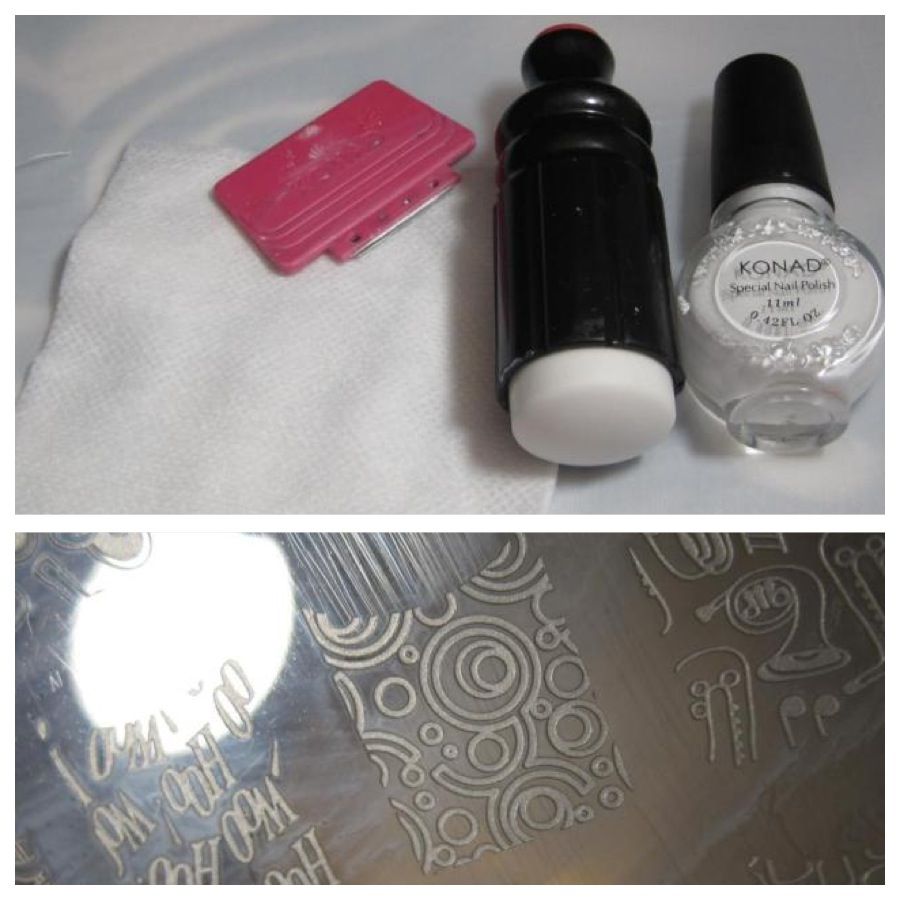
2. Using the Cheeky XL Musical Nails stamping plate and Konad White polish, I stamped a design over Ocean. You could use pretty much any design you wanted with white and it would work equally as well with this manicure, I would just choose one with a bold pattern. Also, something that has recently been a big help with stamping is my discovery of gauze squares (found in the first aid section of your local pharmacy). They are lint free and thus don't leave you with fuzzies on your stamper and plate when cleaning up like cotton pads do.
To keep up with all of the new happenings at piCture pOlish, be sure to follow them on Facebook, Pinterest, Instagram, Twitter, Google+, and You Tube.
Oh and guess what...there are awards! How exciting! All of the participants in Blog Fest 2013 will go into the running to win the chance to create a Collaboration Shade with piCture pOlish to be released in 2014! There will be 3 awards chosen based on voting. You can view the entries on a special pin board on Pinterest created for the Blog Fest, and then cast your vote on piCture pOlish's website in the Blog Fest 2013 Zone. You have a chance to win free polish when you cast your vote as well! The awards are as follows:
1 x award as voted by piCture pOlish friends and fans
1 x award as voted by the participants of Blog Fest 2013
1 x award as voted by Jules and Megs of piCture pOlish
piCture pOlish sent me 3 shades to use in my mani: Ocean (turquoise blue jelly with scattered holo shards), Mad Magenta (hot pink/magenta crème), and Honey Dew (soft mint green crème). We were allowed to use the 3 shades that we were given as well as black and/or white as accents in our manicures. After much deliberation, I decided that I really wanted to play on the jelly quality of Ocean with my nail art and chose to use it in a stamped jelly sandwich with dotted accents. For those of you who are unfamiliar with jelly sandwiches (at least the nail variety), it is a technique in which you "sandwich" glitter between layers of a jelly polish so that the glitter peeks through due to the sheer nature of the jelly. In this case, I am using a stamped design instead of glitter.
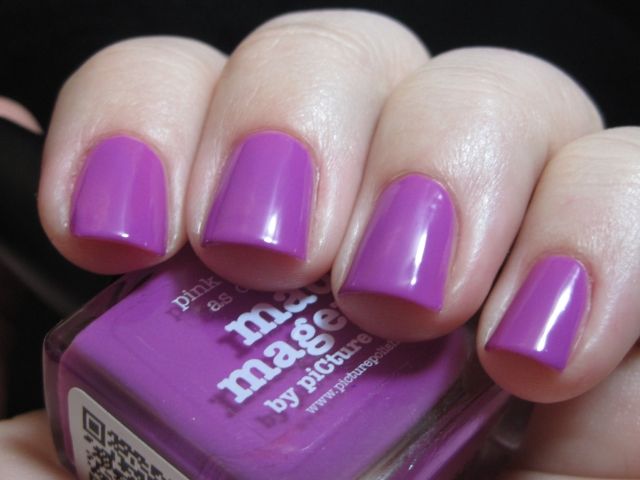
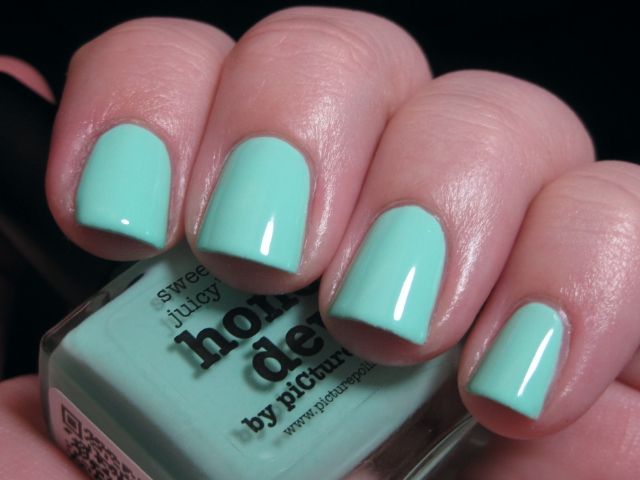
Here are some quick swatches of Mad Magenta and Honey Dew before we get started.
Mad Magenta (2 coats) - this one wanted to lean more purple in pictures than in real life
Honey Dew (3 coats) - It did not give me lobster hands in real life, but mints seem to do that in pics
Here is a step-by step tutorial on how to achieve this look. As you will see, it is quite simple.
As you see, Ocean has those lovely holo shards (NOT glitter) that piCture pOlish does so well.
2. Using the Cheeky XL Musical Nails stamping plate and Konad White polish, I stamped a design over Ocean. You could use pretty much any design you wanted with white and it would work equally as well with this manicure, I would just choose one with a bold pattern. Also, something that has recently been a big help with stamping is my discovery of gauze squares (found in the first aid section of your local pharmacy). They are lint free and thus don't leave you with fuzzies on your stamper and plate when cleaning up like cotton pads do.
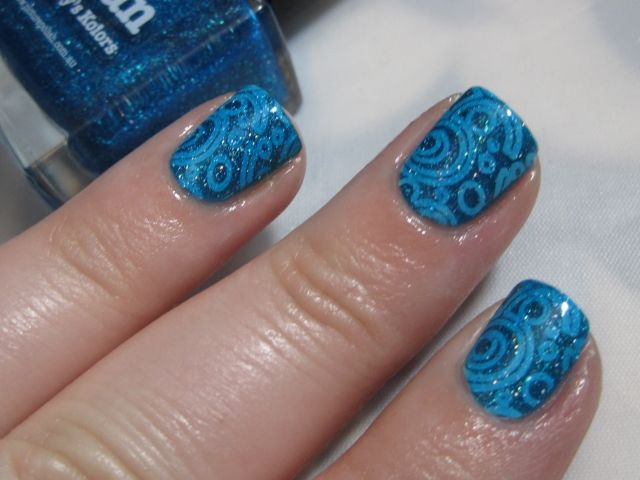
3. Next, I layered 1 additional coat of Ocean over the stamped design. Doesn't this look awesome? I have done this with regular jellies before, but the holo shards in Ocean make this look sparkly and magical!
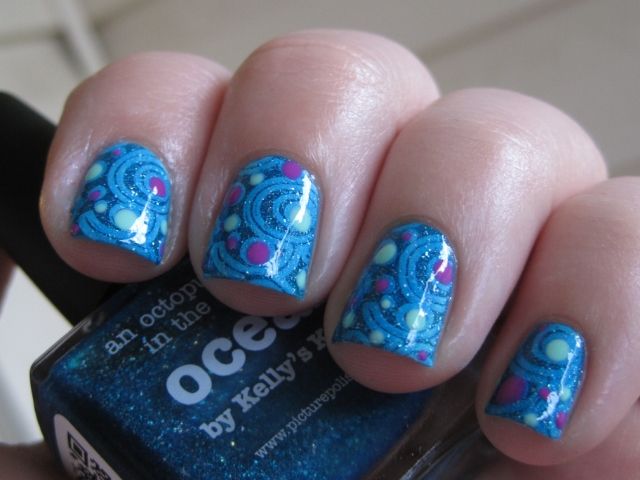
4. Finally I used Honey Dew and Mad Magenta to add dots to my design. I used a paper plate to dab little pools of polish to dip my dotting tools in. As you can see, the design I chose has some logical places to add dots (the circles) but if your design doesn't have circles, you can certainly still add dots to liven it up it. When I did the dots, I did not do them all the same size but instead used several different sizes of dots to give the design more of a random, unstructured feel. Wait about 10 minutes or so before adding topcoat to complete your design to avoid smearing the dots.
So that's it! The completed look is very striking, but the process to achieve it is quite simple. I hope that it will be easy for anyone to reproduce using the pattern of your choice. It reminds me a bit of a psychedelic Starry Night painting or planets of some sort. And if you are scared of stamping, DON'T BE! Get yourself one of those squishy stampers (like the one I have pictured above) and it makes the process SO much easier.
piCture pOlish products are available from their website based out of Australia. They do ship internationally and details about their shipping policies are available on their shipping page. piCture pOlish also has international stockists located all over the world. I have personally ordered from Llarowe, Overall Beauty, and Harlow & Co., but a complete list of stockists is located on piCture pOlish's network page. Also, be sure to check out their Everyday Deals section to score awesome deals on polishes!
To keep up with all of the new happenings at piCture pOlish, be sure to follow them on Facebook, Pinterest, Instagram, Twitter, Google+, and You Tube.
I hope you guys have enjoyed my contribution to piCture pOlish Blog Fest 2013! Please be sure to check out all of the other participants today and see the amazing nail art they have created (and vote (for me!) on Pinterest once the contest is up and running!). You can also find pictures on Instagram using #ppblogfest2013. Thanks for looking everyone!
Subscribe to:
Posts (Atom)