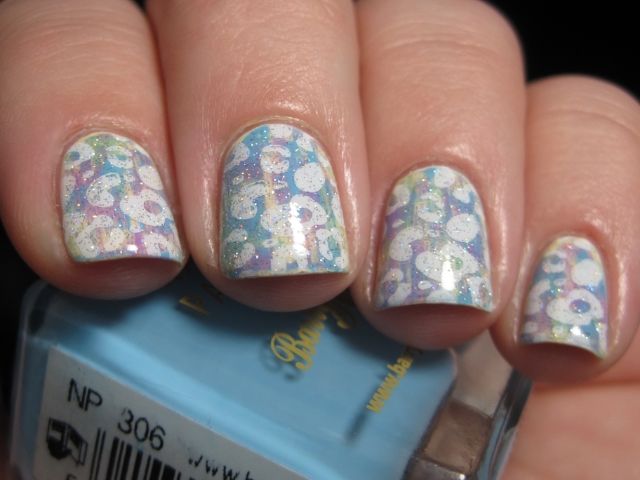
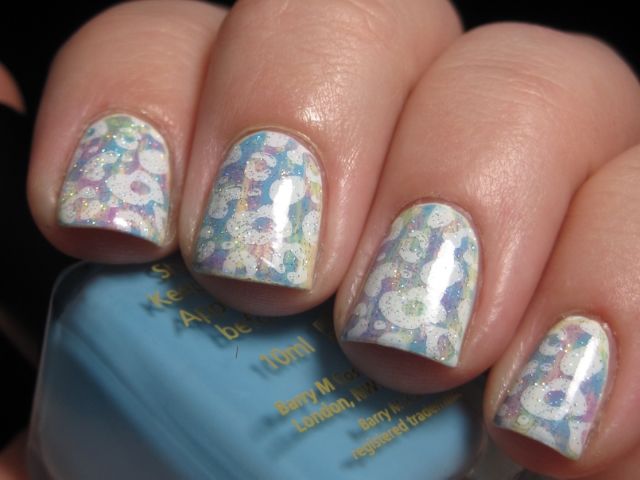
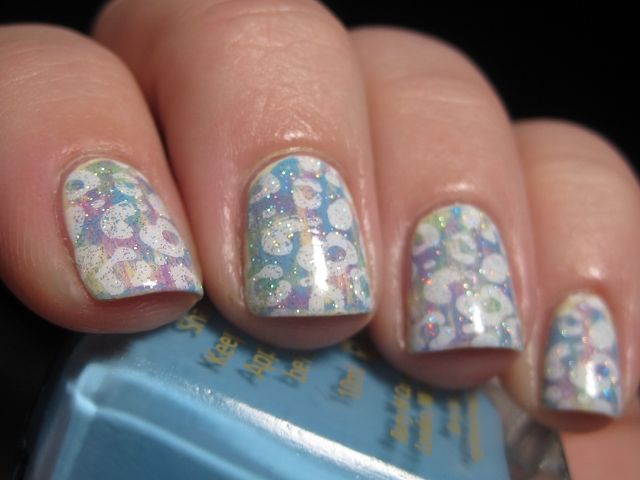
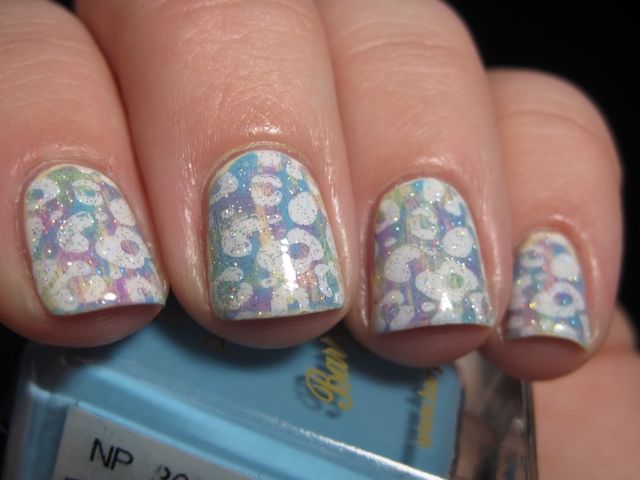
Hi everyone! Today's 30 Day Challenge prompt was Splatter Mani. Now I'm going to be honest with you...I tried to do a splatter mani the regular way. It was such a mess! There was polish EVERYWHERE! I think, in the end, the straws I had were too big and thus instead of a niced splattered effect on my nails it was globs of polish. I will try again someday, but for today...we have the cheater's version of a splatter mani.
When Bundle Monster released their recent Create Your Own stamping plates, one genius person submitted a splatter image and it is on plate BM-416. I never thought this was such a big deal until I actually TRIED to do a splatter mani and saw what a huge mess it makes, so this image is perfect for a hassle-free splattered look. I used Zoya Blu (baby blue) for the base of my mani and then the stamping colors were Barry M Cyan Blue (bright blue), Barry M Blackberry (navy), and American Apparel African Violet (purple) (which is showing some signs of the original splatter mani carnage on its bottle). I stamped first with the purple, then the bright blue, then the navy, rotating my image and moving it around on the nail each time so that the patterns looked random. I feel like pictures made this look a little weird, but it looked awesome in real life!
Be sure to check out what everyone else is doing today! They probably did the real thing, but I still like my cheater's version. ;) Thanks for looking everyone!
Showing posts with label Barry M. Show all posts
Tuesday, April 15, 2014
Tuesday, April 1, 2014
30 Day Challenge, Day 1: Favorite Creme
Hi everyone! I've decided to join my pal from Dani's Manis (@danilouwho on Instagram) in her 30 Day Challenge! If you want to join in, be sure to head over to her blog to check out all of the Inlinkz details for each day or if you want to join on Instagram, use the hashtag #getnailedwithdani.
Day 1 starts out seemingly easy: Wear your favorite creme. NOT EASY! I have too many favorite cremes! I decided to attempt to show you one of my newer favorite cremes that I've never been able to capture accurately. Barry M Greenberry is an almost neon mint green creme. Every picture I have ever taken makes it look light blue. I used a mega filter in the first picture below to try to get close, but it still leans a bit greener than this pic. It's the best I could do (JUST TRUST ME IT IS AWESOME!). It's so bright and perfect. If you love mints, you will love this.
These next two pics are nowhere in the realm of accurate, but I wanted you to be able to see my nifty Born Pretty Store water decals (Item S040). These lacy flower decals added a subtle and elegant look to my simple creme mani. They came in a set with 10 white and 10 black decals, so they would look nice over pretty much any color. Can you guys tell I'm obsessed with water decals? They are so easy!
Barry M is a drugstore brand from the UK and I have pretty much adored every creme that I've tried from them. If you aren't in the UK, they are available from Ninja Polish. I highly recommend giving their cremes a try!
Be sure to check out Born Pretty Store for all of your nail art supply needs (you can use my coupon code JCX31 for 10% off your order). I've always had great experiences with ordering from them at very reasonable prices. Also, you can't beat free worldwide shipping! You can also follow Born Pretty Store on Facebook and Instagram.
*all products in this post were purchased by me*
Thanks for looking everyone, and be sure to check out everyone else taking part in the challenge!
Thursday, January 2, 2014
Random Pastel Leopard...
Yeah...I have no idea... I was wanting to do something atypical for winter and somehow a pastel leopard was born. And then I had to throw some glitter in there too. I guess this is where my brain goes after too many days of work and too much gloomy weather...
I started out doing a distressed look with Revlon Buttercup as my base and then I used Illamsqua Jo'mina, OPI Mermaid Tears, and Barry M Blueberry Ice Cream for my other colors. Then I stamped a leopard design using the Cheeky XL Wild at Heart plate and Konad White. Finally I added a coat of China Glaze Fairy Dust.
And that concludes this edition of random, non-seasonally appropriate nail art. Thanks for looking everyone!
Wednesday, October 23, 2013
Musings about Nfu-Oh 51
Hi everyone! I've heard a lot of talk recently about Nfu-Oh 51 in reference to it being a dupe for Color Club The Uptown. I've been thinking about it a lot so that gave me an overwhelming desire to wear it. I think that the major thing that people forget about Nfu-Oh 51 is that there are not only flakies present in the purple jelly base but also a LOT of red/green color shifting shimmer a la Clarins 230. Now I don't have The Uptown, but I do have Layla Ceramic Effect 52 (aka The Butterfly Effect) and these look super close to me based on swatches I have seen. The big thing to note: NEITHER of these have the shimmer that Nfu-Oh 51 has. It almost takes over the polish and obscures the flakies somewhat because it is so dense (especially in pictures). I have always thought of Nfu-Oh 51 as more of a layering polish, and the shimmer really pops when you layer it over dark colors. I went with a navy blue for this mani, Barry M Blackberry. This is 2 coats of Nfu-Oh 51 over Barry M Blackberry.
Gah! So pretty! I was reminded again why this is one of my favorite polishes! It never disappoints! I do think that Nfu-Oh 51 and Color Club The Uptown/Layla CE 52 are kissing cousins, but based on what I've seen I definitely do not think they are dupes. Thanks for looking everyone!
Monday, June 24, 2013
Oopsie Daisies Electric Lemonade
Hi everyone! So my summer obsession with neons continues today with a lovely glitter topper from Oopsie Daisies new Tiki Bar Collection called Electric Lemonade. This collection is so fun and is based on fruity summer drinks. I knew Electric Lemonade had to be mine as soon as I saw it. It may now be tied for my favorite Oopsie Daisies polish with Apple Picking. The mixture of blue, pink, yellow, and green neon glitters is just gorgeous. Here I layered 2 coats of Electric Lemonade over Barry M Blueberry Ice Cream.
Oopsie Daisies new Tiki Bar Collection (along with all of creator Cathryn's polishes) are available from her Etsy Shop as well as from Edgy Polish. As always, thanks for looking!
Sunday, March 31, 2013
Pastel Brushstrokes
Happy Easter everyone! I haven't done much as far as Eastery nails this year, so I wanted to go all out on Easter. I wanted a pastel look and I had several ideas (water marble, gradient, dots) but I ended up going with a brushstroke mani. For any of you out there that are afraid of nail art, this couldn't be simpler.
Here is a step-by-step:
1) Paint on your base color. Use the lightest color you are working with (in my case it was the yellow) and let it dry.
2) Get a small brush to make swipes of color on your nails. I have seen some people use the actual polish brush, but this didn't work as well for me. To make the "brushstroked" look, you want as little polish on your brush as possible or otherwise it will just make blobs of color. I opted to use a frayed, bristly brush so that the brushstrokes would really be apparent (it was an old ELF concealer brush that was partially melted off from dipping it in acetone for clean-up...nothing fancy! Haha!).
3) Get a flat surface (I used a paper plate) and blob some polish on it sort of like a painter's palette. It doesn't take much! Work with one color at a time because you want the polish to still be thin and wet when you swipe in on your nail. If you put all of your colors out on your plate at one time, the ones you use last will dry out and get thick before you get to them.
4) Dip your brush LIGHTLY into the first color and make a few random swipes on each nail. Repeat this with all of the other colors that you have chosen, cleaning your brush with acetone between each color and drying it a bit with a paper towel. Be sure to clean the brush or otherwise your colors will look very muddy. Also be sure to leave some of your base color peeking through!
5) Clean up your cuticles and seal with topcoat!
This sounds more labor intensive than it is. I think it took me 5 minutes to do once my base color was dry. You can do this with any color scheme you want and you can also try it with different finishes (and mix finishes) for a very interesting look.
I hope all of you have a blessed Easter! Thanks for looking!
Here are the colors that I used:
L-R: OPI Sparrow Me the Drama, Revlon Buttercup, Orly Ancient Jade,
Barry M Blueberry Ice Cream, Illamasqua Jo'mina
Here is a step-by-step:
1) Paint on your base color. Use the lightest color you are working with (in my case it was the yellow) and let it dry.
2) Get a small brush to make swipes of color on your nails. I have seen some people use the actual polish brush, but this didn't work as well for me. To make the "brushstroked" look, you want as little polish on your brush as possible or otherwise it will just make blobs of color. I opted to use a frayed, bristly brush so that the brushstrokes would really be apparent (it was an old ELF concealer brush that was partially melted off from dipping it in acetone for clean-up...nothing fancy! Haha!).
3) Get a flat surface (I used a paper plate) and blob some polish on it sort of like a painter's palette. It doesn't take much! Work with one color at a time because you want the polish to still be thin and wet when you swipe in on your nail. If you put all of your colors out on your plate at one time, the ones you use last will dry out and get thick before you get to them.
4) Dip your brush LIGHTLY into the first color and make a few random swipes on each nail. Repeat this with all of the other colors that you have chosen, cleaning your brush with acetone between each color and drying it a bit with a paper towel. Be sure to clean the brush or otherwise your colors will look very muddy. Also be sure to leave some of your base color peeking through!
5) Clean up your cuticles and seal with topcoat!
This sounds more labor intensive than it is. I think it took me 5 minutes to do once my base color was dry. You can do this with any color scheme you want and you can also try it with different finishes (and mix finishes) for a very interesting look.
I hope all of you have a blessed Easter! Thanks for looking!
Wednesday, March 6, 2013
Layered NOTD: Flakies + Glitter
Today I have an evolving mani for you that just got better with each layer! I started off with a base of Barry M Indigo and added Nfu-Oh 52, which has green shimmer as well as blue/green flakies.
Next I added a coat of Enchanted Polish Ciao Milano for even more shifting awesomeness!
Thanks for looking everyone!
Sunday, January 13, 2013
Snowy Layerings
Wow...I've been doing a lot of blue lately, huh? I guess it is the blue withdrawals during Christmas. I wanted to do a mani that looks like glistening snow, so I decided to layer two glitter polishes together to get this effect. I started off with a base of Barry M Blueberry Ice Cream, a light blue creme. Next I layered on 1 coat of Darling Diva Polish The Big "O", which is a clear base packed with every kind of disco glitter under the sun. It is awesome...and would look good over ANYTHING! Finally I layered on 1 coat of Lynnderella Love, Lace, and Lilacs for the "snowy" effect. I loved this mani so much! I reminded me of Femme Fatale Shimmering Snowcap and Lynnderella Ice the Snowcake (those polishes inspired me). The disco glitters were so sparkly in real life.
And here is Barry M Blueberry Ice Cream by itself. I'm beginning to love Barry M cremes almost as much as Illamasquas. They have dreamy, usually once coater formulas.
So how did I do? Do you think I even got close to my inspiration polishes? I'm trying to resist buying "all the things" and if I think I can come close to something (or at least close enough to squash a lemming) with things that I already own, then I will just layer it and not purchase. Thanks for looking everyone!
Friday, December 14, 2012
Some Non-Christmas Mani Spam!
Well...maybe a few of them are red...but that's ok, right? ;)
First up is one I did a little while back. This is OPI Man of La Mancha over Pretty Serious Poltergeist Puddle. This was SO pretty! I loved it!
Here is Poltergeist Puddle on its own. This is one difficult polish to photograph. It wants to photograph more blue than it actually is...but it has an abundance of pink and blue shimmer in it. The first picture is probably the most color accurate...but it still isn't just right.
Next is Cult Nails Annalicious. I have so many pretty reds that I can't resist wearing them during Christmas...though they don't represent any particular day of the Advent Calendar Challenge.
Next up I happened to purchase Layla Ceramic Effect #52 (aka The Butterfly Effect) from Ulta when they put out the new displays. It is very dupey to Nfu-Oh 51, but the purple jelly base is a touch more opaque. This is 2 coats over Barry M Indigo.
This is Barry M Indigo on its own. It is just perfect! It is so vibrant. Hard to photograph accurately too...purples like this often are.
Next up is Zoya Fei Fei. This one has so much pretty going on. So many different colored shimmers in the base. They are really hard to pick up in photographs, but they are beautiful in real life.
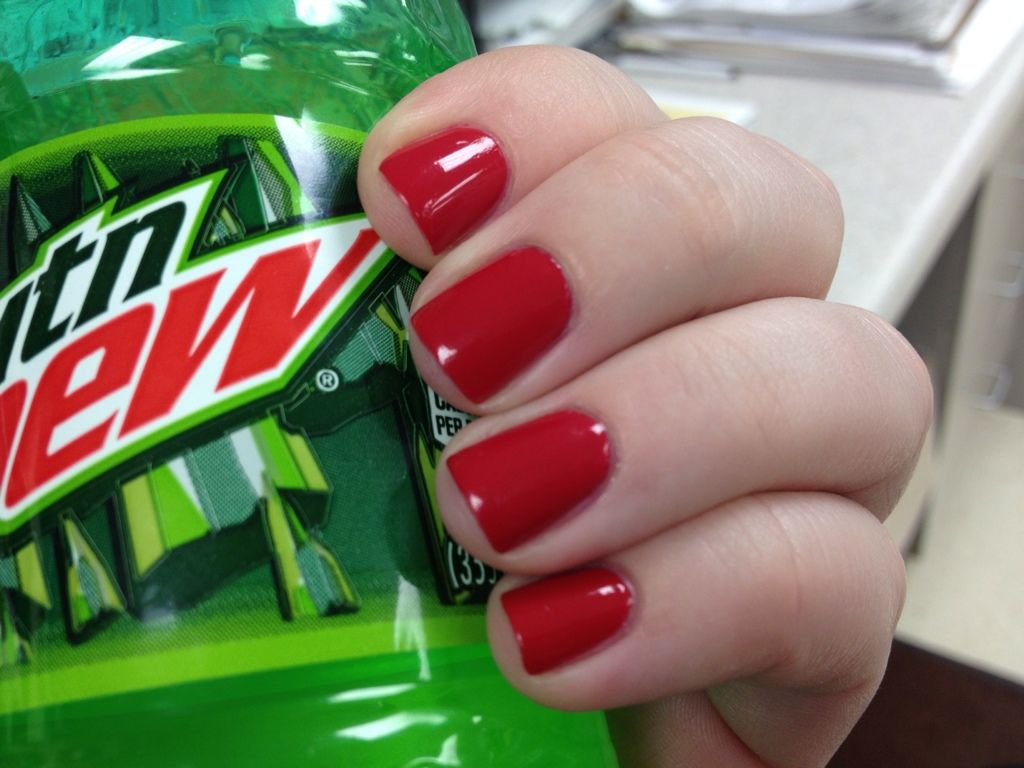
Oooh and here is a fun one for you...what do you do when you forget to take pictures of your mani? Well you take silly iPhone shots of course! This is one of my absolute favorite red cremes, OPI Red Hot Ayers Rock. Well look at that...it is featured with my favorite beverage!
I was disappointed with this picture, but I did the mani and picture in a rush one day. This is in my top 20 and I wanted to get a new photo of it. This is OPI Diva of Geneva. It will always hold a special place in my heart.
This polish just made it into my Indie top 20 by a hair. I wore it for the first time days before submissions were due and it stole my heart. This is Enchanted Polish Octopus Garden. I wore it for a few days because I couldn't make myself take it off. I discovered something else too...these polishes do not need black undies! When I reviewed the new Beatles polishes a few months back, I layered them all over black because I assumed they would be similar to the Ozotic Mish Mash polishes and pop over black. I was SO wrong. This is 2 coats, no undies. Color me impressed. I love these Beatles polishes even more now! I didn't have any sun so I didn't get any good pics of the holo in these, but it is there!
And last but not least is Darling Diva Polish Seriously Serious. This polish is also SO hard to photograph (are you sensing a theme in this post? LOL!). It is a micro green and purple holograhic glitter polish. This is 1 coat over black. In real life, it has an overall purple look with splashes of green. You barely see the black undies, but they make the purple and green pop. The black polish shows up in pictures more than it does in real life.
So...how did you enjoy that little spamfest? I figured you might need a little break from Christmas related stuff so I hope you liked it! Thanks for looking everyone!
Subscribe to:
Posts (Atom)