*Some Press Samples Included*
Hi everyone! This is a bittersweet post because it will be the very last link-up for Paint All the Nails. I've so enjoyed the time that I've spent with these lovely ladies sharing our nail art, and boy have we as a group posted some glorious manis! For our last link-up, we decided to do a "best of" post, and each of us chose a mani done in a previous link-up to be inspired by. Let's check out my inspiration!
Showing posts with label Paint All the Nails. Show all posts
Thursday, December 15, 2016
Thursday, October 27, 2016
Paint All the Nails Presents: Gilded
*Press Samples*
Hi everyone! I've been a bit quiet lately, but I'm back today with another edition of Paint All the Nails. This month's theme is Gilded, so we have all of beautiful golden accented manis to share with you! I love adding gold to my manis in the fall, so I have an autumnal gilded mani to share with you today.
Thursday, July 28, 2016
Paint All the Nails Presents Neon
*Some Press Samples Used*
Hi everyone! I'm a bit late to the party today, but I couldn't miss out on the link-up with my lovely friends from Paint All the Nails! I've already done two neon looks for our link-ups this year so far, but this time Neon was the theme!
Thursday, June 30, 2016
Paint All the Nails Presents Animal Print
*Press Samples*
*Purchased by Me*
Hi everyone! Long time, no see. I've been taking a break from blogging for a bit because I was very stressed out with stuff in my life and blogging was stressing me out even more! My husband pretty much insisted that I needed to put it down for a bit and take a break, and I did just that. Even though I was pretty stubborn for months about doing it, in the end he was right and it's given me a chance to recharge. I'm probably going to shake things up a bit going forward and try to get back to my roots by incorporating more nail art and pulling oldies from my collection to share more often. I have several different collections to share with you that are long overdue over the next week, but today I'm going to start with a link-up with some of my favorite ladies from Paint All the Nails!
*Purchased by Me*
Hi everyone! Long time, no see. I've been taking a break from blogging for a bit because I was very stressed out with stuff in my life and blogging was stressing me out even more! My husband pretty much insisted that I needed to put it down for a bit and take a break, and I did just that. Even though I was pretty stubborn for months about doing it, in the end he was right and it's given me a chance to recharge. I'm probably going to shake things up a bit going forward and try to get back to my roots by incorporating more nail art and pulling oldies from my collection to share more often. I have several different collections to share with you that are long overdue over the next week, but today I'm going to start with a link-up with some of my favorite ladies from Paint All the Nails!
Thursday, April 28, 2016
Paint All the Nails Presents Monochrome
*Press Samples*
*Purchased by Me*
Hi everyone! It's time for another link-up from the ladies of Paint All the Nails and today we are presenting Monochrome manis! Now monochrome can mean doing all of any color family, but for our purposes this week we chose to stay to greyscale.
*Purchased by Me*
Hi everyone! It's time for another link-up from the ladies of Paint All the Nails and today we are presenting Monochrome manis! Now monochrome can mean doing all of any color family, but for our purposes this week we chose to stay to greyscale.
Thursday, March 31, 2016
Paint All the Nails Presents Pastel Geometric
*Some previous press samples included*
Hi everyone! Today I have the March edition of Paint all the Nails Presents and today we decided to have a double doozie: Pastel Geometric. As soon as I saw this prompt I knew what I wanted to do because it's a nail art design that I've had on my list to try for years! It's a very simple technique using striping tape, but it can be a little time consuming. The end results are totally worth it though!
Thursday, February 25, 2016
Paint All the Nails Presents Marble
*Nothing to Disclose*
Hi everyone! Today the ladies of Paint All the Nails have a wonderful theme to work with: Marble! This theme is actually really diverse and can encompass many techniques and ideas to produce a marbled or marble-like look on the nails (we made sure to let everyone interpret the theme loosely, so we will likely see a variety of looks!). For my look today, however, I decided to use what has become the traditional marbling technique and often one of the most dreaded techniques in the nail world: the water marble.
Friday, January 29, 2016
Paint All the Nails Presents: Pantone Color of the Year
*Press Samples*
Hi everyone! Today I have a very fun edition of Paint All the Nails Presents...we are using the Pantone colors of the year! I'm not sure if you've heard, but this year there are two colors of the year instead of one: Serenity and Rose Quartz. They are so lovely together, so we thought we would pay homage to them with a little nail art! I'm a day late posting due to continued computer craziness and the failings of my original design, but I was determined to make something work!
Thursday, December 17, 2015
Paint All the Nails: Secret Santa Edition
*Press Samples Included*
Hi everyone! Today we have a very special edition of Paint All the Nails...Secret Santas! For this link-up, we were all randomly assigned a Secret Santa and instead of a gift we recreated one of their nail art looks! I was super excited to get the fabulous Lucie from Lucy's Stash as my Secret Santa and I had a blast looking through her nail art looks! There were SO many fabulous things to choose from because Lucie is a nail art master. I decided focus on her winter/Christmas designs because I have barely been able to do nail art for the season so far this year and I fell in love with two of her designs...so I did them both!
Thursday, November 26, 2015
Paint All the Nails Presents Dry Brush
*Press Samples*
Hi everyone and Happy Thanksgiving! Today for the monthly Paint All the Nails! link-up we are doing the dry brush technique. If you have been a follower of my blog for awhile, you might know that this is one of my favorite nail art techniques because it is so darn easy and gives a very striking effect. Because I love the simplicity of the technique so much, I did a really simple dry brush look for you today.
Thursday, October 29, 2015
Double Stamp All the Nails!
Hi everyone! Today Paint All the Nails is doing double stamping! I love double stamping and I'm often inspired by the double stamping looks that Deborah from Love Varnish is famous for doing because they are always so elegant! Today, I decided not to go for a traditional elegant double stamping look, but instead went for a Halloween spin.
For my mani, I started out with a base of China Glaze Lady and the Vamp (which has such a weird name because I'm imagining a vampy red) and then I put Sally Hansen Jack-O-Lantern over it for a little old school glittery goodness. Then I used the MoYou-London Festive plate 16 and Pretty Serious Presence to stamp on the spider webs. Next I stamped on some spiders from the same plate using Konad Black to stamp. It was a very cliche Halloween mani, but I really enjoyed it. I love the depth that double stamping adds to a manicure...you can almost make something that looks like a decal using the technique.
Thursday, September 24, 2015
Negative Space All the Nails!
*Some items in this post were press samples*
Hi everyone! It's time for the monthly Paint All the Nails link-up and this time were are doing Negative Space nails! Ok, I'm going to admit...when I first saw that everyone wanted to do Negative Space nails, I was less than excited. My nails are disgustingly stained and I'm always jealous of all of the pretty negative space looks that I see around and I want to know HOW they keep their nails so nice and wear so much polish all the time. I've only done one negative space look before and I remember that I somehow got my nails looking alright then (not great), but now I feel like it's impossible. I decided I soldier on and hopefully I wouldn't be too embarrassed by my yellow nails.
Thursday, August 27, 2015
Gradient All the Nails!
*Nothing to Disclose*
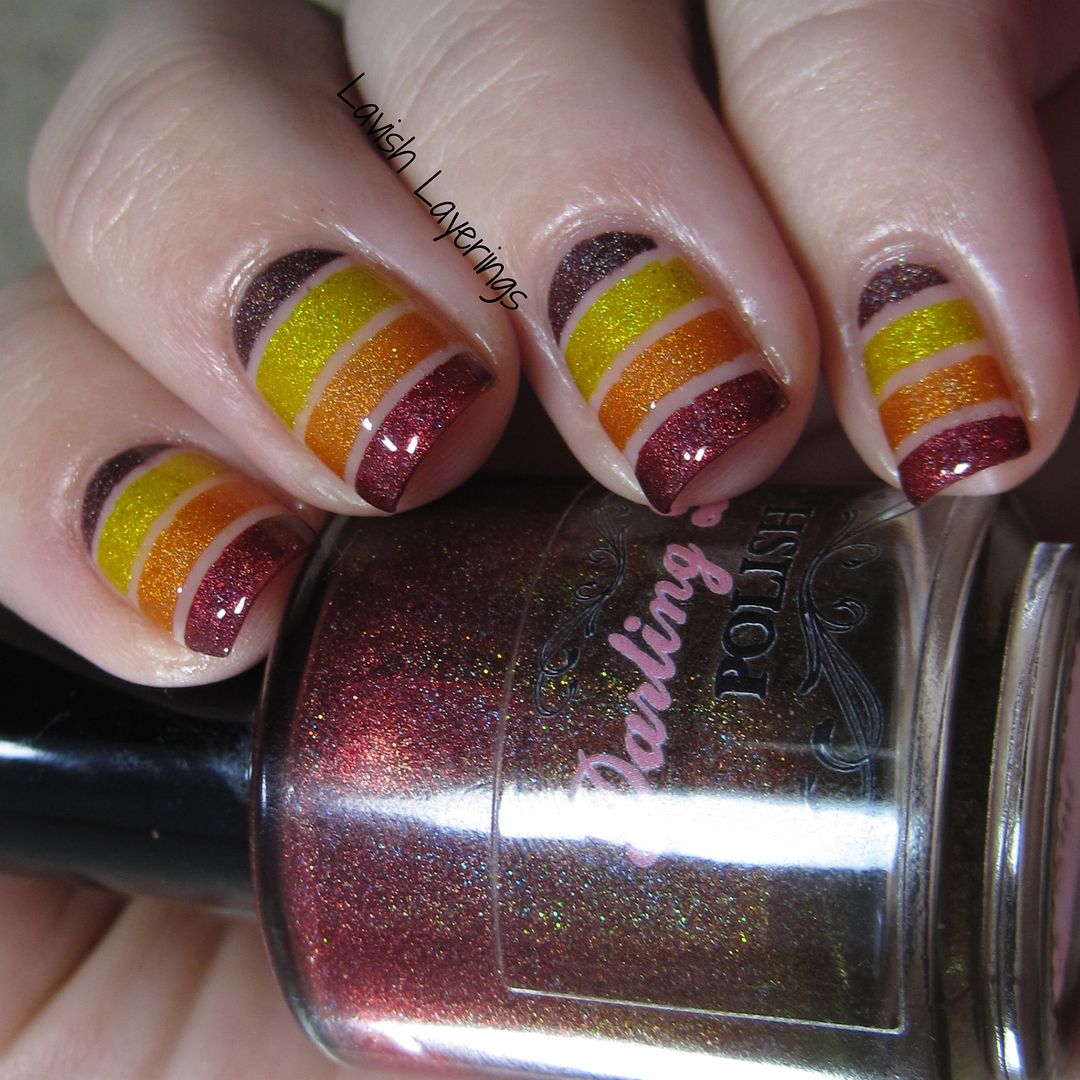
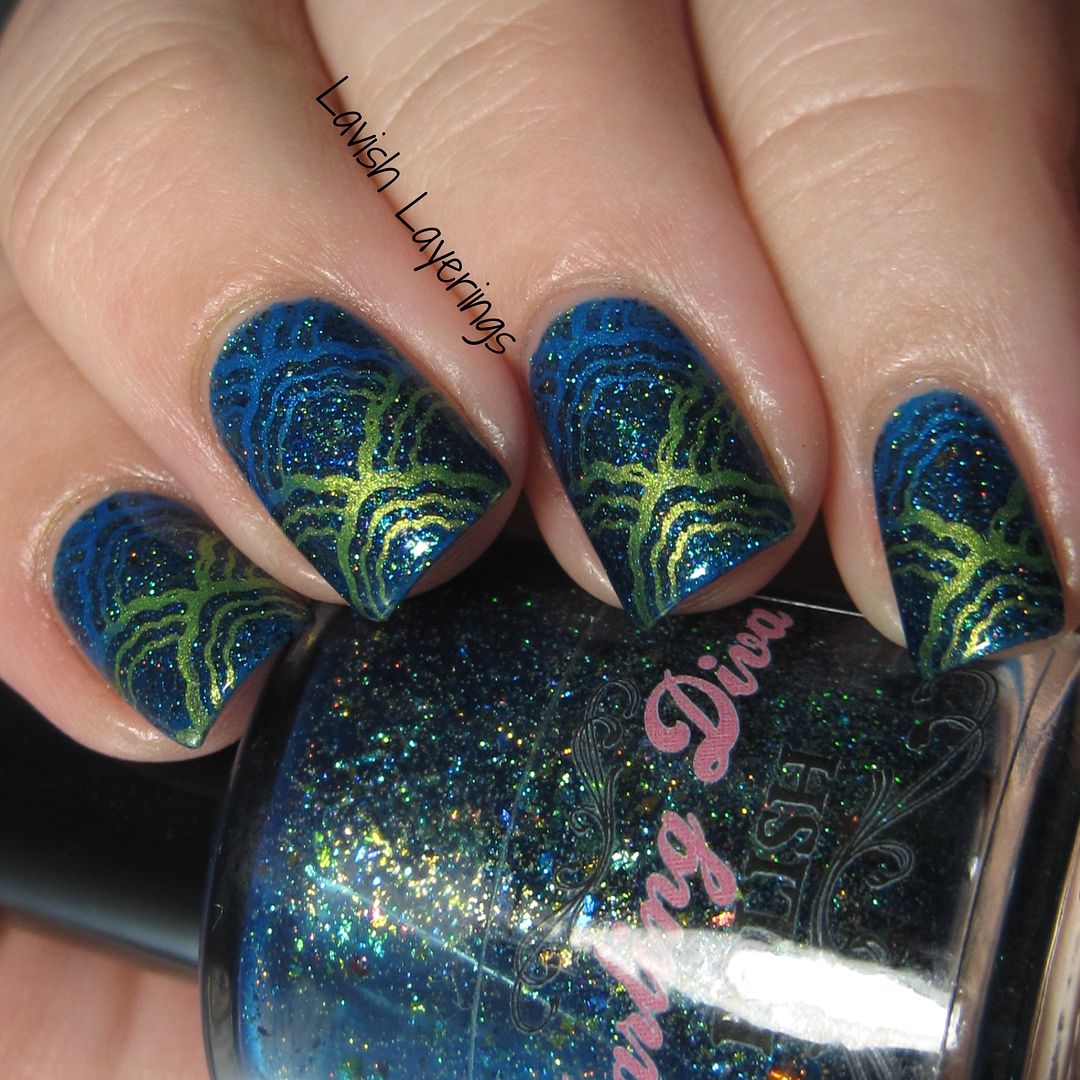
Hi everyone! Today I have another link-up with the ladies from Paint All the Nails! This month's theme is gradients, so I chose to do a gradient stamping design. I originally did a holo gradient which I intended to look sunny and bright, but somehow along the way it ended up looking like candy corn. It's still beautiful, but I think I will save that one for closer to Halloween. ;)
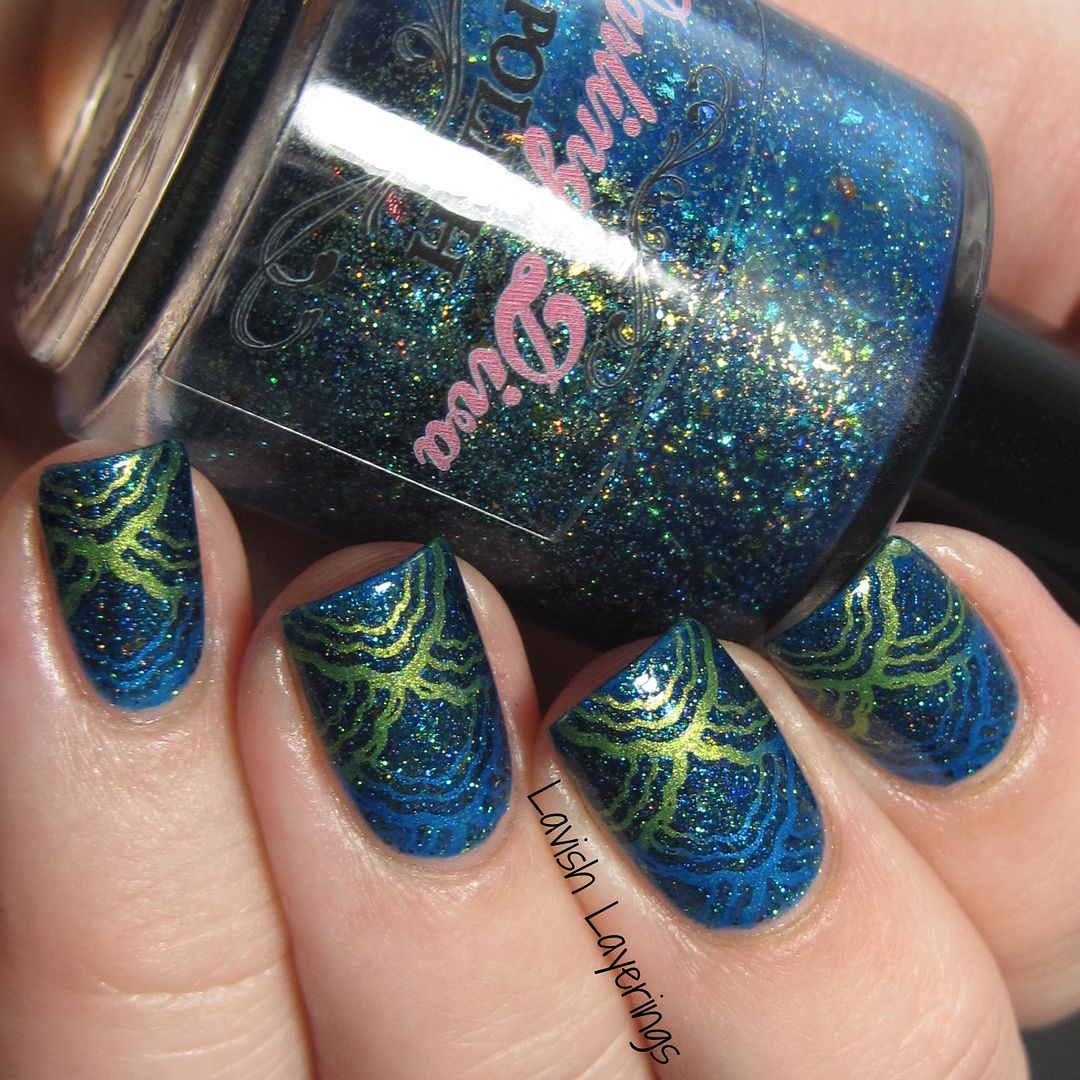
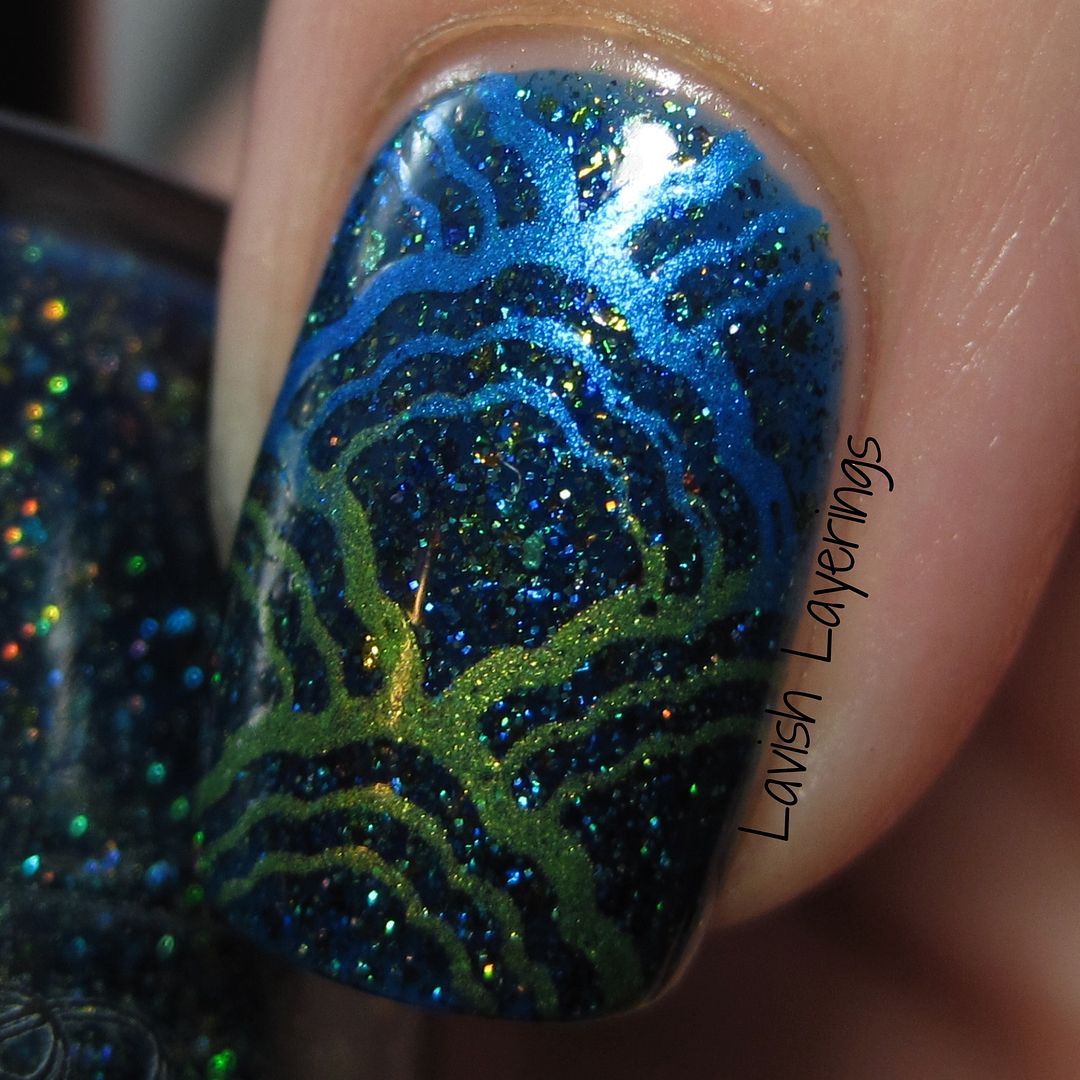
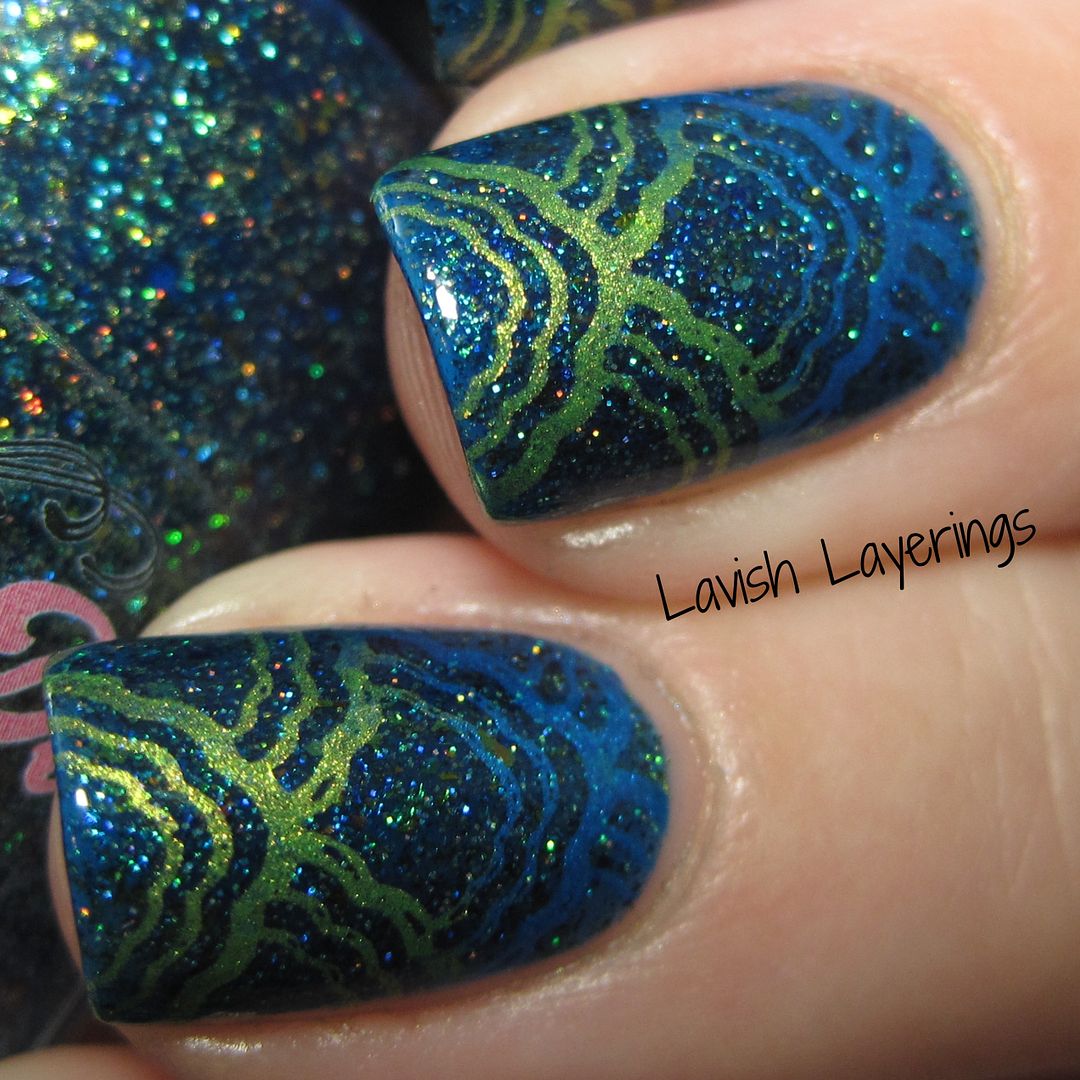
For this mani, I started off with a base of Darling Diva Polish Peekablue, which is AMAZING and you need it (nuff said)! It was so mermaidy, that I was inspired to pull out my trusty MoYou-London Sailor plate 05 and I picked out a pretty scalloped/shell design. For my gradient stamping, I used two polishes from a new to me brand, Hit the Bottle. They make super opaque stamping polishes in an array of stunning colors, and for this design I used Green Around the Gills (green) and Blue-tiful (blue) for my mani. Hit the Bottle is an Australian indie brand, but they are available from US e-tailer, Beautometry. I just love how this one turned out! Sometimes my favorite looks happen by chance.
Be sure to check out what all of the other crazy talented ladies are doing for their gradient manis! Thanks for looking everyone!
Hi everyone! Today I have another link-up with the ladies from Paint All the Nails! This month's theme is gradients, so I chose to do a gradient stamping design. I originally did a holo gradient which I intended to look sunny and bright, but somehow along the way it ended up looking like candy corn. It's still beautiful, but I think I will save that one for closer to Halloween. ;)
For this mani, I started off with a base of Darling Diva Polish Peekablue, which is AMAZING and you need it (nuff said)! It was so mermaidy, that I was inspired to pull out my trusty MoYou-London Sailor plate 05 and I picked out a pretty scalloped/shell design. For my gradient stamping, I used two polishes from a new to me brand, Hit the Bottle. They make super opaque stamping polishes in an array of stunning colors, and for this design I used Green Around the Gills (green) and Blue-tiful (blue) for my mani. Hit the Bottle is an Australian indie brand, but they are available from US e-tailer, Beautometry. I just love how this one turned out! Sometimes my favorite looks happen by chance.
Be sure to check out what all of the other crazy talented ladies are doing for their gradient manis! Thanks for looking everyone!
Monday, July 20, 2015
Paint All the Nails Does Floral
*Nothing to Disclose*
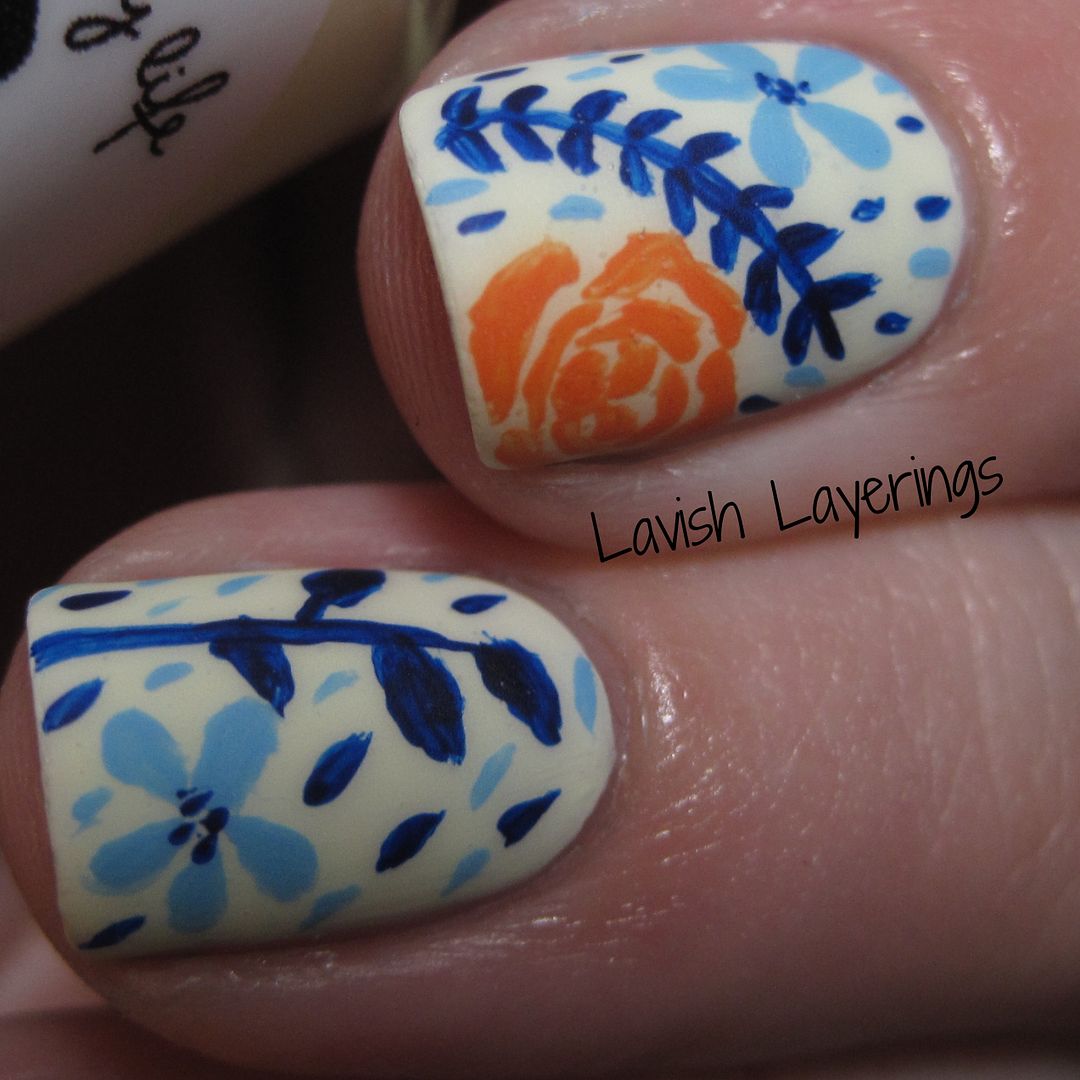
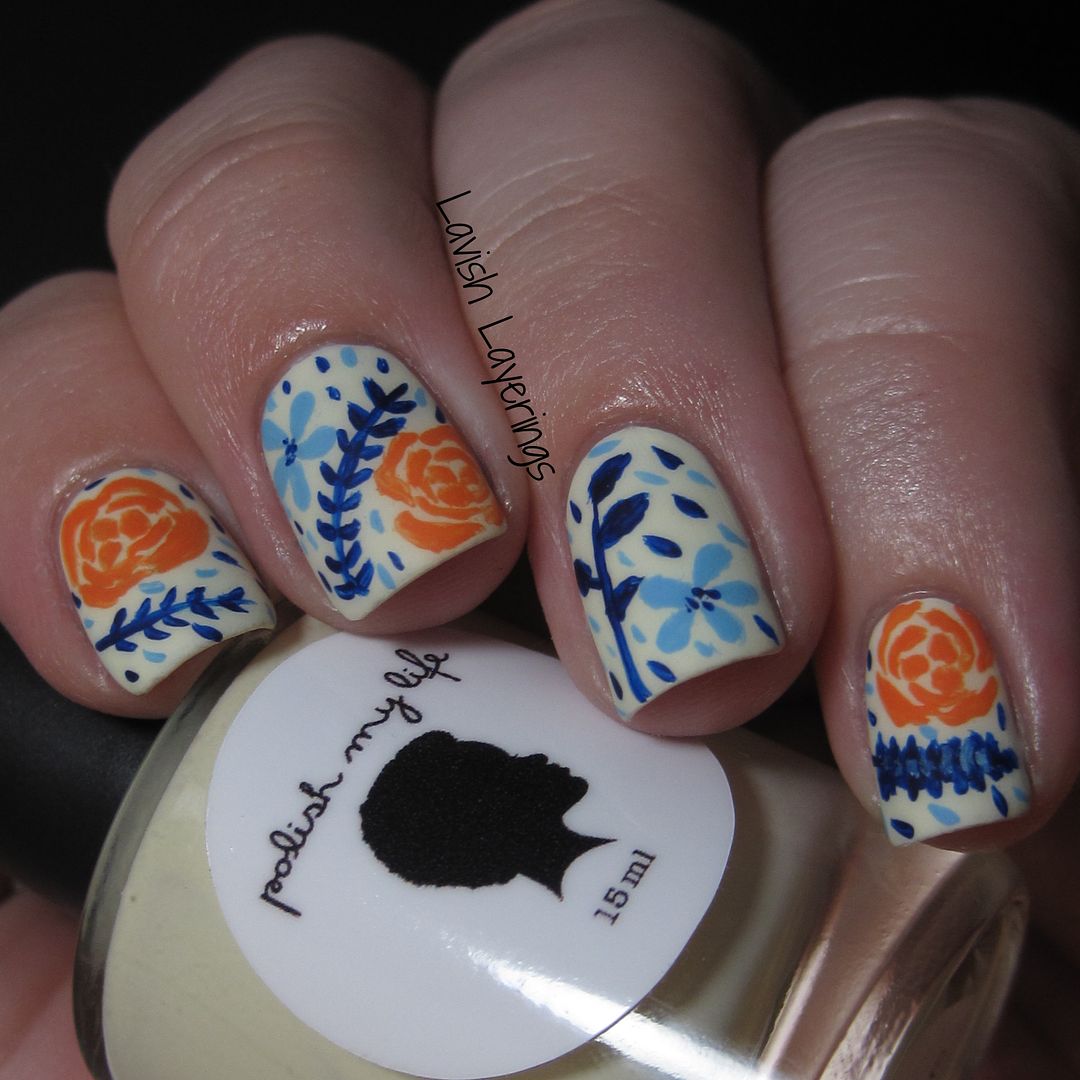
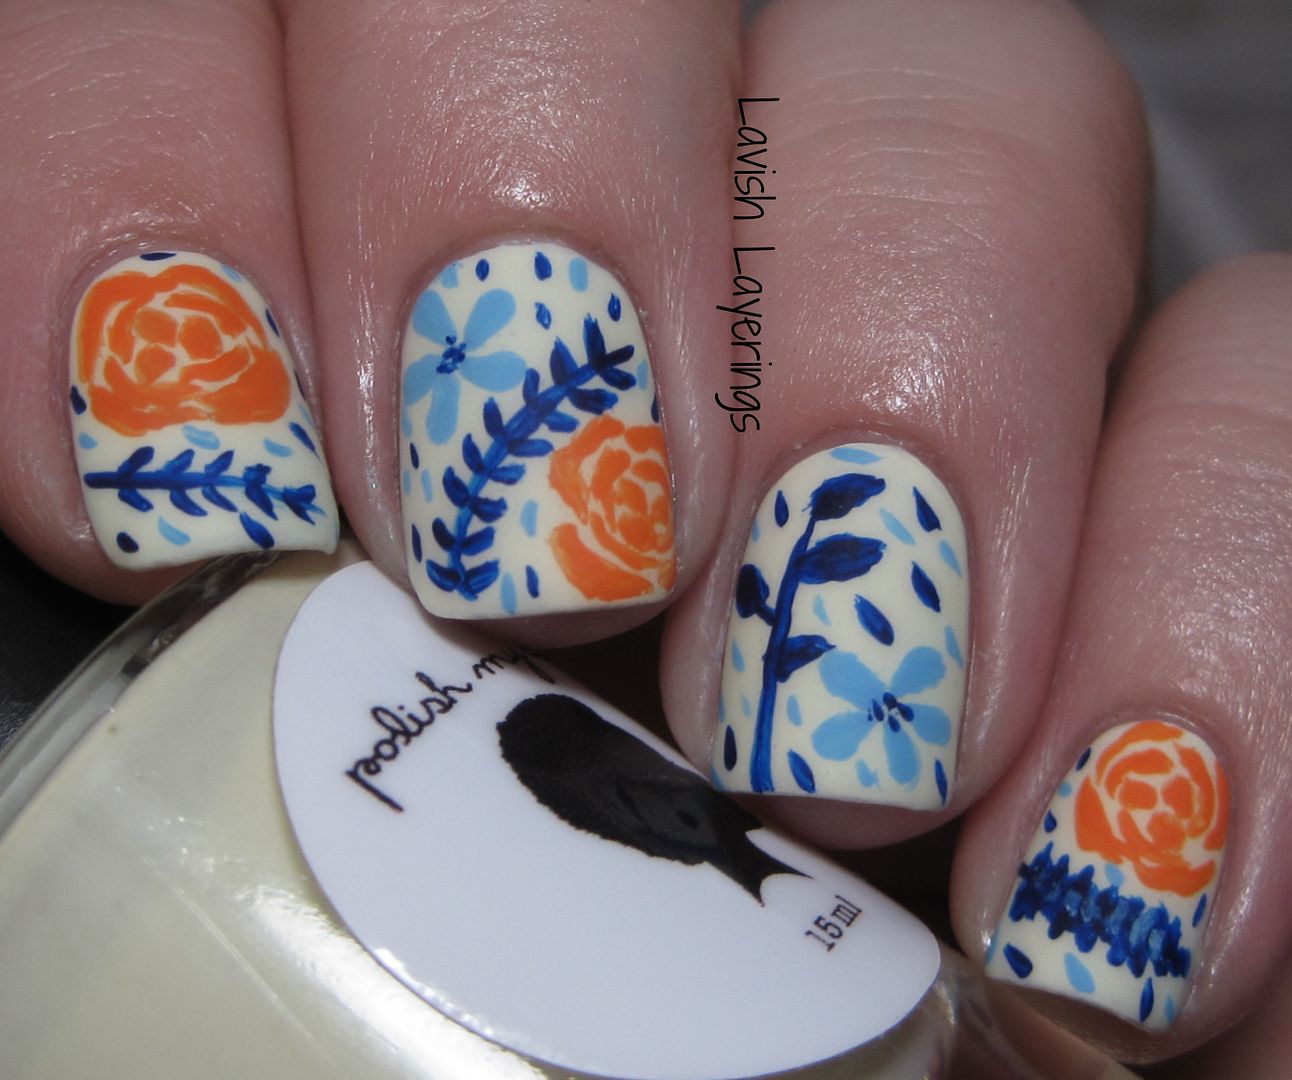
Hi everyone! We are taking a week off from Multichrome Mondays because I'm very excited to participate in a link-up today with some of my favorite bloggers for Paint All the Nails Does Floral! <3 No joke...I feel like I'm among celebrities here! Since the theme for this link-up is florals, who better to inspire my nail design today than one of these fellow artists! I've long admired the fabulous free-hand designs that Lindsey at Wondrously Polished creates. I've been intimidated to try them in the past, but I figured that this was the ideal time to give it a go. I used her Vintage Floral design as inspiration for today's manicure, and I'm so completely smitten with how it turned out!
I wanted to pay homage to Lindsey's design, but I decided to use a different color scheme to give the look a slightly different feel (she used pink, teal, and green for hers). I started off with a base of Polish My Life Rays of Sun, a pale buttery yellow creme. For the artwork, I used acrylic paints (I use these acrylic paints for nail art) in orange, and two different shades of blue (I custom mixed the colors a bit to get them the shade I wanted). Freehand art is definitely not my specialty, so this was a challenge! I played around with a dotting tool and detail brush but finally decided that the brush was working better for the design. Roses are so hard for me, I don't know why! They were the most difficult part of the design to make look right. After I finished with the design, I finished it off with a coat of OPI Matte Topcoat which really gave the look the perfect finishing touch. I'm definitely not on Lindsey's level (because she is crazy talented!) but I was very pleased with how my design turned out, especially for a first try! I loved the color scheme too...it felt very much like a vintage fabric. If you want to give this design a try, Lindsey has a tutorial for it on her blog. It's a very free-form design so you can switch it up however you want, but she shows how to create the basic elements of the design step-by-step.
Be sure to check out what the other ladies have in store for today...I know it is going to be amazing! I'm so excited to see their manis! Thanks for looking everyone!
Hi everyone! We are taking a week off from Multichrome Mondays because I'm very excited to participate in a link-up today with some of my favorite bloggers for Paint All the Nails Does Floral! <3 No joke...I feel like I'm among celebrities here! Since the theme for this link-up is florals, who better to inspire my nail design today than one of these fellow artists! I've long admired the fabulous free-hand designs that Lindsey at Wondrously Polished creates. I've been intimidated to try them in the past, but I figured that this was the ideal time to give it a go. I used her Vintage Floral design as inspiration for today's manicure, and I'm so completely smitten with how it turned out!
I wanted to pay homage to Lindsey's design, but I decided to use a different color scheme to give the look a slightly different feel (she used pink, teal, and green for hers). I started off with a base of Polish My Life Rays of Sun, a pale buttery yellow creme. For the artwork, I used acrylic paints (I use these acrylic paints for nail art) in orange, and two different shades of blue (I custom mixed the colors a bit to get them the shade I wanted). Freehand art is definitely not my specialty, so this was a challenge! I played around with a dotting tool and detail brush but finally decided that the brush was working better for the design. Roses are so hard for me, I don't know why! They were the most difficult part of the design to make look right. After I finished with the design, I finished it off with a coat of OPI Matte Topcoat which really gave the look the perfect finishing touch. I'm definitely not on Lindsey's level (because she is crazy talented!) but I was very pleased with how my design turned out, especially for a first try! I loved the color scheme too...it felt very much like a vintage fabric. If you want to give this design a try, Lindsey has a tutorial for it on her blog. It's a very free-form design so you can switch it up however you want, but she shows how to create the basic elements of the design step-by-step.
Be sure to check out what the other ladies have in store for today...I know it is going to be amazing! I'm so excited to see their manis! Thanks for looking everyone!
Subscribe to:
Posts (Atom)