Wednesday, December 3, 2014

OMG Nails Strips Review

*Press Sample*

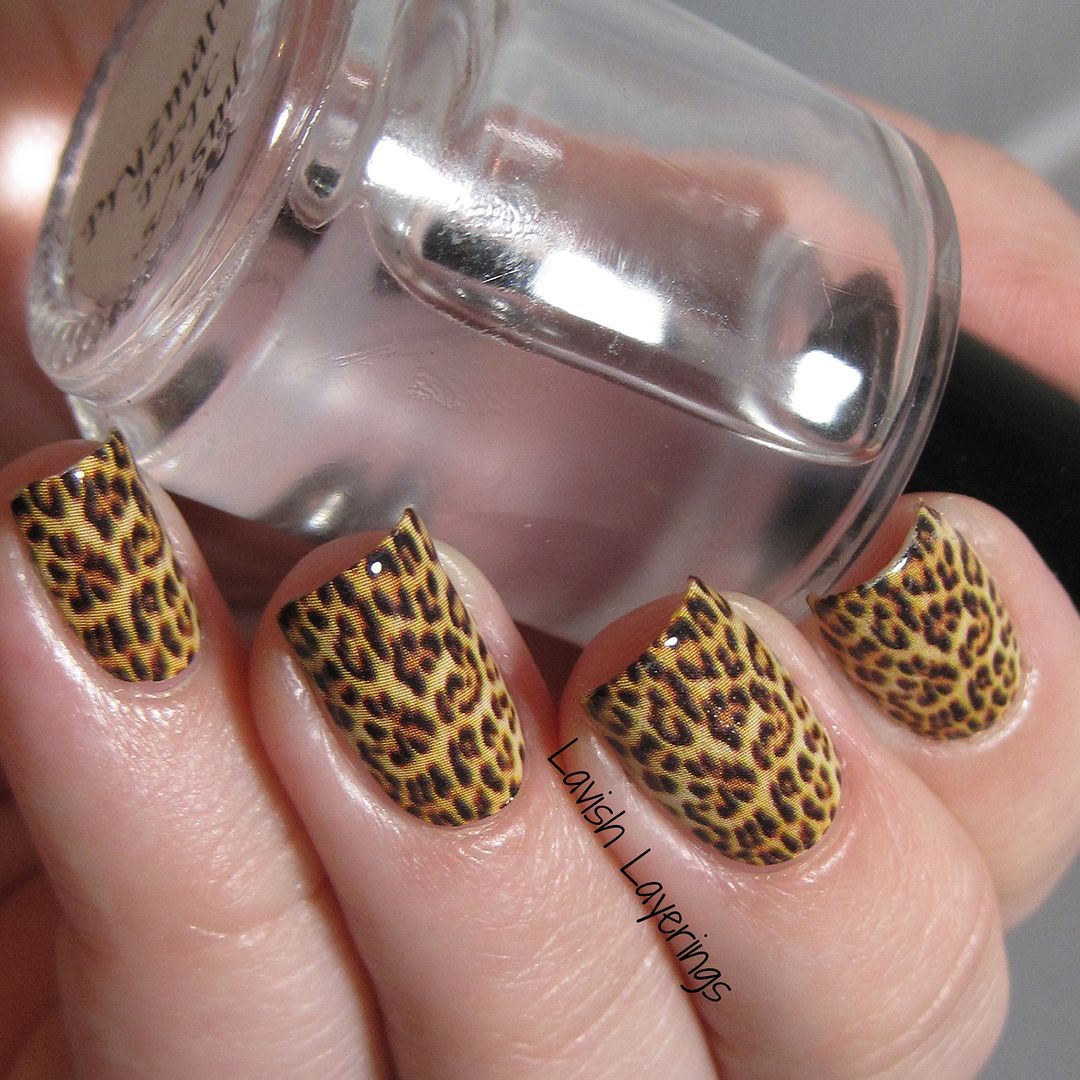
Hi everyone! Today I have a new to me product called OMG Nail Strips. I have used nail strips in the past, but they have always been of the water decal variety that you have to soak in water, peel off, and then position on your nail. These strips are sticky and you just peel them off of their backing and stick them on your nail. I got two different patterns to sample, but today I'm showing you the Cheetah pattern, which I think is a very universal design that most girls would love (I mean, who doesn't like animal prints?)

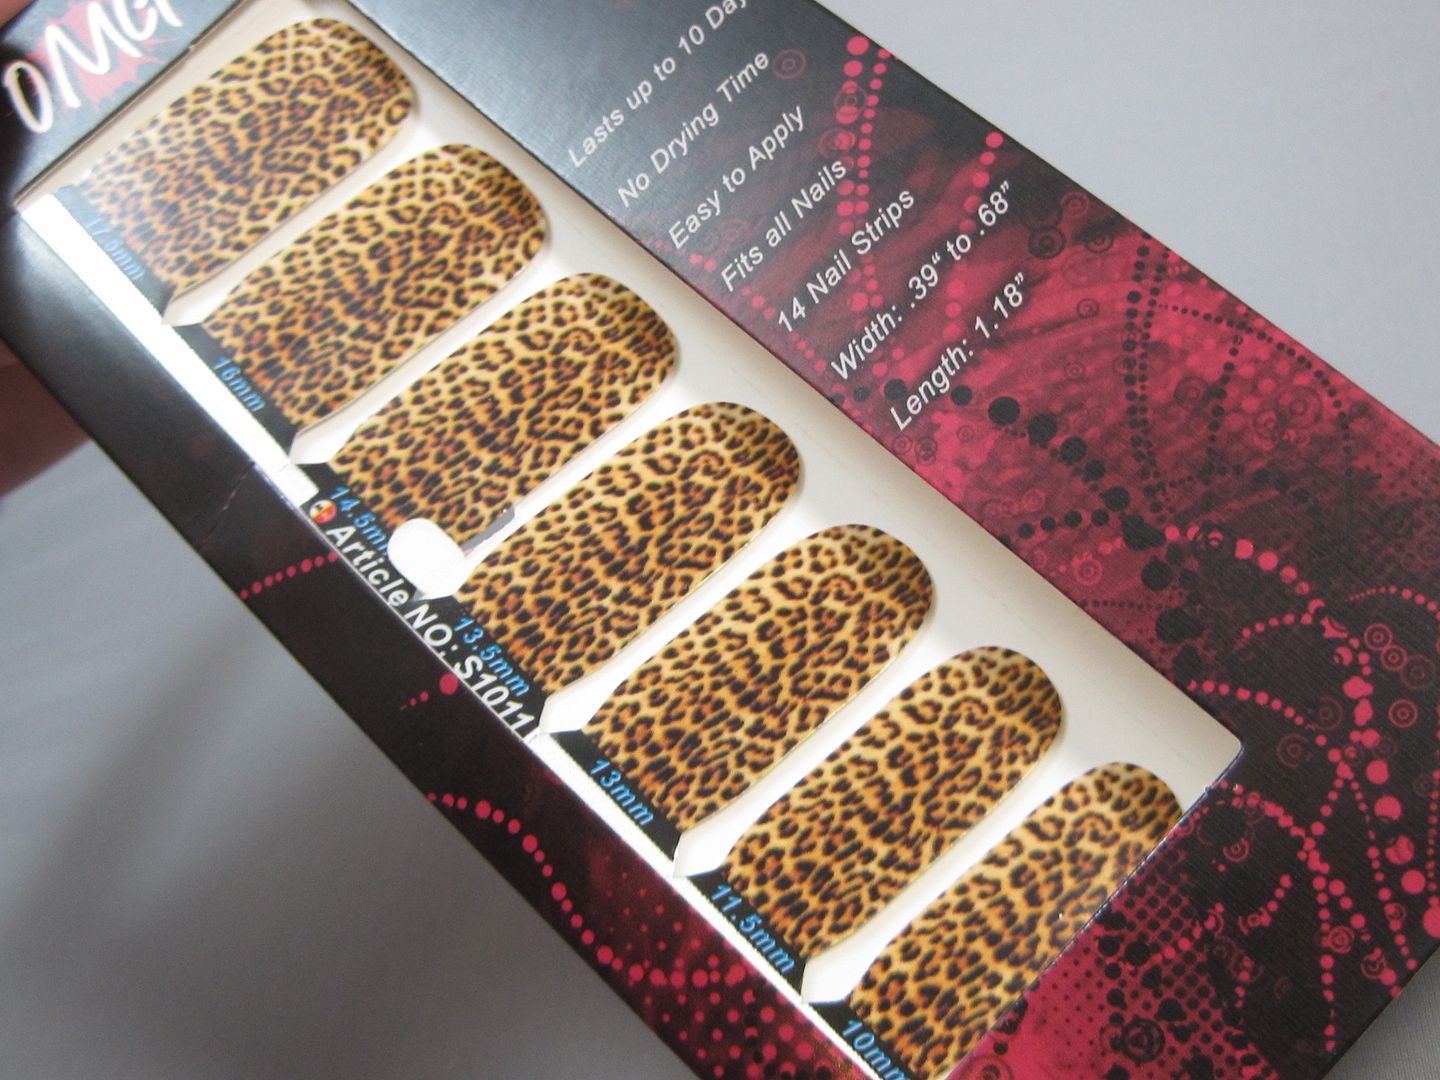
These strips come in a package of 14 varying widths so they will fit a variety of nail sizes (and even toes). I found that they fit my nails pretty perfectly without having to do much manipulation, but I do have wider nails. My pal Novi at Colors Frenzy recently reviewed them and she has nails on the narrower side and had to trim them down a little on the sides to fit her nails properly. I would much rather have to cut them a little than them not be wide enough and leave gaps at the edges of my nails, which is something I've experienced before. Those times I've had to wear a base color to compensate for the gaps, and that just adds an extra step to something that is supposed to be easier than polishing!

Steps for Application
1) "Size-up" the strips against your nails and determine the appropriate sized strip for each nail
2) Wipe down nail with alcohol or acetone to remove any oily residue that might be there to help the strips stick well. 
3) Peel off the clear plastic from the top of the strip and then peel off the paper backing.  
4) Center the strip on your nail and smooth out the strip onto your nail starting from center and working out to eliminate bubbles. Keep smoothing the strip down with your finger to eliminate bubbles if they do occur. The great thing about these strips is that they are sticky, but also easy to peel back up if you make an error with sticking them without tearing!  
5) Cut off any excess that is hanging over the tip. These are pretty long to accomodate longer nails, so if you have shorter nails like me you will likely have a good bit.  
6) Now, the directions state to file the excess off at the ends of your nails to get them even with the nail and that works perfectly BUT, I like to do it slightly differently (so use whichever method you prefer). If you file them off, then you are left with an exposed free edge which I don't care for. You can see in my pics that I did this on the pointer finger and you can see a bit of free edge. Most people don't mind this, but I'm a weirdo and I don't like it!. What I like to do is trim down the strip as close to your free edge as possible. THEN you tuck the edge of the strip under your nail and dab it with pure acetone and your clean up brush. This process will melt away the excess strip and seal the edge of the strip to your nail while covering your free edge. I have used this method before for other types of strips, and it works perfectly with these too.
7) Seal with topcoat! It's best to not use a quick-dry topcoat I've heard because that can cause some pulling at the edges, but I used NYC Grand Central Station and experienced no issues, and it is pretty fast drying. 
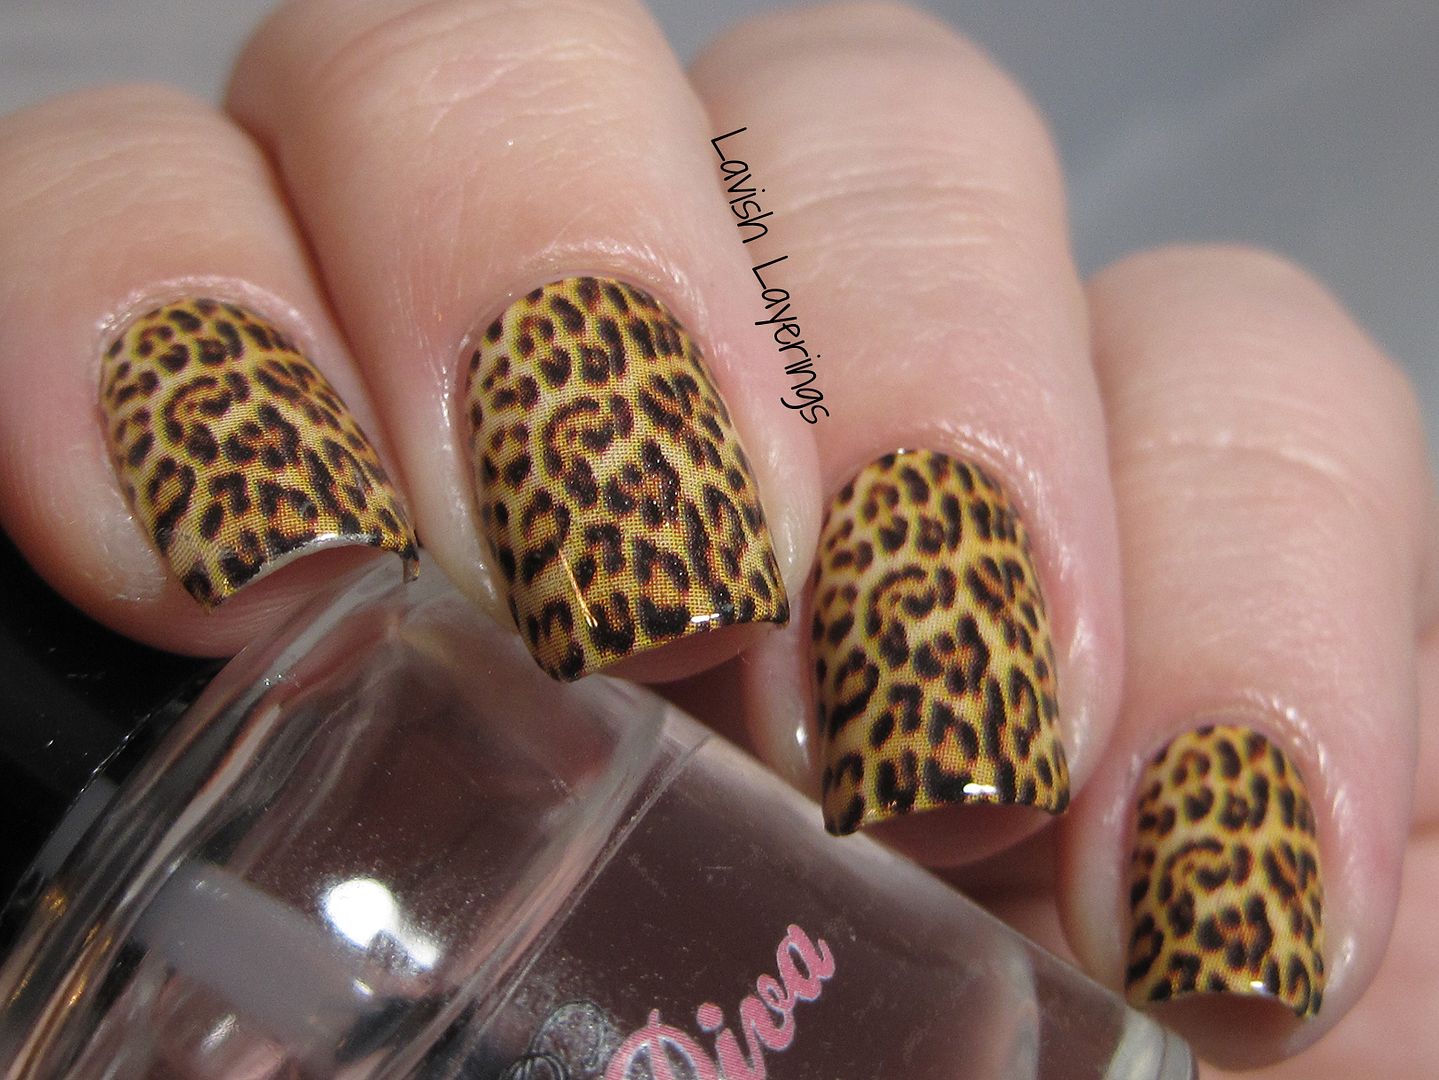
(excuse the little weirdness on my middle nail, that is bubbles from my topcoat NOT the strip!)

The great thing that I found about these strips is that they clean up really easily with acetone. Once you stick them on, if there is a little bit overlapping your cuticle or up the edge, you can just dip a clean-up brush in acetone and the strip sort of melts away with the acetone (similar to polish) and leaves you with a clean edge. This is a SUPER HANDY tip! The other great thing about them is that they are super thin and flexible, so they adhere really closely to your nail so it looks like you have polish on, not some sort of thick, stiff thing on your nail that peels up at the edges. They remove just like polish too with regular polish remover. I've read that they have great staying power, so they would be ideal to wear on a trip. I personally paint my nails almost every day, so I can't test out the longevity of them right now, but I plan on wearing some when I go away from home for a weekend and see how they hold up over 3-4 days.


OMG Nail Strips retail for $7.99 per pack on their website OR they offer a coupon code on their site where you can get 5 packs for $25 (5pack), which I think is an awesome deal! I might partake in that deal soon actually, because they have a lot of cute designs! Even if you don't want to do a full mani with them, they would be super cute for accent nails to jazz up a plain mani.

What do you think of these? Have you ever tried nail strips? Thanks for looking everyone!

Tuesday, December 2, 2014

Flakies + Stamping with Essie Shine of the Times and Born Pretty Store Stamping Plates

*Some items in this post were sent for review*

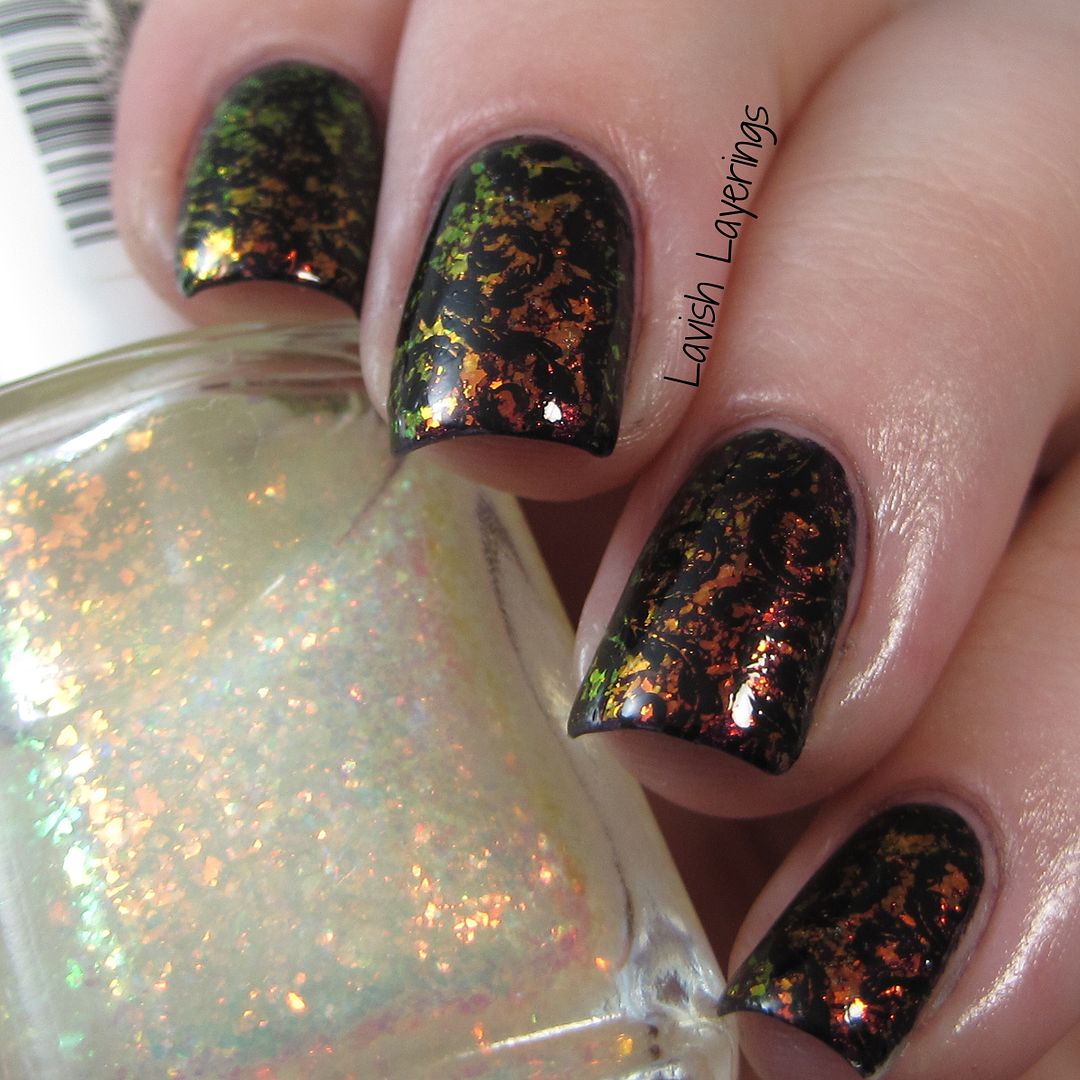
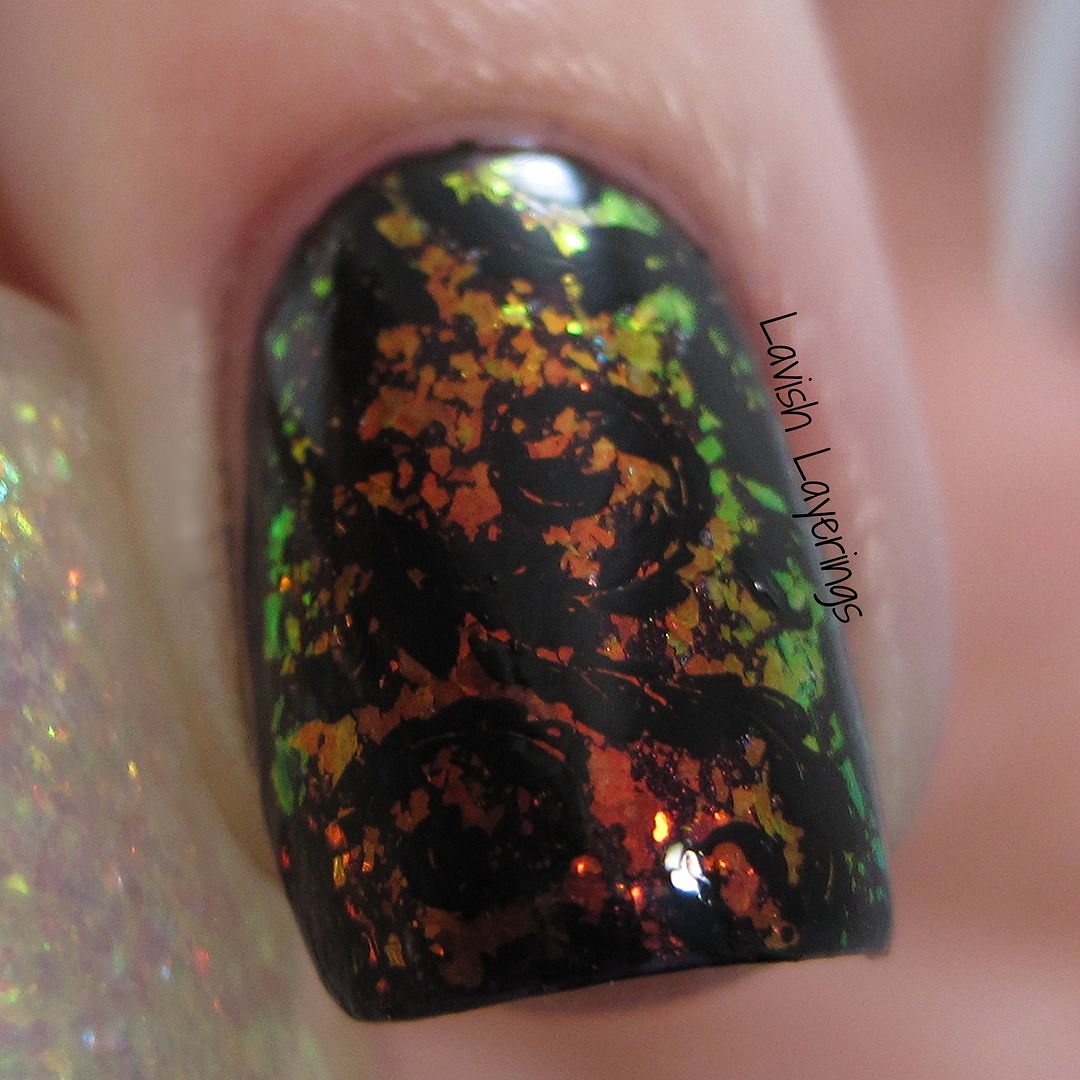
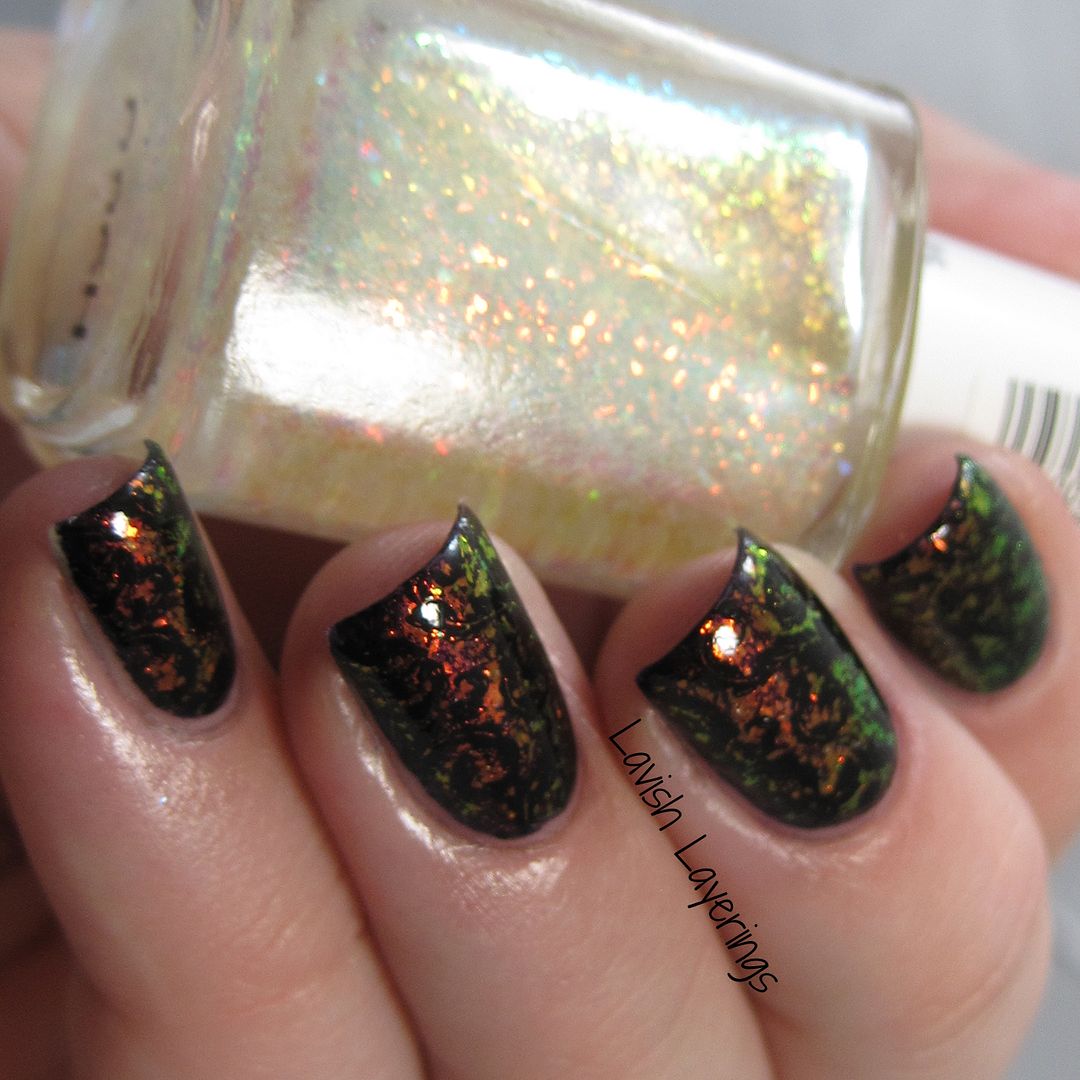
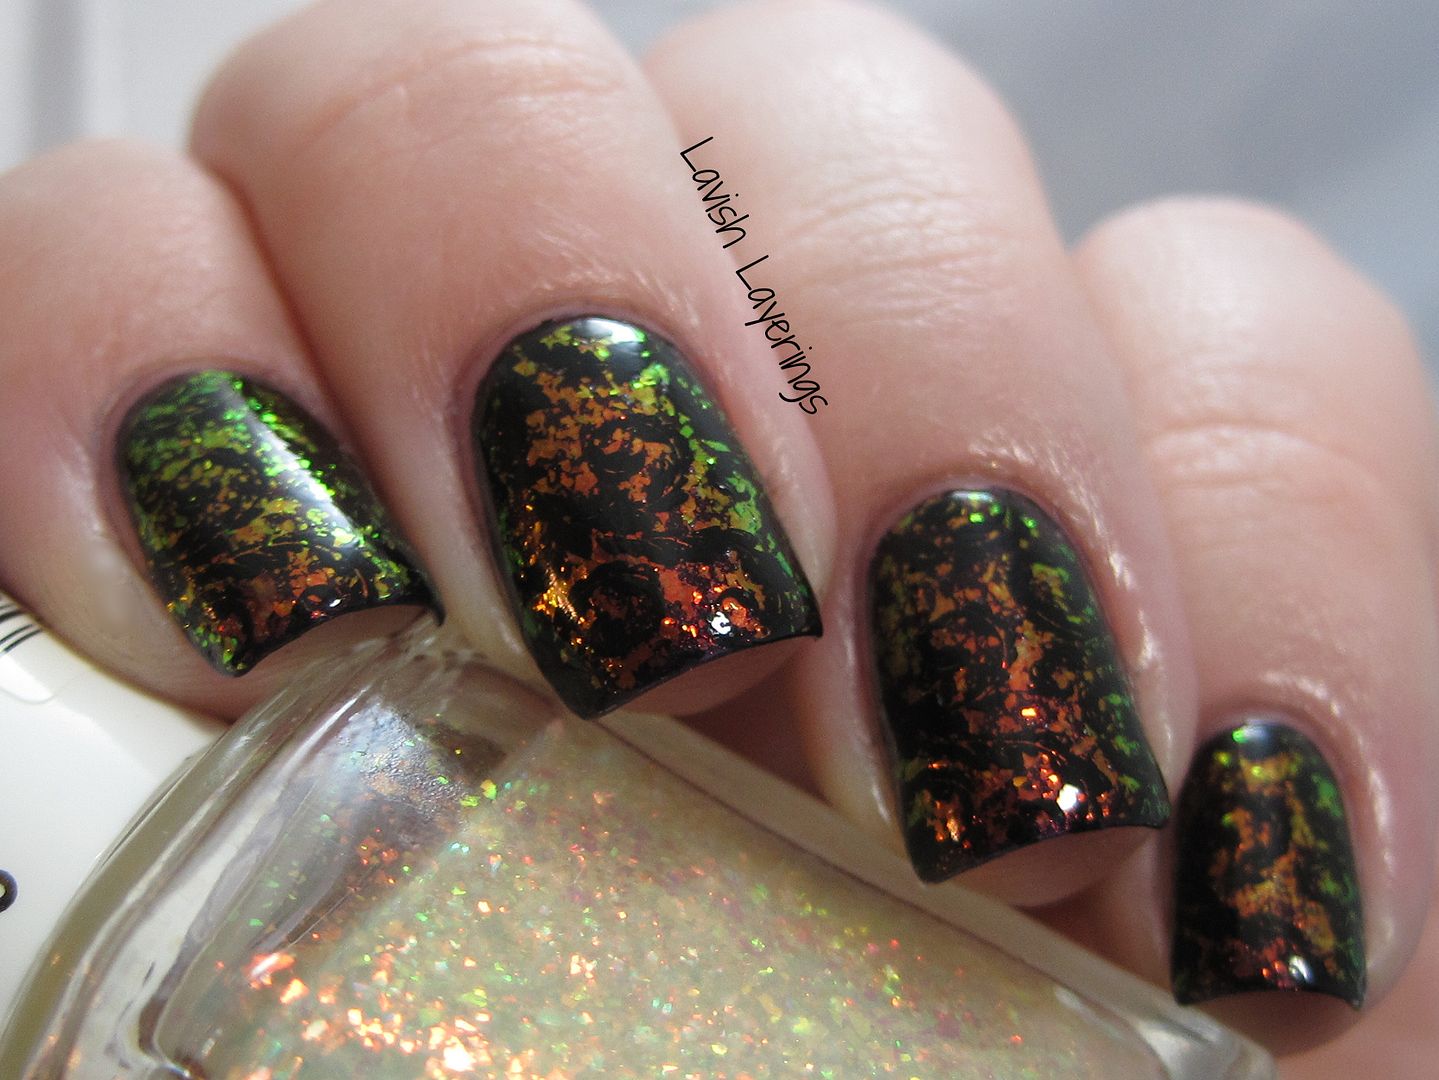
Hi everyone! With the recent flakie madness, I decided to pull out one of my all-time favorite flakies, Essie Shine of the Times. What I love about this one is that it is SO DENSE and gives such amazing coverage with one coat. For this mani, I started out with a base of OPI Every Month is Oktoberfest and then I painted on 1 coat of Essie Shine of the Times. I decided I wanted to see what it would look like with black stamping so I stamped over the mani with a leafy image from Born Pretty Store plate 05 (Egypt Style) Stamping Plate and Mundo de Unas Black. The image stamped really nice and crisply, but my base sort of swallowed it up because it is so busy. I feel like it gave the overall look a nice "weathered" sort of feel, but I don't feel like it showcases the stamp as nicely as I wanted it to so I will use it again and do a full review of the plate. All in all, I really loved this mani and the flash of the flakes is so nice over a dark base.


Be sure to check out Born Pretty Store for all of your nail art supply needs (you can use my coupon code JCX31 for 10% off your order).  I've always had great experiences with ordering from them at very reasonable prices. Also, you can't beat free worldwide shipping! You can also follow Born Pretty Store on Facebook and Instagram. 

What do you think about the resurgence of flakie madness? I personally love flakies, so I can never get enough! I feel like I have most of my bases covered in my collection as far as these type of flakie are concerned so I haven't picked any of the new ones up yet, but I am still tempted... Thanks for looking everyone!

Monday, December 1, 2014

CYNA 12 Days of Christmas Challenge: Snowflakes

*Nothing to Disclose*

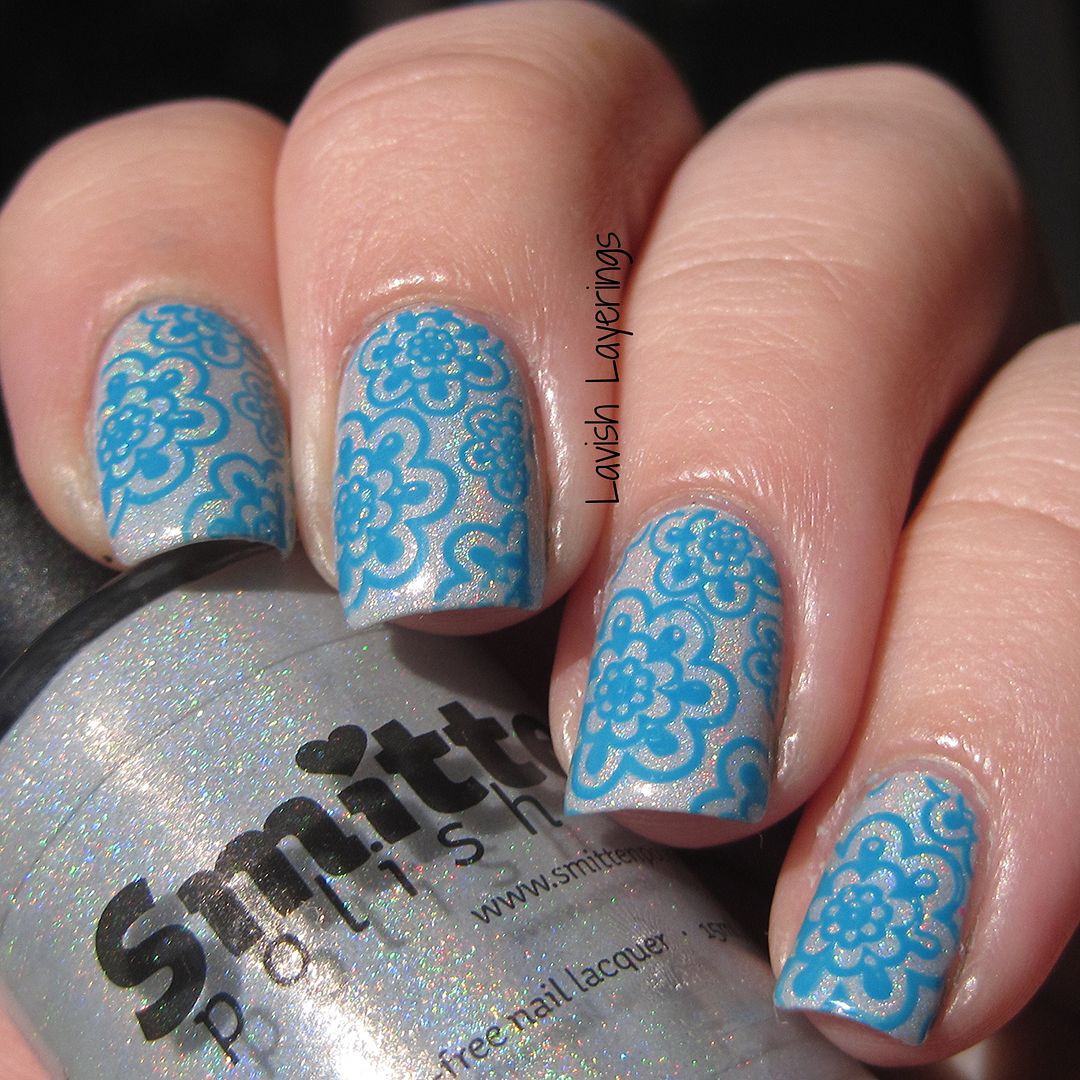
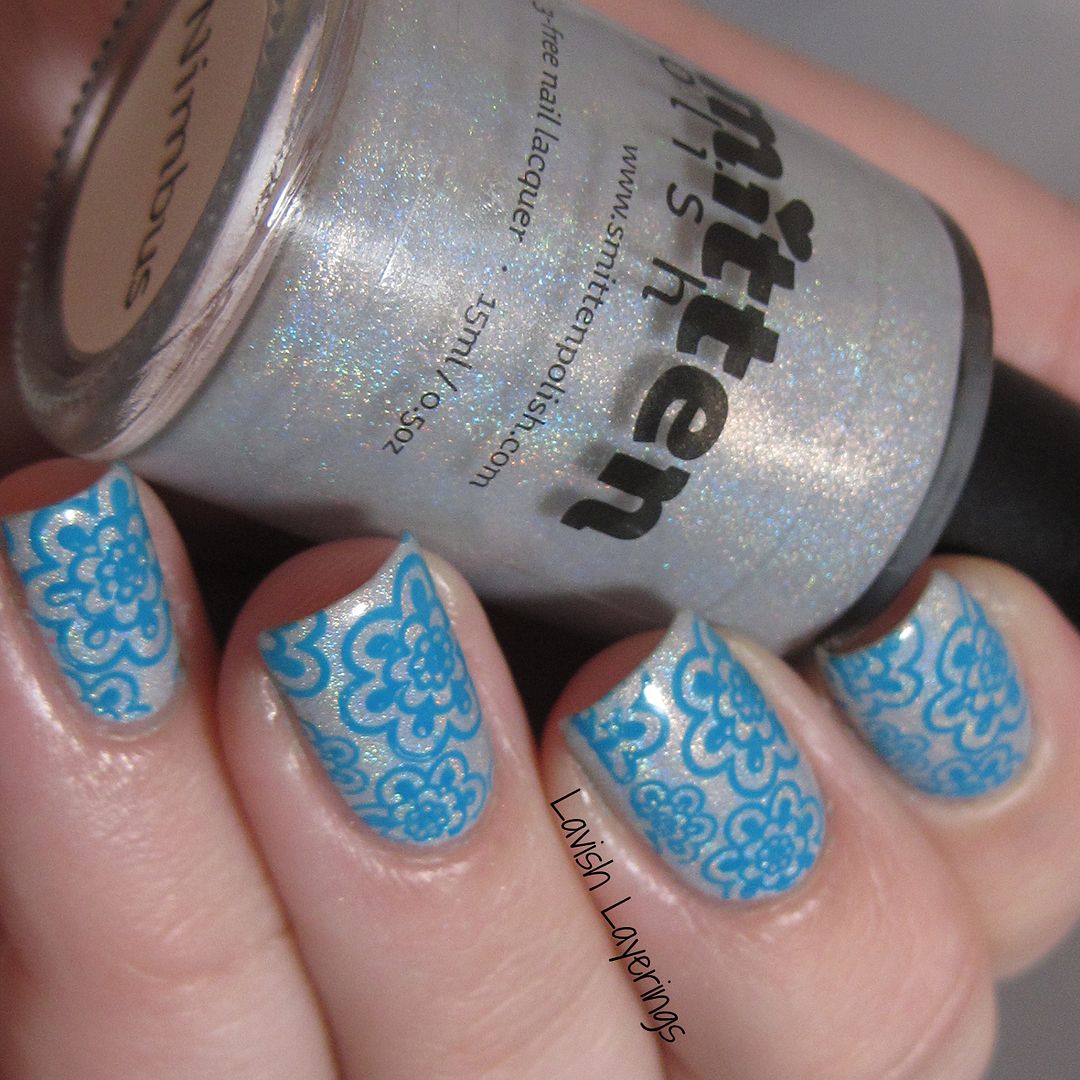
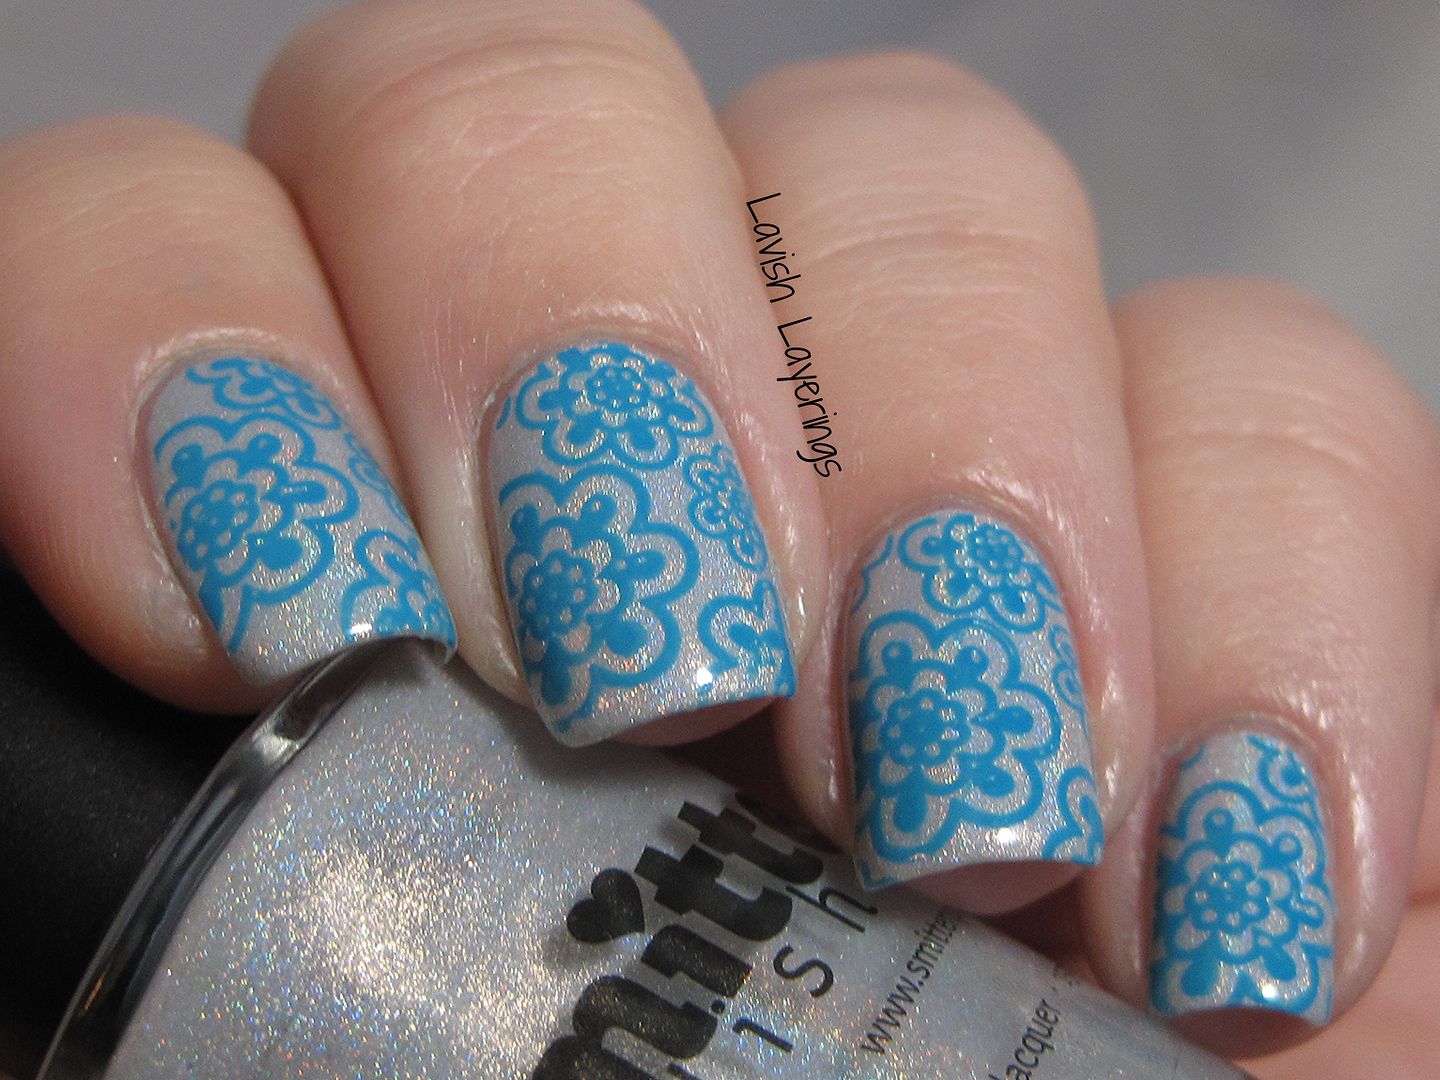
Hi everyone! Today is the first day of Challenge Your Nail Art's 12 Days of Christmas Challenge. I don't know if I will be able to participate the whole time, but I'm going to try to do as many as I can because I love Christmas-inspired manis! The first prompt was snowflakes, and I took the obvious route for me: stamping. I knew what colors I wanted to use for a base and a stamp, but I had to pick a snowflake design. I was looking through my Bundle Monster plates and I actually have 2 snowflake plates that I have used before, but I found a 3rd one that is sort of snowflake-esque, but it also might be flowers. I thought that one might be the most appropriate for me since in south Alabama we never see real snowflakes, so a snowflake-esque flower is usually as close as I will get to snow.

For this mani, I started off with a base of Smitten Polish Nimbus, a super pale grey linear holo (the closest thing to a white holo I have). Next I used Bundle Monster plate BM-321 and Sally Hansen Insta Dri Brisk Blue. Definitely a bit of a rush job with the stamping, but it isn't my worst either. :) Earlier, I discovered that Traci over at Newsie Nail Novice and I almost have twinsie nails today, so that shows you what a perfect polish Nimbus is to get you in a snowy mood!


If you want to join in, the prompts are for every other day all the way up until Dec 23!

Be sure to check out what everyone else did for today's prompt! Thanks for looking everyone!
KBShimmer Holly Back Girl

*Press Sample*

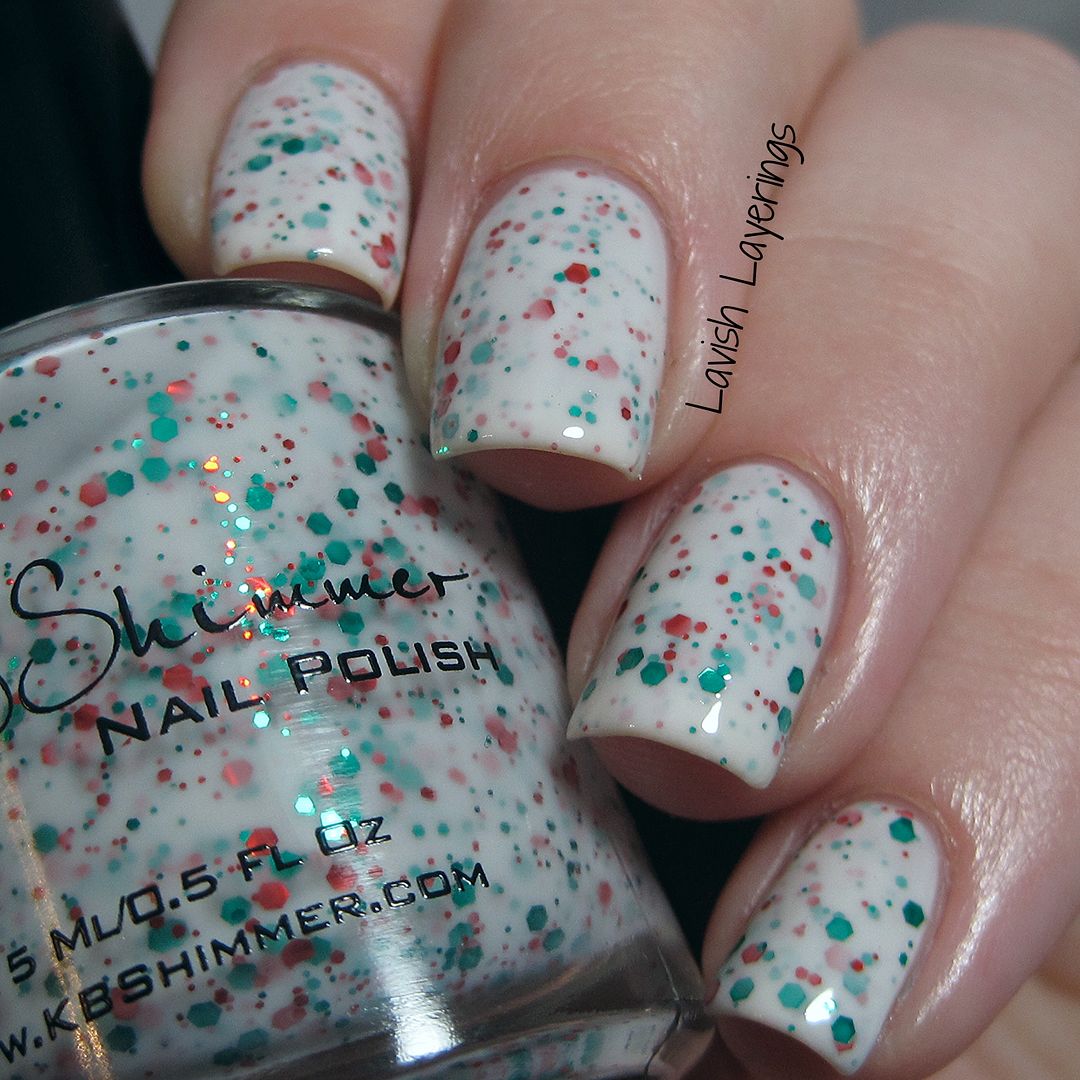
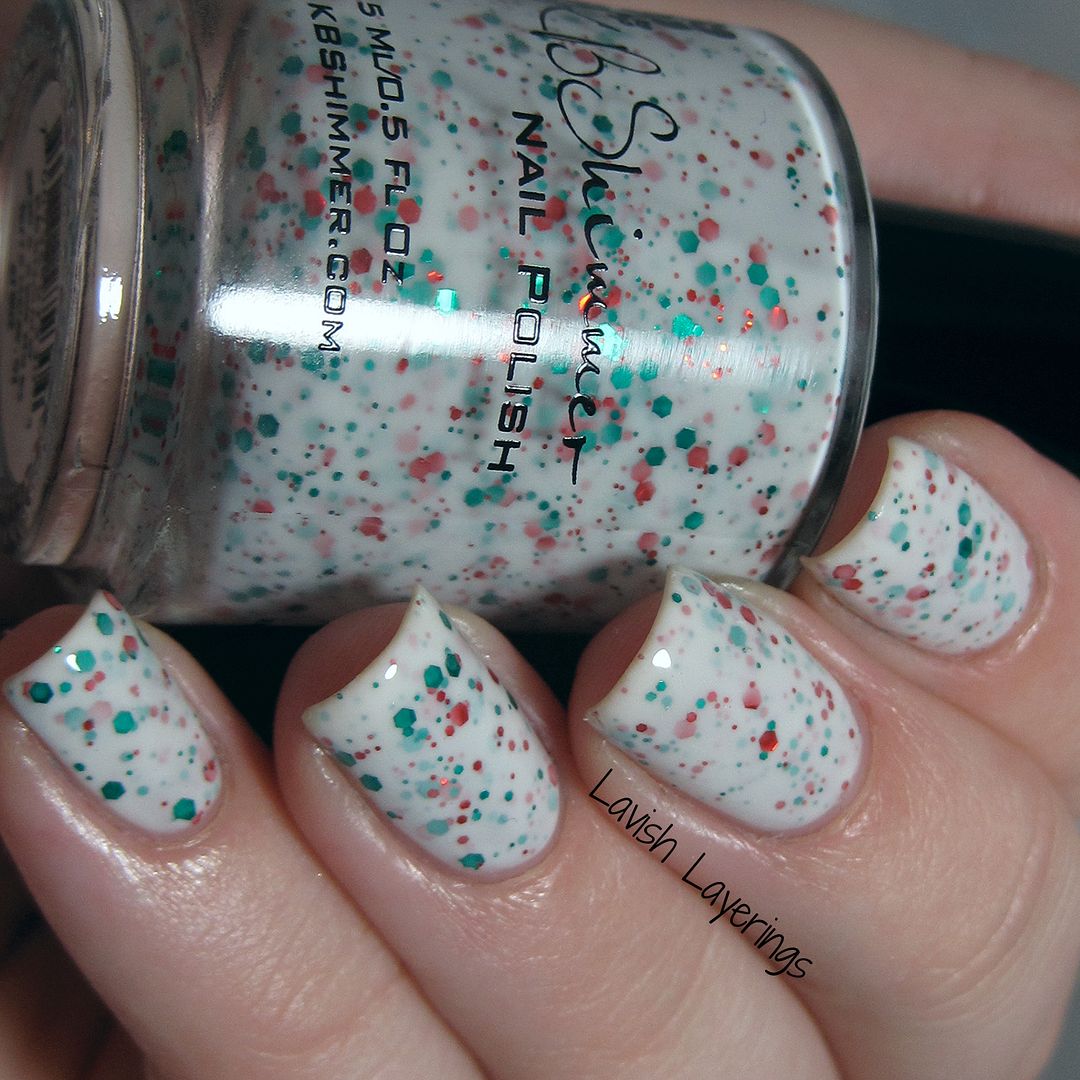
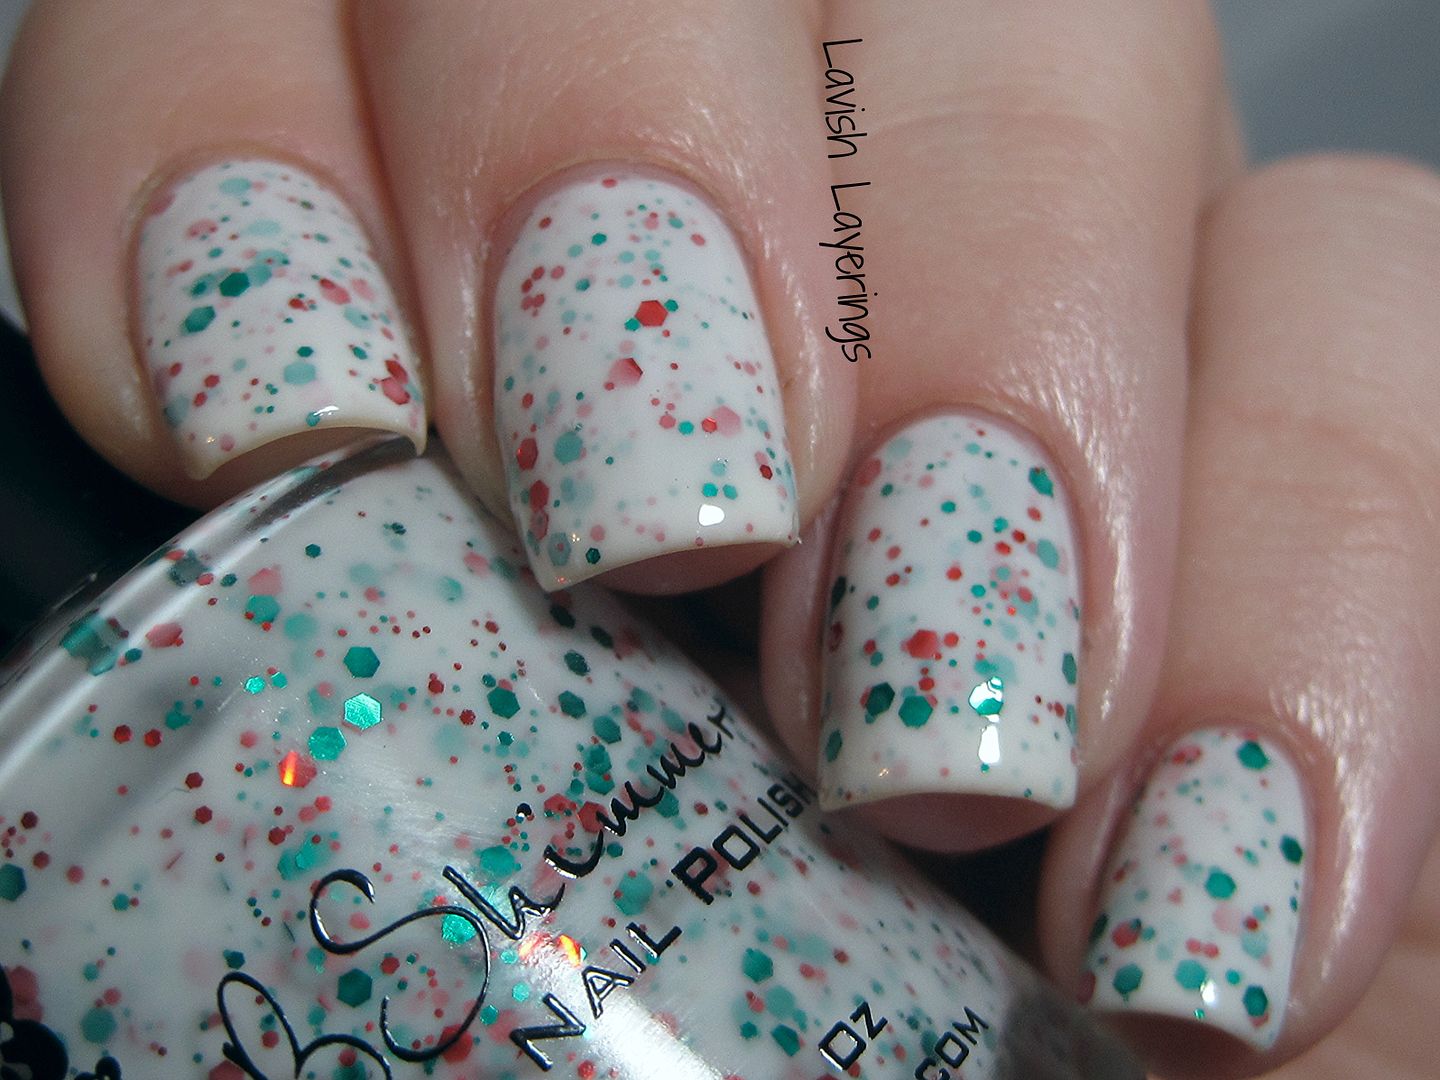
Hi everyone! I realized that even though I have featured KBShimmer Holly Back Girl on the blog with nail art using KBShimmer's vinyls, I never did a full swatch and review of it. It is such a fabulous polish that it deserves a little more attention! I feel like since it is the quintessential Christmas polish that it is appropriate to post it on the first day of December. I can finally do Christmas-themed things with abandon! YAAAAY!

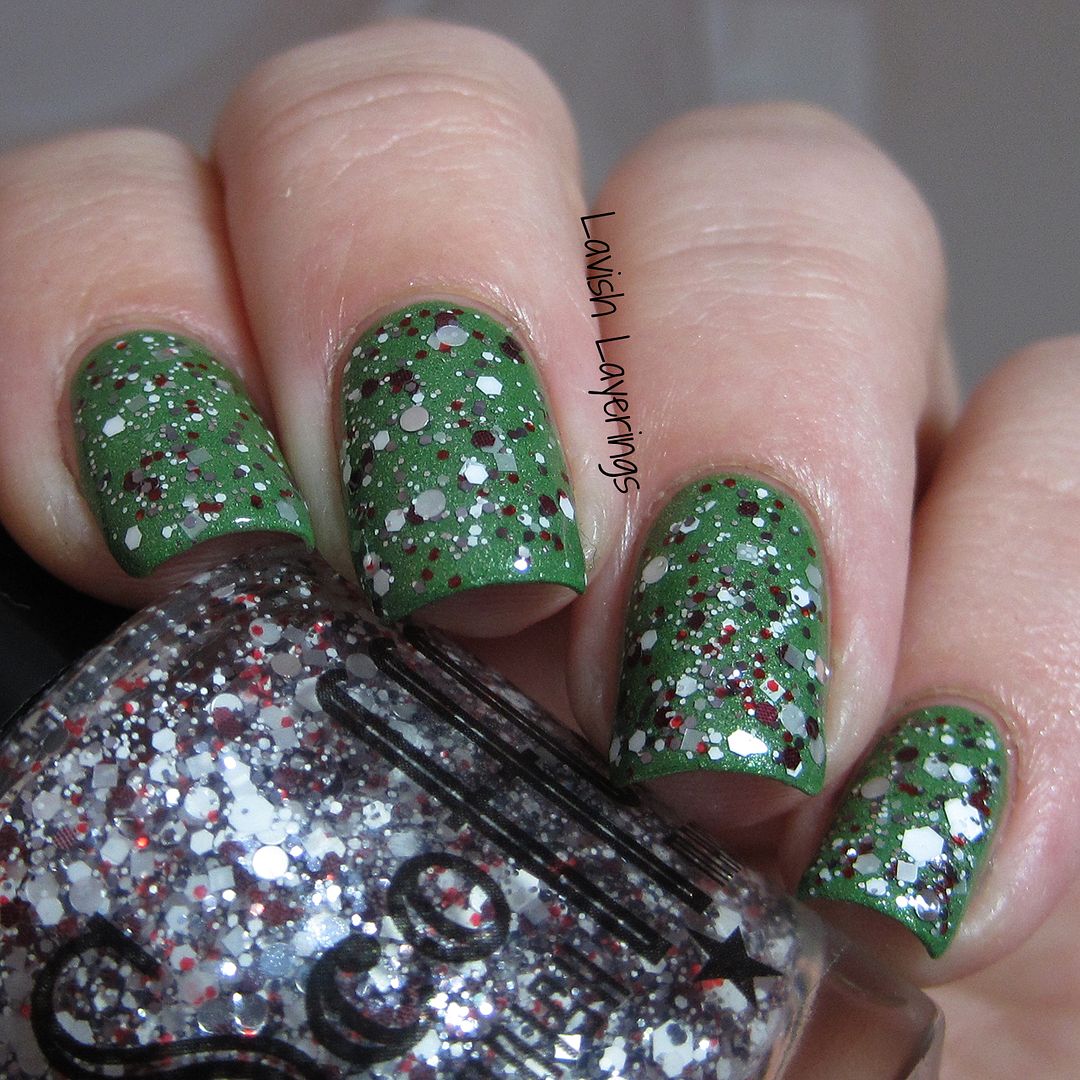
KBShimmer Holly Back Girl is a white crelly with red and green glitters. The formula on this polish is absolute perfection and it builds up nicely in 3 thin coats. This polish is available for sale in the KBShimmer shop so you can go purchase it OR you can also get it free with any purchase of $70 or more (use coupon code HBGFREE at checkout after you add it to your cart). That offer is valid through 12/31/14. It is such a fun polish and one that everyone needs for the holiday season!


KBShimmer products are available from their website as well as from Harlow & Co. (Canada) for international customers.  Be sure to follow them on Facebook and Instagram for updates on new collections and to see swatches of all of their polishes. 

Are you as excited as I am for Christmas polishes/manis!?! Thanks for looking everyone! 
Sunday, November 30, 2014

Fekkai VoxBox Review from Influenster

*Press Samples, Affiliate Links*

Hi everyone! Today I have a bit of a different review for you. I signed up with Influenster recently and received my first VoxBox to try. The Fekkai VoxBox contained samples of Fekkai's Salon Technician Color Care Shampoo and Conditioner as well as a nice sized sample of their Technician Color Care Luxe Color Masque.


I really liked that Influenster asked targeted questions about my hair, hair care routine, hair condition, etc in order to send a sample that fit my needs vs just a generic sample for everyone. Since I have color-treated hair, this was the perfect box for me. Here are all of the other options that were available:


Now I will start out by saying that I've only been coloring my hair for a year or so. I've always just been one to purchase cheap, drugstore shampoo with no issues. Once I started coloring my hair, I did make sure to buy sulfate-free shampoos, but they are still on the inexpensive side (and I really don't use them exclusively). I haven't noticed any ill-effects on my hair or color, so I've not yet been enticed to spend more money on products.

I used the Salon Technician Color Care Shampoo and Conditioner samples first. The first thing I noticed about these was that they have a lovely soft rose scent. I was sort of ugggh when I saw " creme rose-scented" because I automatically assumed it was going to smell old-ladyish, but instead I found it to be a nice clean scent that wasn't overpowering. The shampoo had a nice lather and left my hair feeling nice and clean. After washing out the conditioner my hair felt really lush and slick and I could tell it was an upgrade from my normal conditioner (it is infused with grapeseed oil, so that is likely why). My hair is very fine and straight and I don't typically have issues with dryness, so I haven't been seeking out a super moisturizing conditioner, but I can see that this one would likely benefit someone who was having dry hair issues. When I dried my hair, the scent left behind was nice and soft and my hair looked really smooth and silky without being weighed down. Overall I really thought these were nice products. My one complaint with them is the size of the samples because there was only enough in there for one wash, so I don't feel like I got a well rounded experience with it (I think maybe enough product for 5 days would have helped me more). These retail for $20 each for full-sized (8 oz) bottles.


The next day I tried the Technician Color Care Luxe Color Masque. This masque has grapeseed oil in it as well and is supposed to protect color-treated hair with deep conditioning effects when used weekly. I have never used a deep conditioning product before for fear that it would make my hair greasy, so this was a new experience for me. First note that this masque has the same creme rose scent as the shampoo and conditioner, and I already mentioned it was very nice. I decided since this was a nicely sized tub that I would do some extended testing of this product, and I've been using it once a week for about 2 months now. I figure, if you are testing a product that is supposed to help enhance hair color, then it is best to test it longer! Right after using it, my hair felt very soft and supple and had a lot of shine. I didn't feel greasy or heavy either and that is a big plus. I have not noticed significant fading of my color (I really can't tell if its any more or any less than usual to be honest, because it is pretty gradual). The winter has rolled in here along with the dry weather and indoor heating, so my hair is a bit drier and duller than normal this time of year and I feel like these treatments have helped that too. Also, and this may be completely random and unrelated, but I have gotten more compliments on my hair color in the past 2 months than ever, so maybe it IS making a difference I personally haven't notice in the appearance of my color. The full-sized (7 oz) tub retails for $25.


My overall opinion on these Fekkai products is that they are very nice and luxurious. If you are willing to spend the money for high-end shampoo/conditioner, then I think those are good choices but I personally don't see myself spending that much on shampoo and conditioner. The masque, however, will last a good while if used once weekly and I can definitely see myself re-purchasing that in the future. You can purchase these products at Fekkai.com and Amazon.com (and it looks like now you can even get a few dollars off retail price on Amazon).

Have you ever tried Fekkai products? Tell me your experiences! Thanks for looking everyone!

*I received these products complimentary from Influenster for testing purposes.*

Darling Diva Polish Malum

*Purchased by Me*

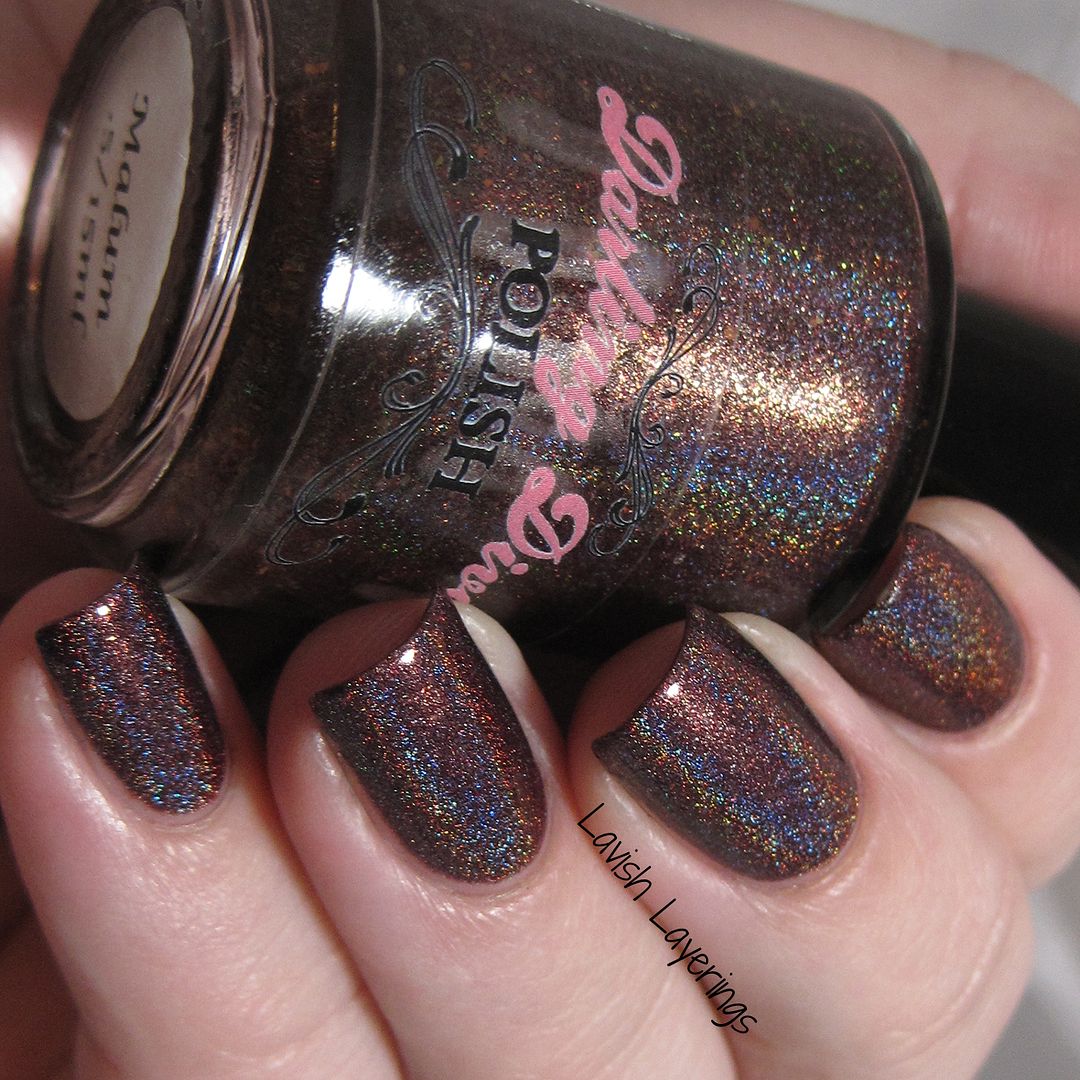
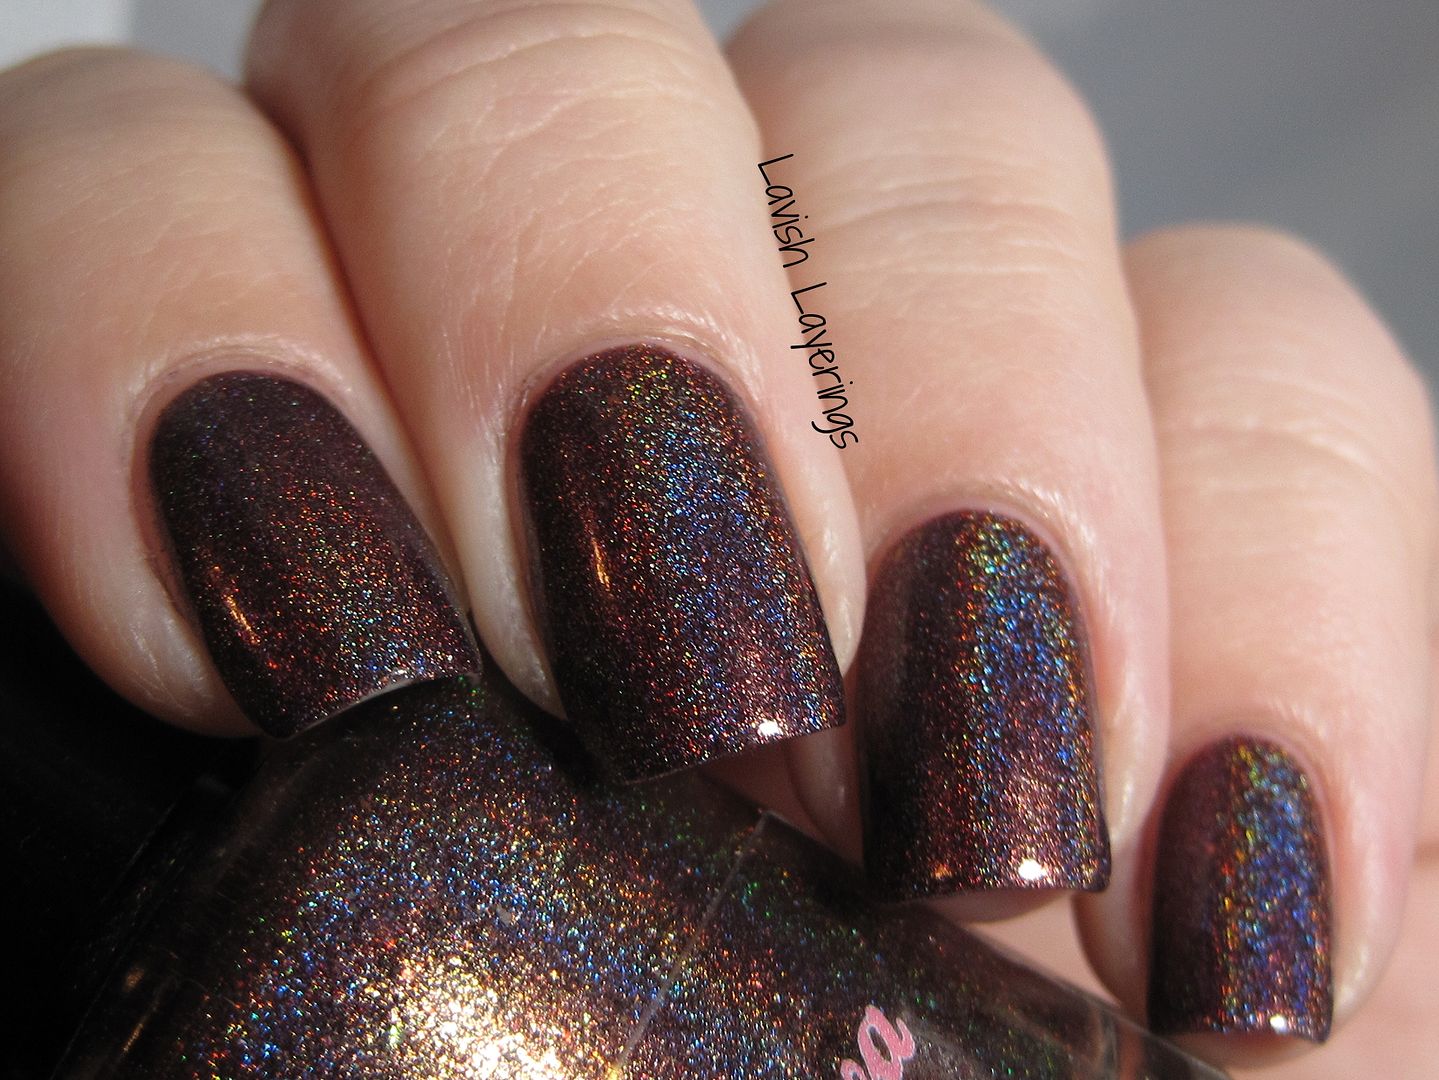
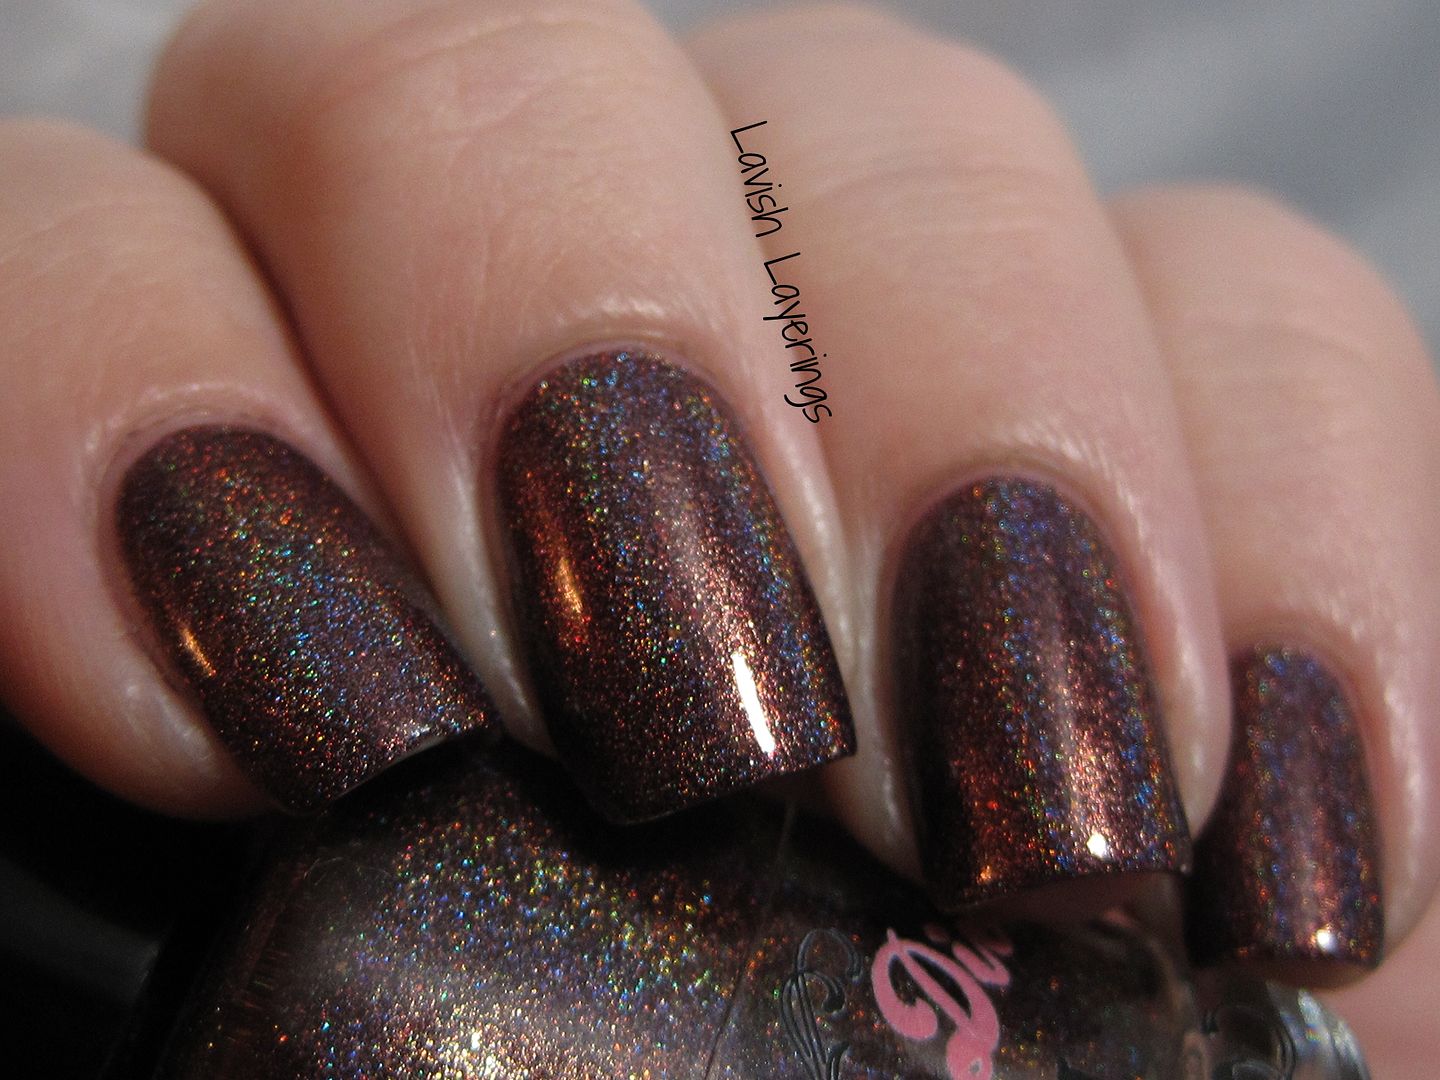
Hi everyone! Today I have a beautiful polish from Darling Diva Polish's Salem Collection to share with you. Malum is a deep mauvy brown linear holo with gold flake shimmer. Formula applied like a dream in 2 easy coats. This polish definitely looks brown, but it has some strong pinky undertones to it that make it unique and the flakes add subtle depth. And obviously, the holo flame is just awesome! Yet another winner in the brown polish department this season! There have been so many pretties! I figured since I have hit you over the head with browns this fall, that it was only fitting that I close out the season with a fabulous one! This was my actual Thanksgiving Day mani by the way. :)


Darling Diva Polish is available from creator Carrie's Big Cartel Shop. Darling Diva Polish is also available from Llarowe (US), Mei Mei's Signatures (Singapore), and Edgy Polish (Sweden). Follow Darling Diva Polish on Facebook and Instagram for updates on new collections and restock news.

Saturday, November 29, 2014

Scofflaw Nail Varnish LE Holiday Duo and Small Swatch Spam

*Some items in this post were provided for review*

Hi everyone! Today I have a new limited edition Holiday Duo from Scofflaw Nail Varnish to share with you that will be released this Sunday (Nov 30) for a 2 hour pre-order window (12 noon-2 PM Central) along with a restock of the current line.

First up I will show you the Holiday Duo and then I have swatches of a few of the polishes that will be restocked on Sunday.