Wednesday, July 31, 2013

Favorite Reds

Oh red...my mistress. I always love a good red. I don't care how non-original red is for a nail polish color, it will never not be a go-to for me. So here is my (slightly excessive) list of favorite reds. Prepare for some super spam!

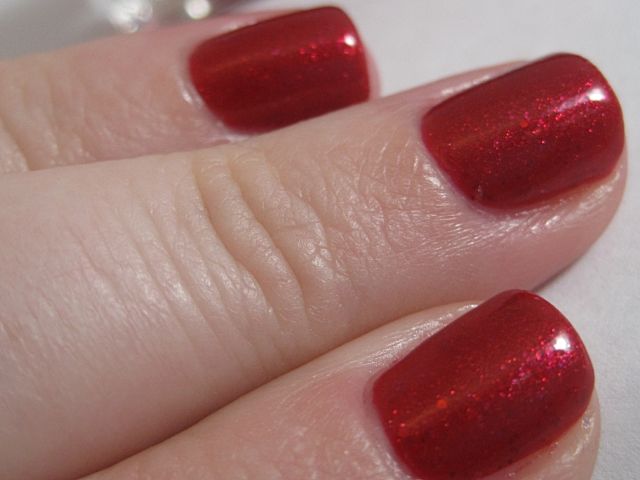
OPI Smitten with Mittens. A deep red glittery polish. Yet another gift from my pal Mox. She is awesome!


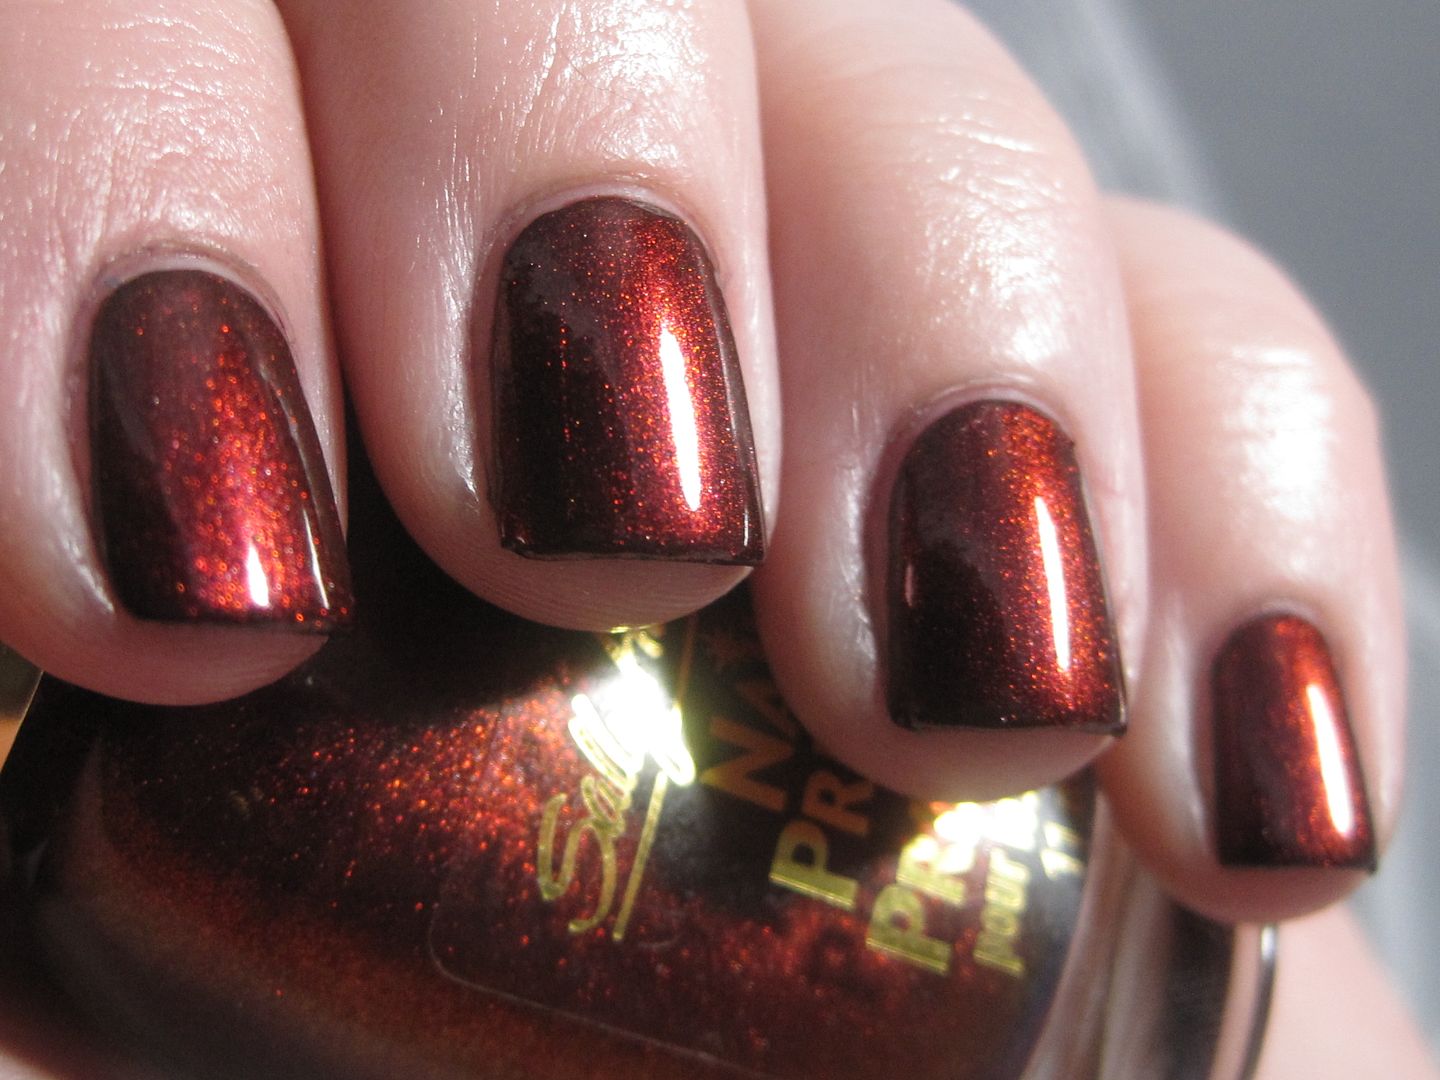
Julie G Hot Cinnamon (with topcoat): Once again, another texture polish that wows with topcoat. I think this polish is just magical...and even more so in person.


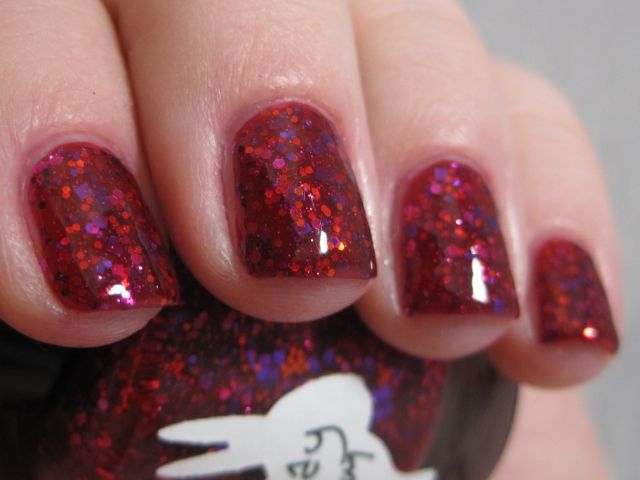
Pretty Serious Vicious Vampire. This red is AMAZING. If you don't have it...get it...so you can see it in person.It's really hard to capture the depth of this polish in pictures. 


HARE Polish Dog Day Dream. This polish could win awards for "most difficult to photograph". It is so completely breathtaking in person but sometimes pictures make it look sort of suspect. 


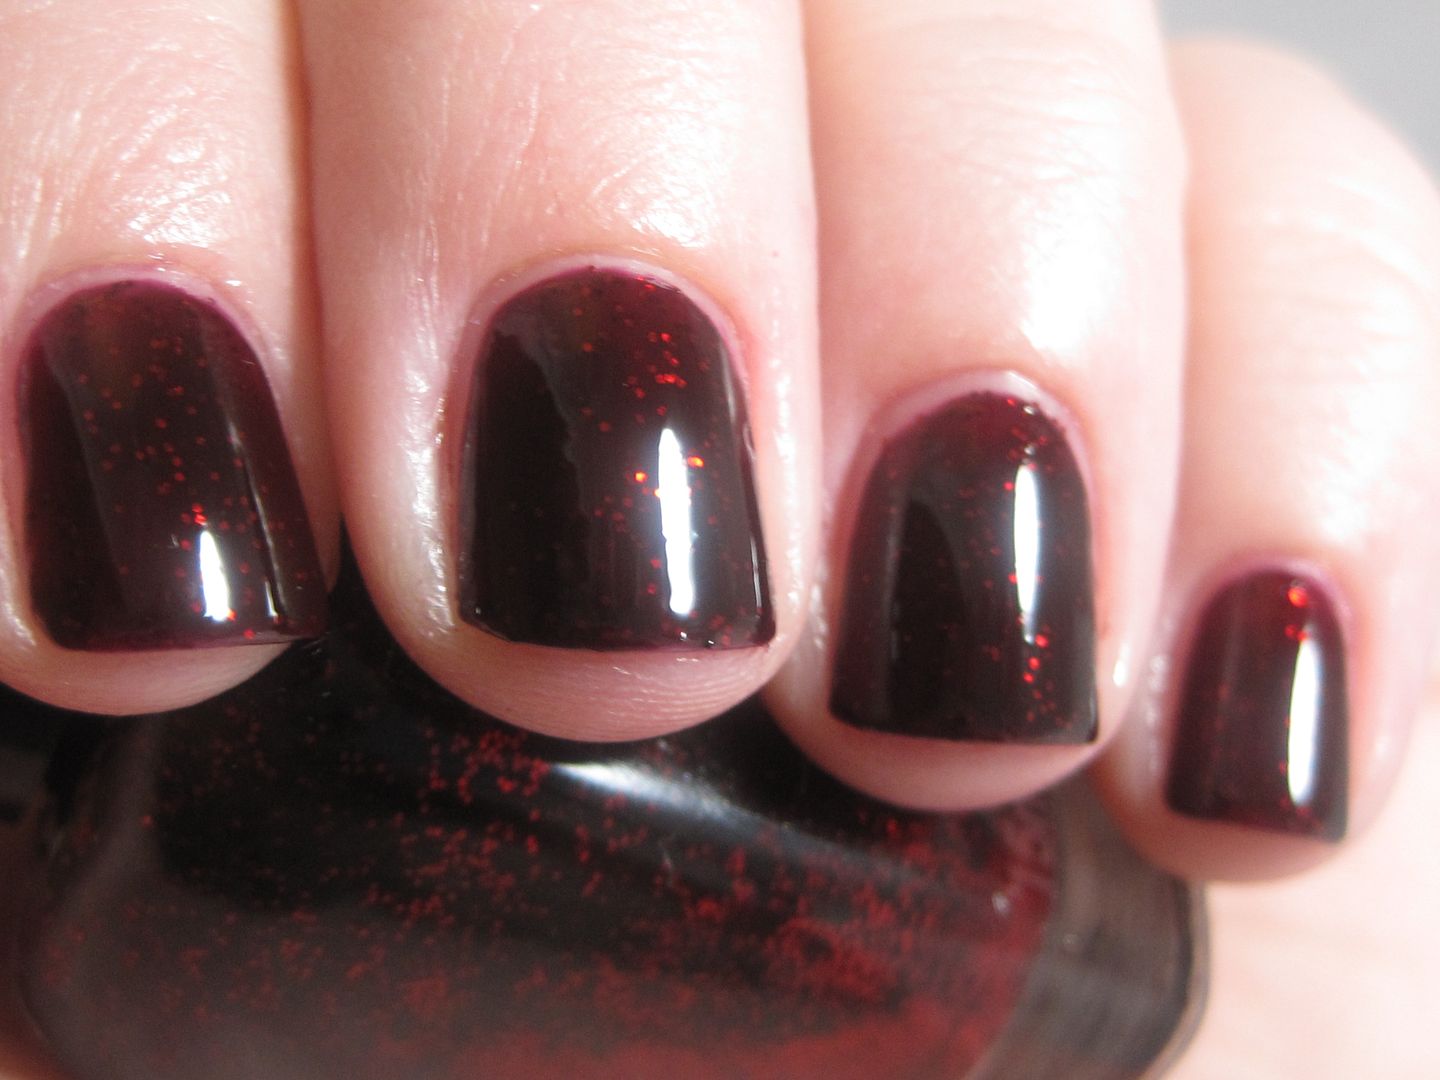
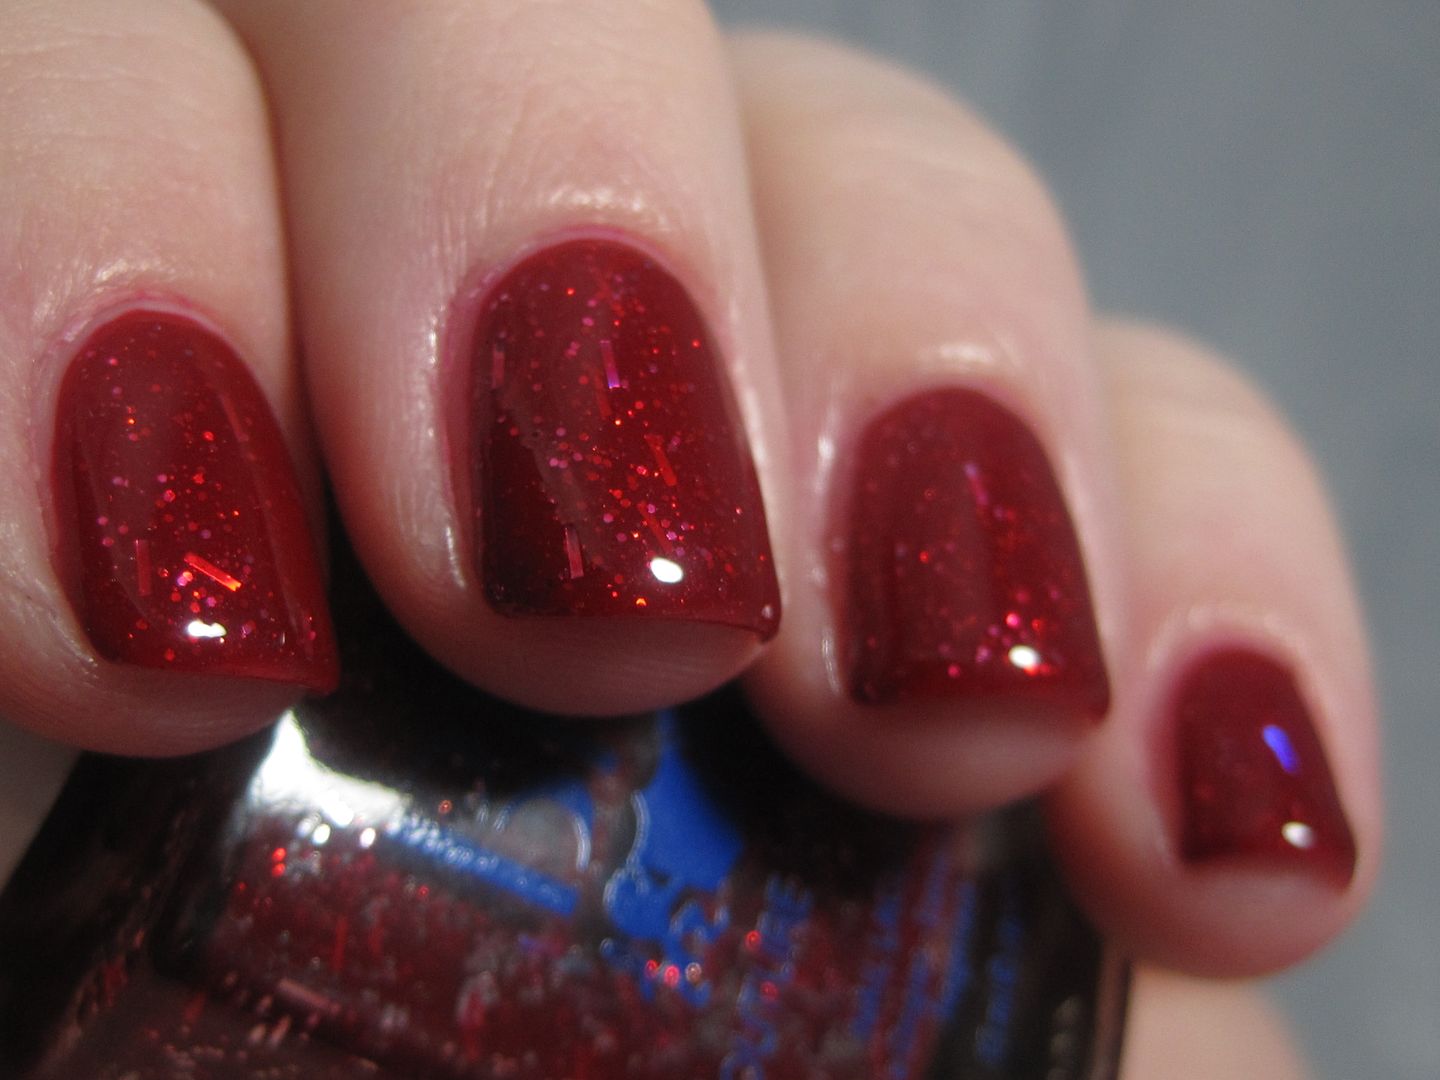
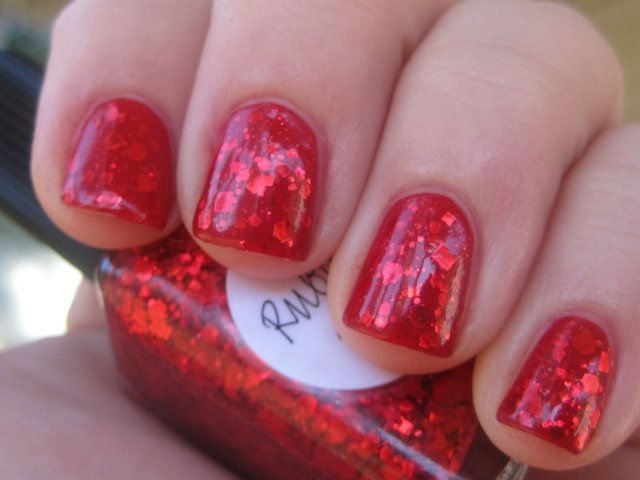
Love Thy Polish Sunday, Bloody Sunday (similar to Drained). This is a deep, vampy red jelly base swimming with small red glitters. Simple, yet perfect. 


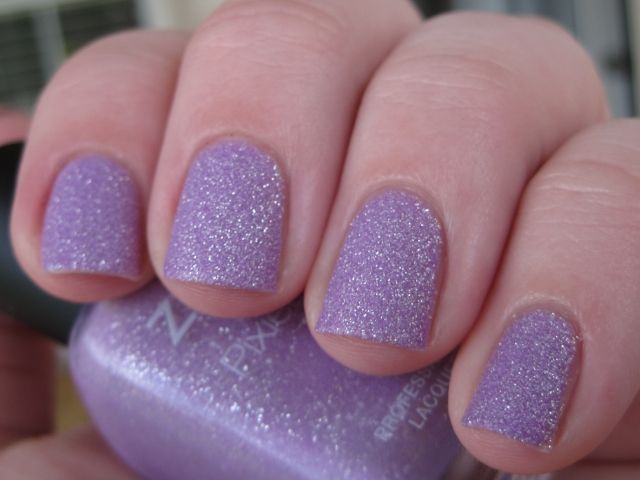
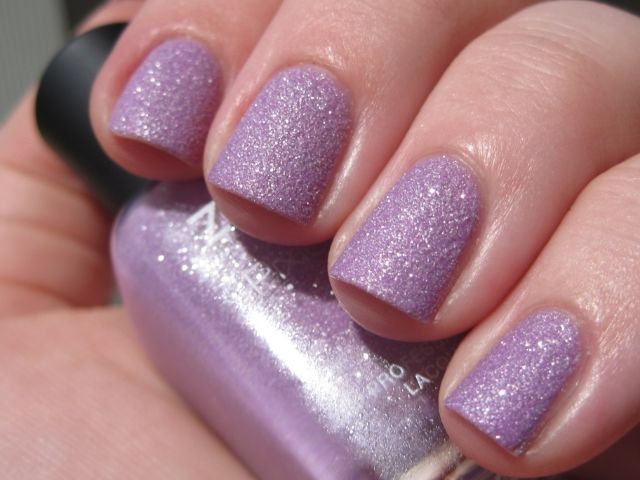
Zoya Blaze. Is this red? Burgundy? Purple? Ehhhhh...we'll call it red for fun. So pretty!


Sally Hansen Ruby Emerald (over black). So glowy and gorgeous. 


Chanel Pirate. My first Chanel. Might as well go for a fabulous classic red, eh?


BB Couture Santa's Sack (over Chanel Pirate). When I got this I was like, ehhh...bar glitter. But then I put it on and it knocked my socks off. So gorgeous! 


Cult Nails Annalicious. Shimmer that is do die for!


Cult Nails Evil Queen. This polish was love at first sight. It applies like a dream too. 


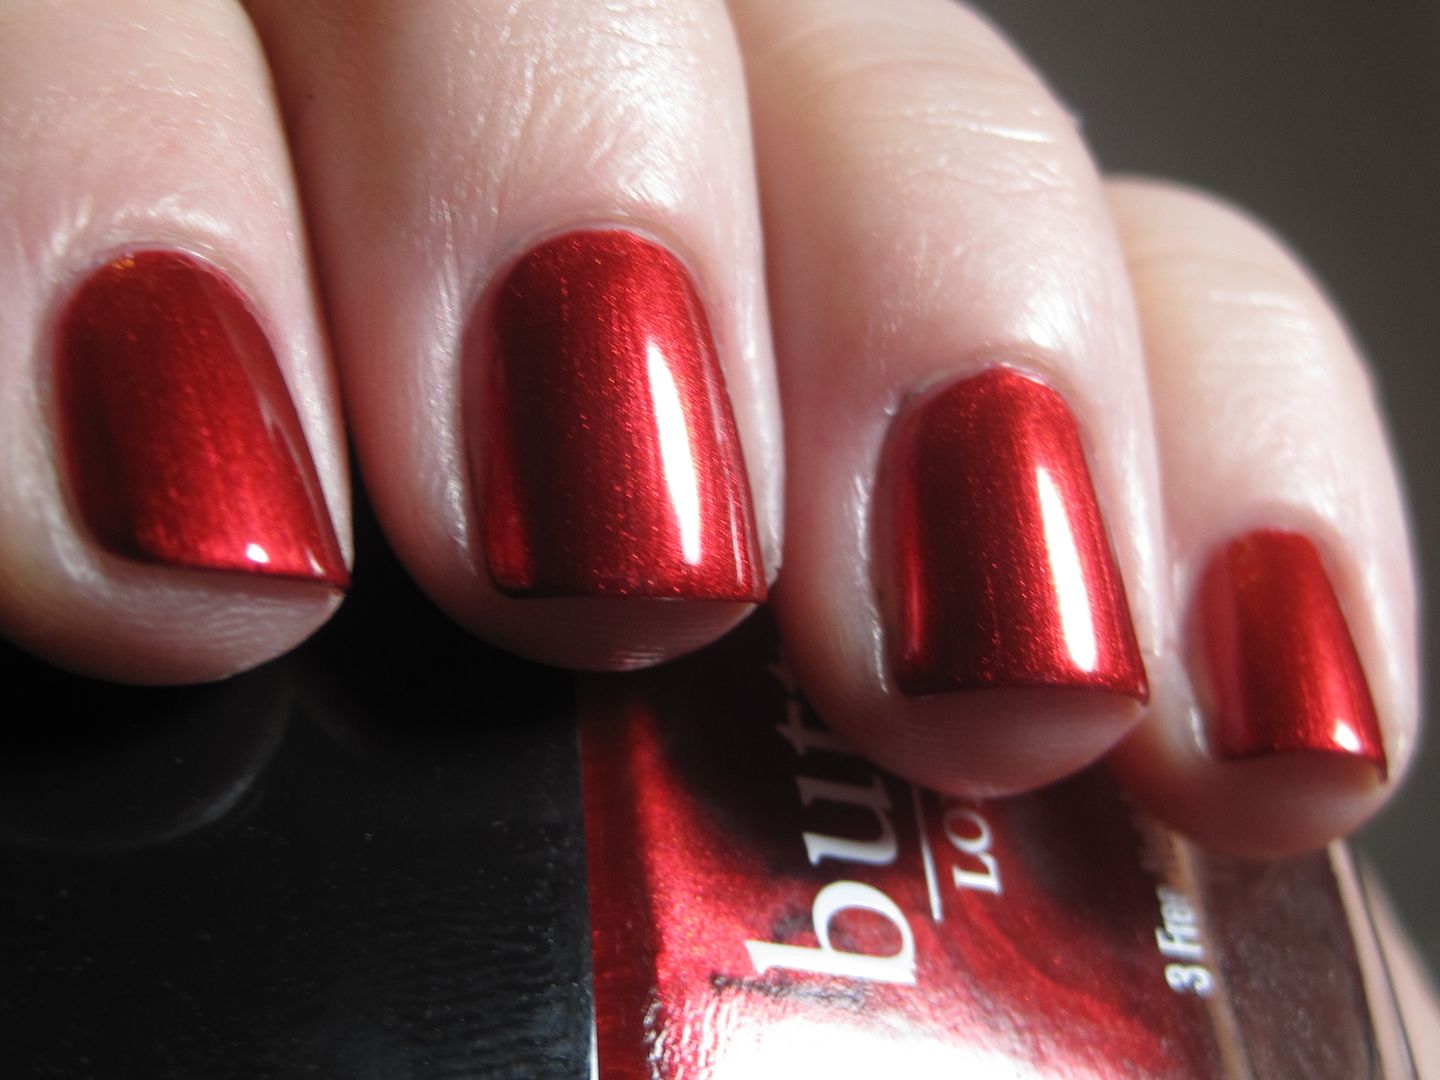
Butter London Knees Up. AMAZING. 


Nicole by OPI Orna-ment For Each Other (2 coats over Zoya Jade). I know a lot of people complain about the Nicole polishes (weird bottle, Kardashian endorsements, etc.) but there are some that are just phenomenal and worth picking up. I got this one on clearance last summer and boy is it stunning. 


Zoya Jade. Everyone has their favorite polish like this (red microglitter in a classic red jelly base). Most people choose China Glaze Ruby Pumps. I prefer Zoya Jade by far. It is perfect. I think it is because the red glitter is just a smidge finer than Ruby Pumps. 


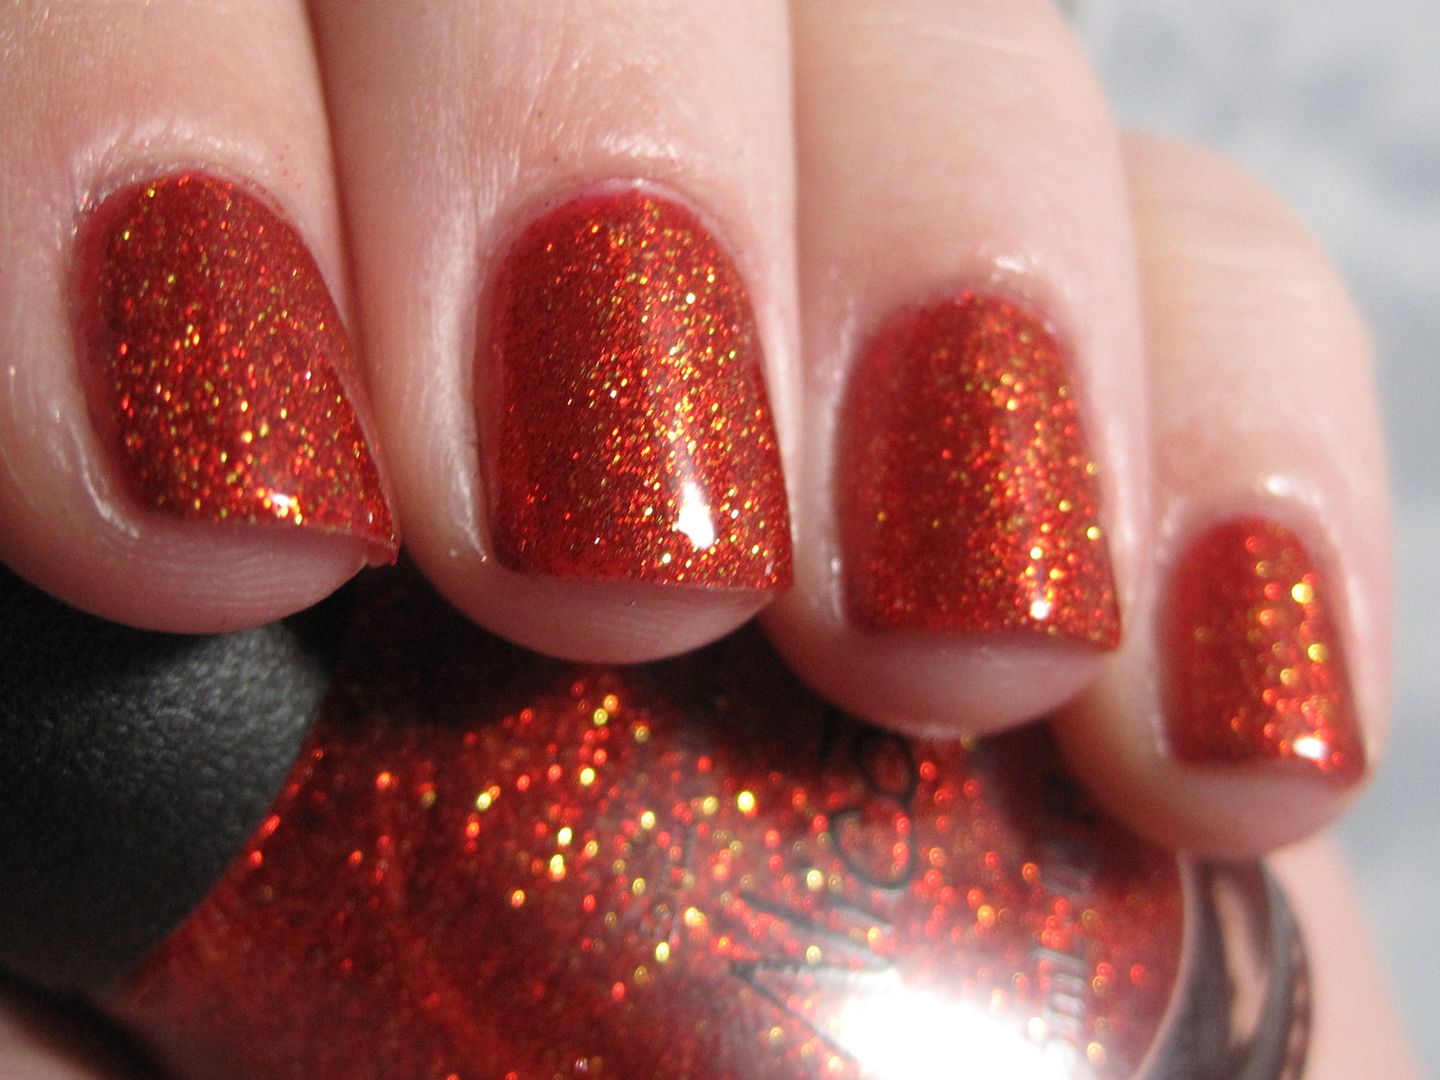
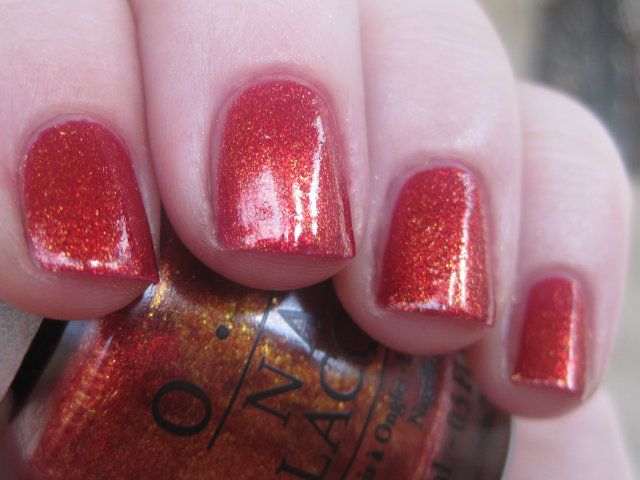
Jade Vermelho Surreal. My favorite red holo, bar none. It has a different tone to it than most other red holos. It leans more orange than pink.


Lynnderella Ruby Red Ruby (over Butter London Come to Bed Red). I don't love this one as much as some people do, but it is still a stunning red glitter. 


OPI DS Indulgence (and Zoya Riva). These polishes are near dupes to me, so I will show you just the OPI since I have a better picture of it. I initially fell in love with Riva when the Zoya Sunshine collection was released. It is wonderful as a pedi too. 


Barielle Elle's Spell (over OPI Smitten with Mittens). Gah...I love this flakie so hard. The red jelly base is lovely, but it works best when layered over another red (I prefer glittery ones). 


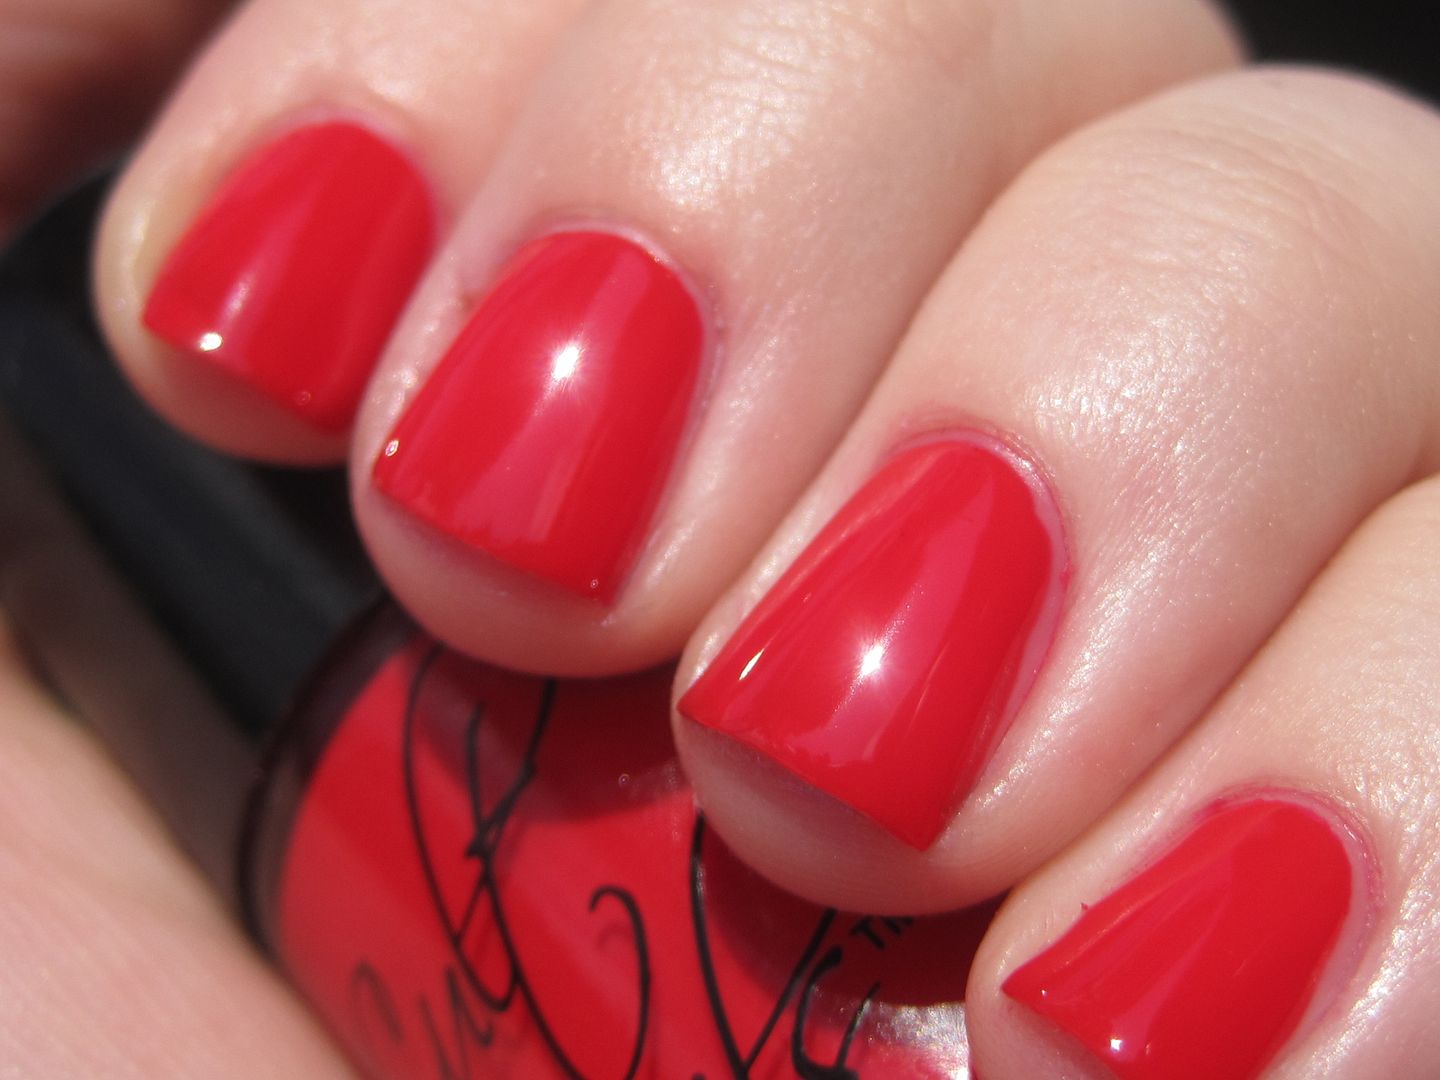
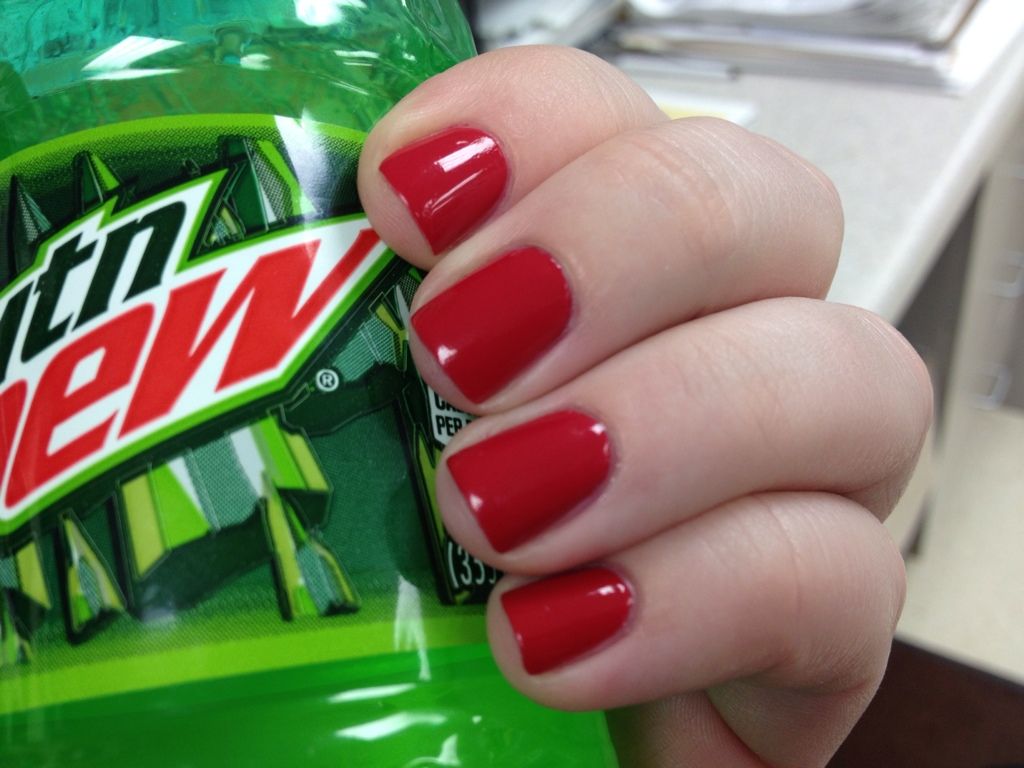
OPI Red Hot Ayers Rock. Favorite Red Creme. 


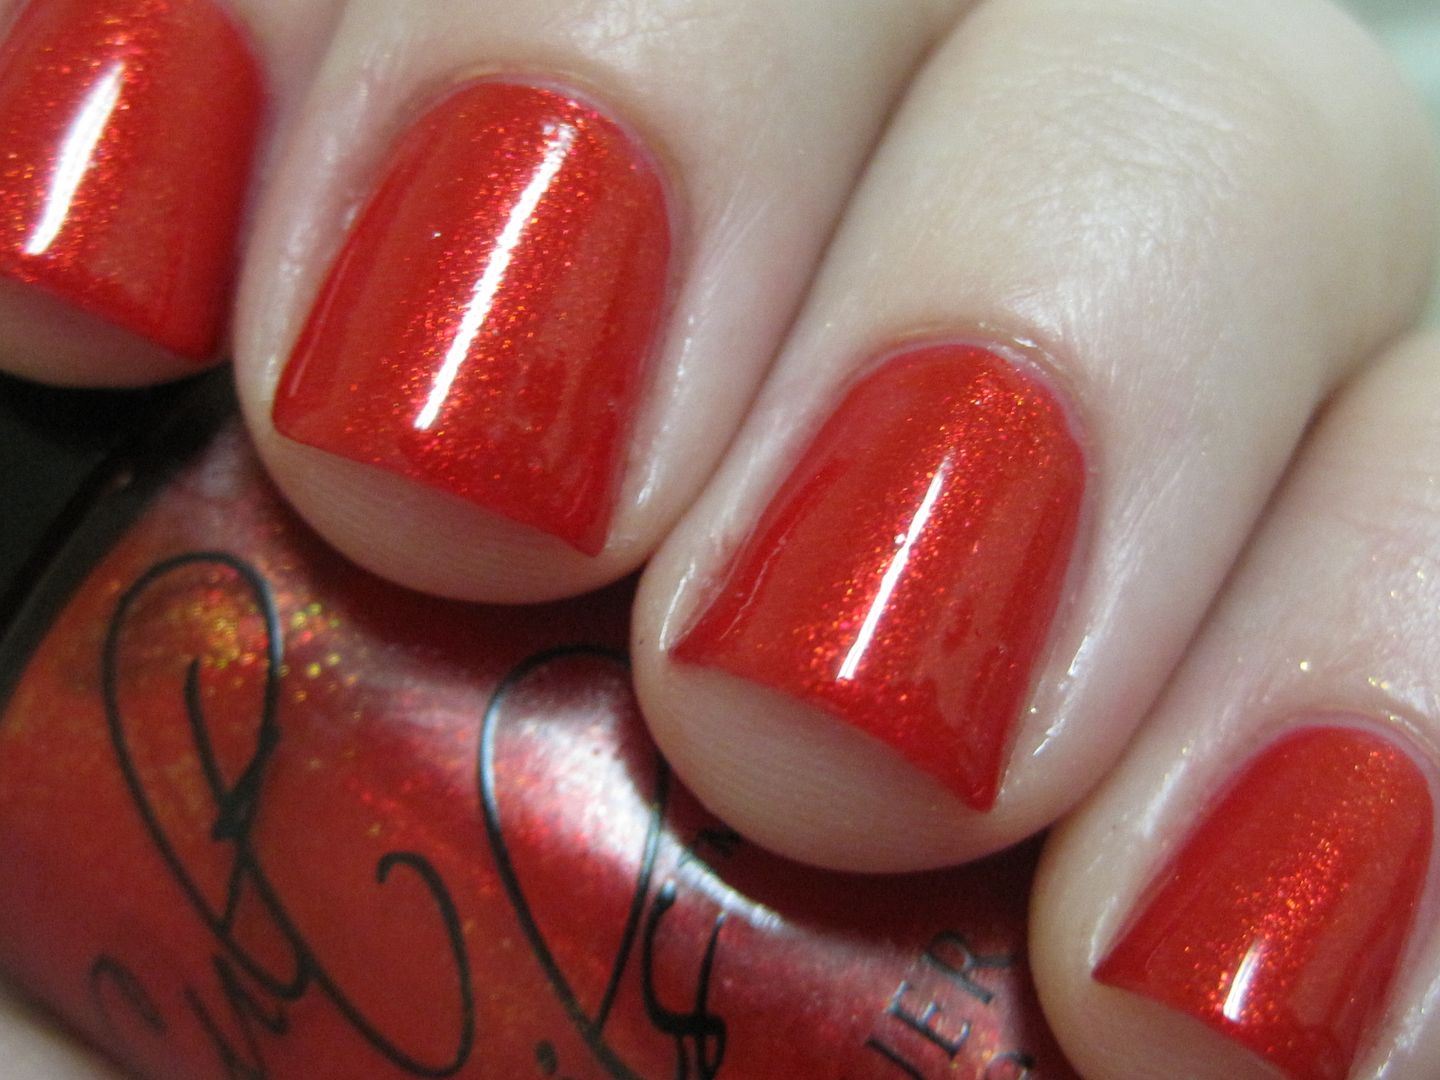
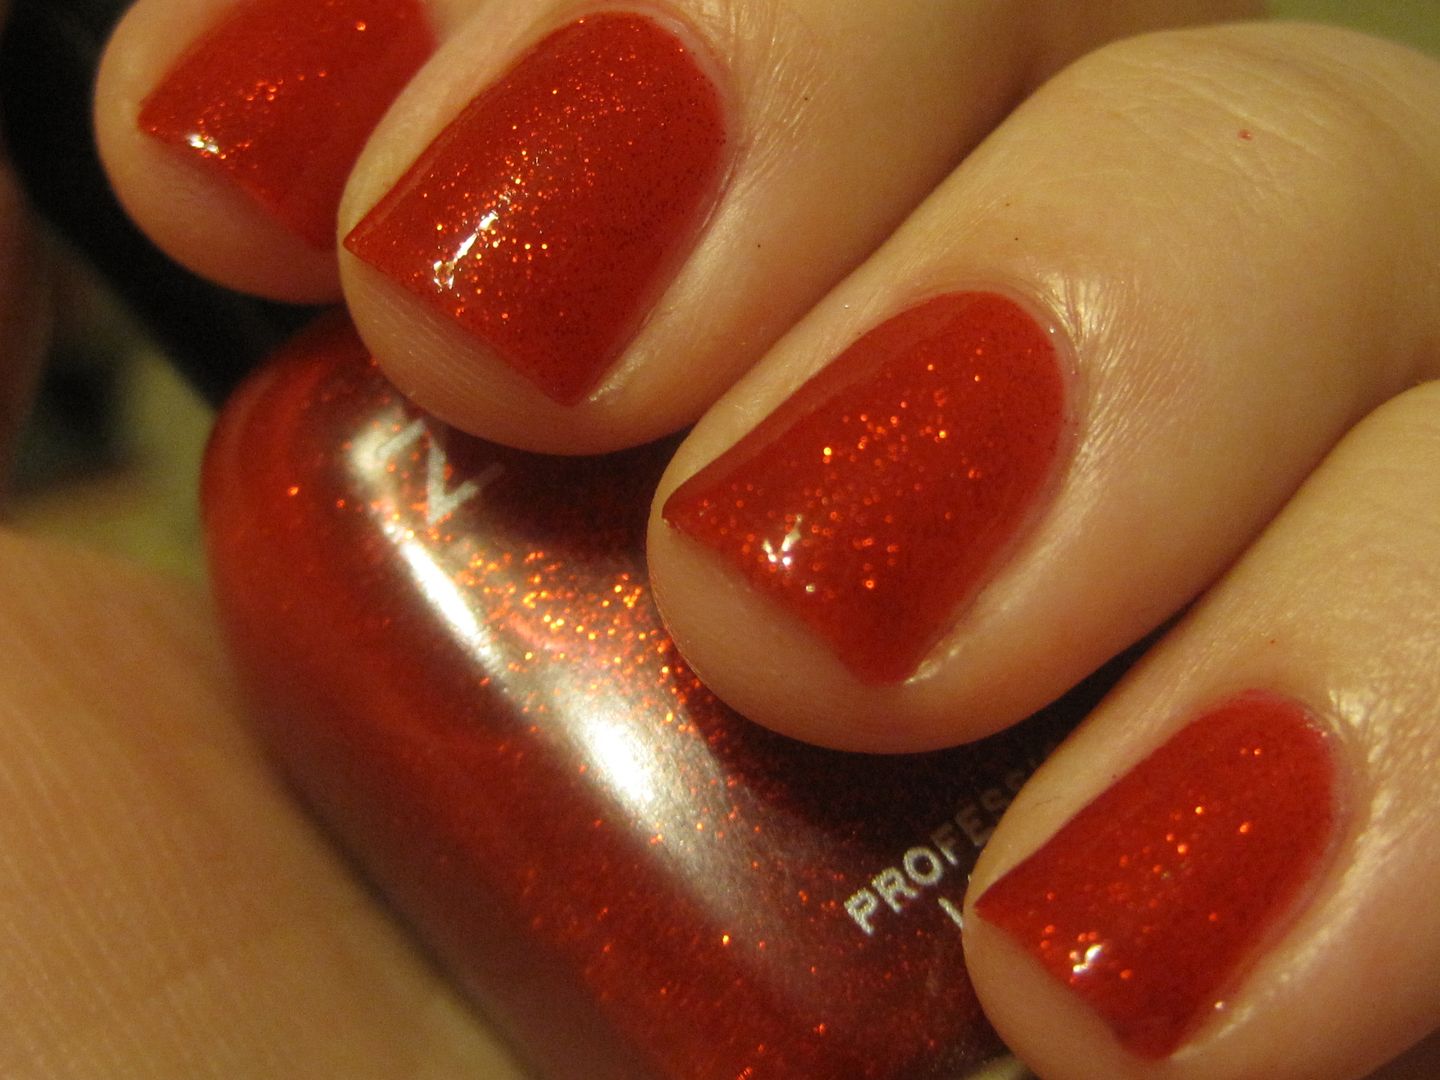
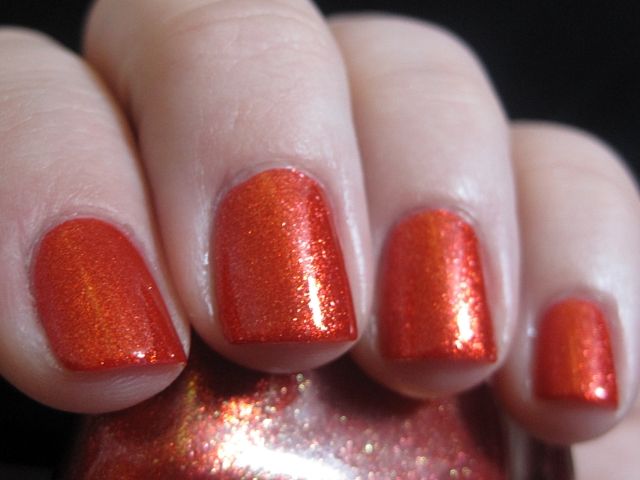
 Contrary Polish Fire-brand. Seriously pretty shimmer action here. 


OPI La Boheme (over black). Gorgeous. It is sought after for a reason. 


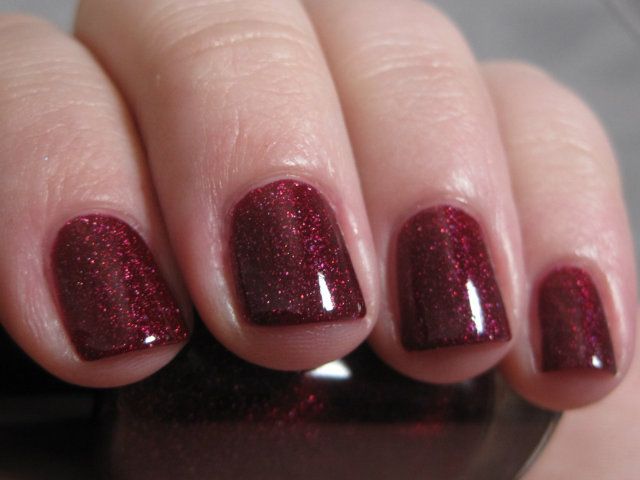
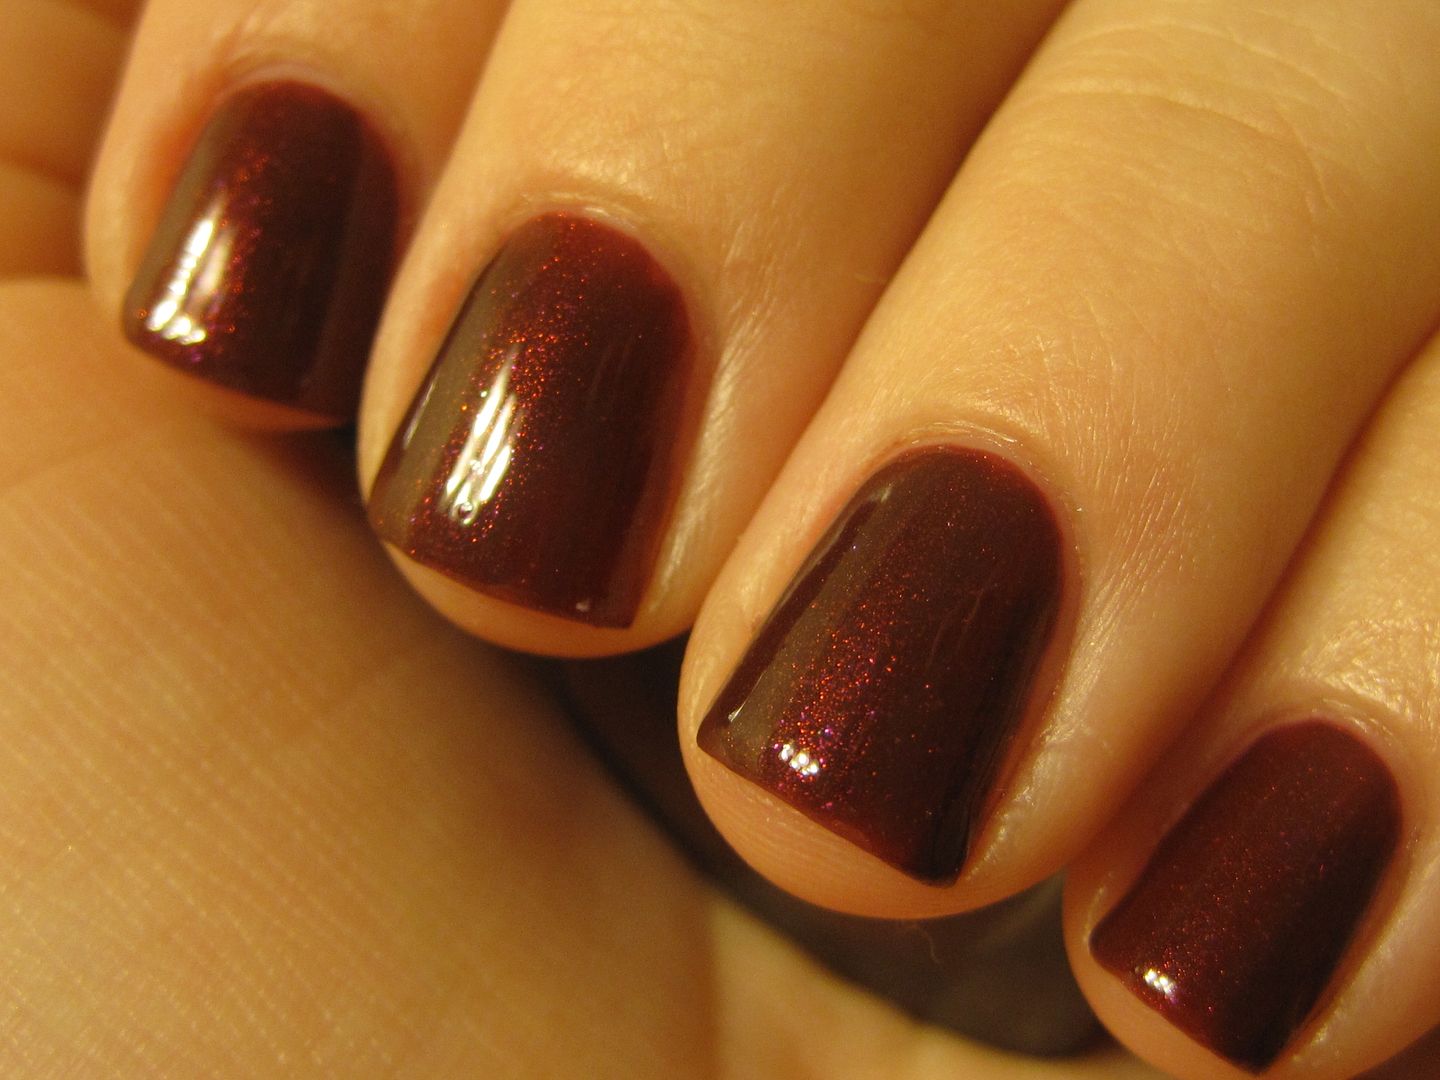
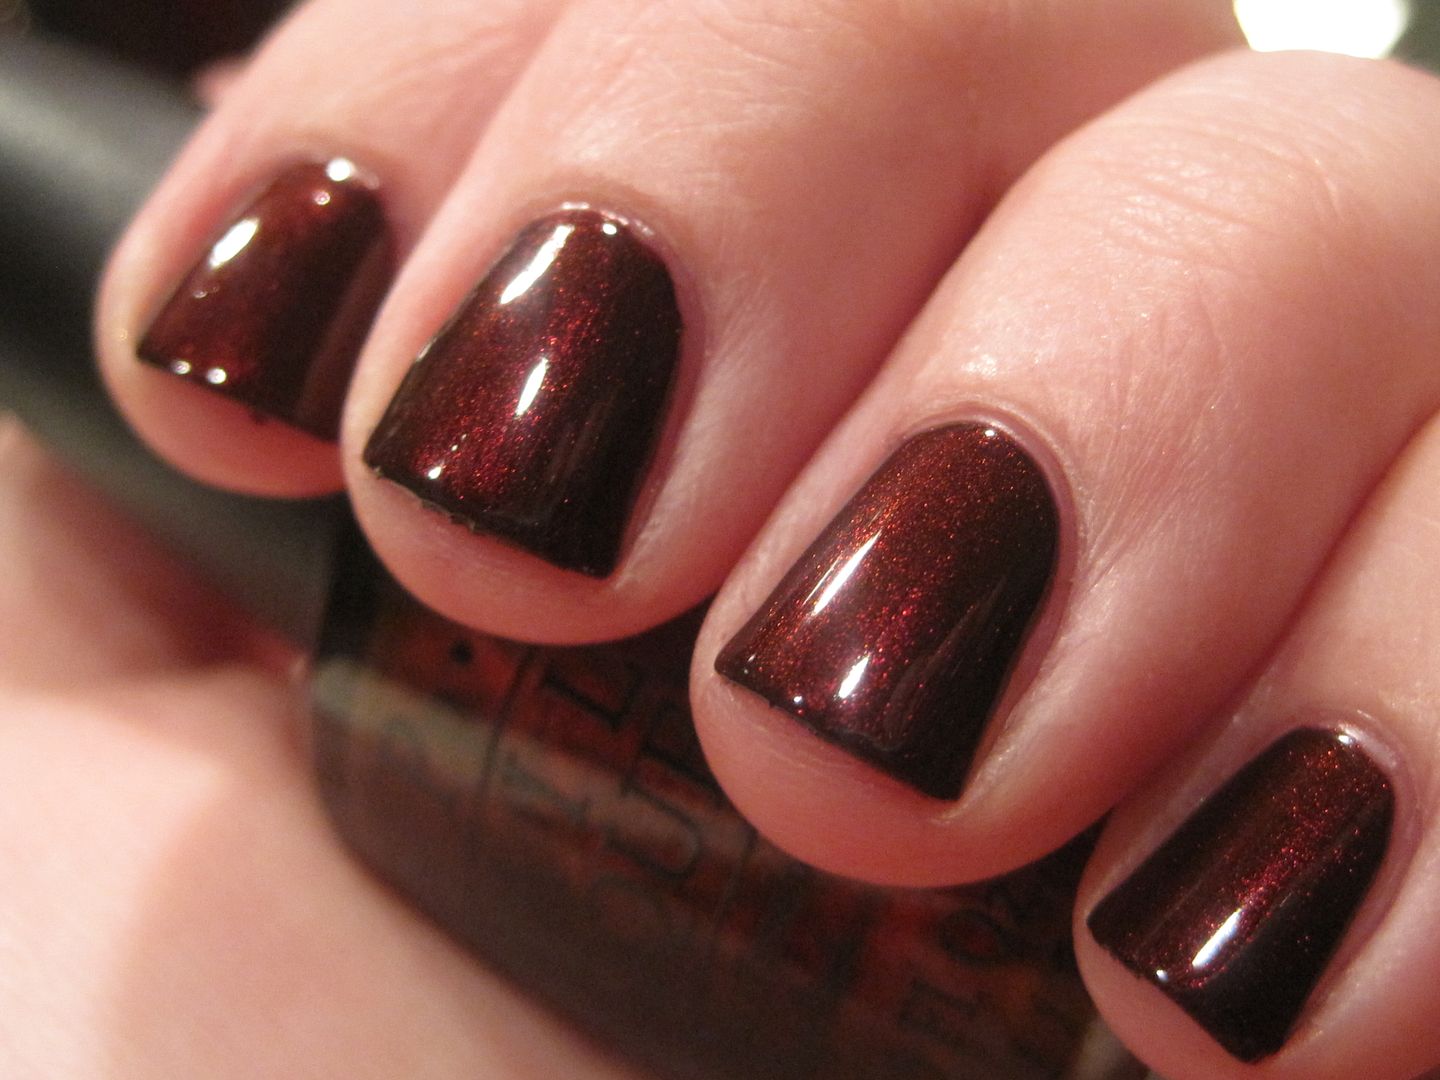
OPI Royal Rajah Ruby. I think that this has taken the place of OPI Black Cherry Chutney in my heart. Perfect vampy red shimmer. 


Zoya Sooki. I still do love this red creme very much, but it isn't my very favorite anymore. It is very bright and tomatoey. 


Zoya Kimmy. I remember it was my obsession with the Zoya Sunshine collection was released. It makes for a stunning pedi! 


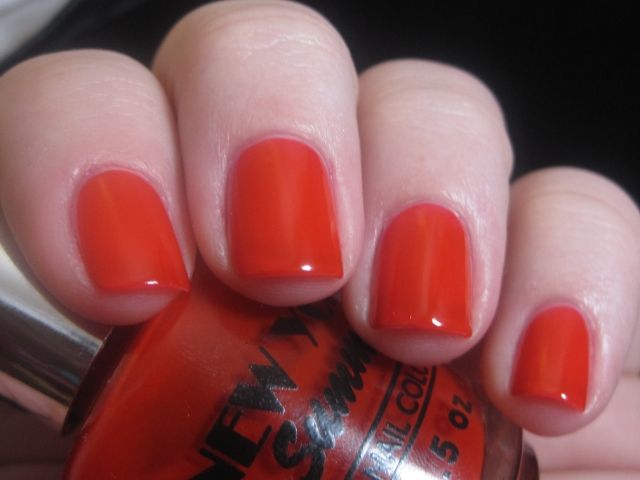
NYS Hot Atomic Red. I have declared this my favorite red jelly (and I do have a few). This one is perfect for jelly sandwiches because it is squishy!


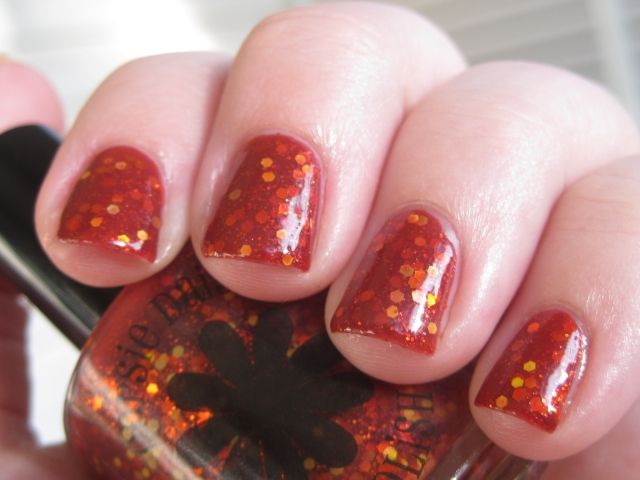
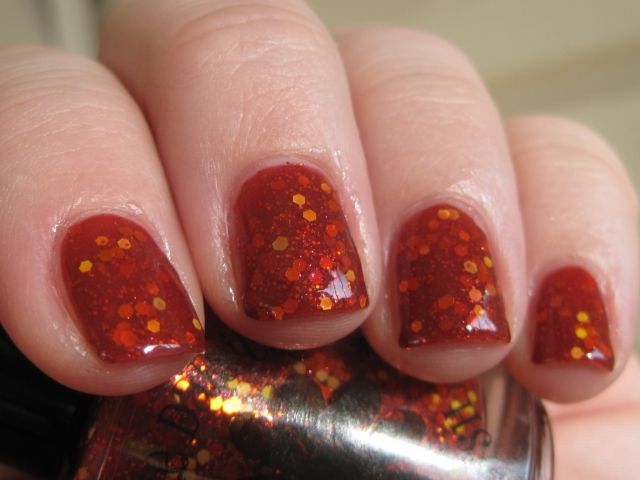
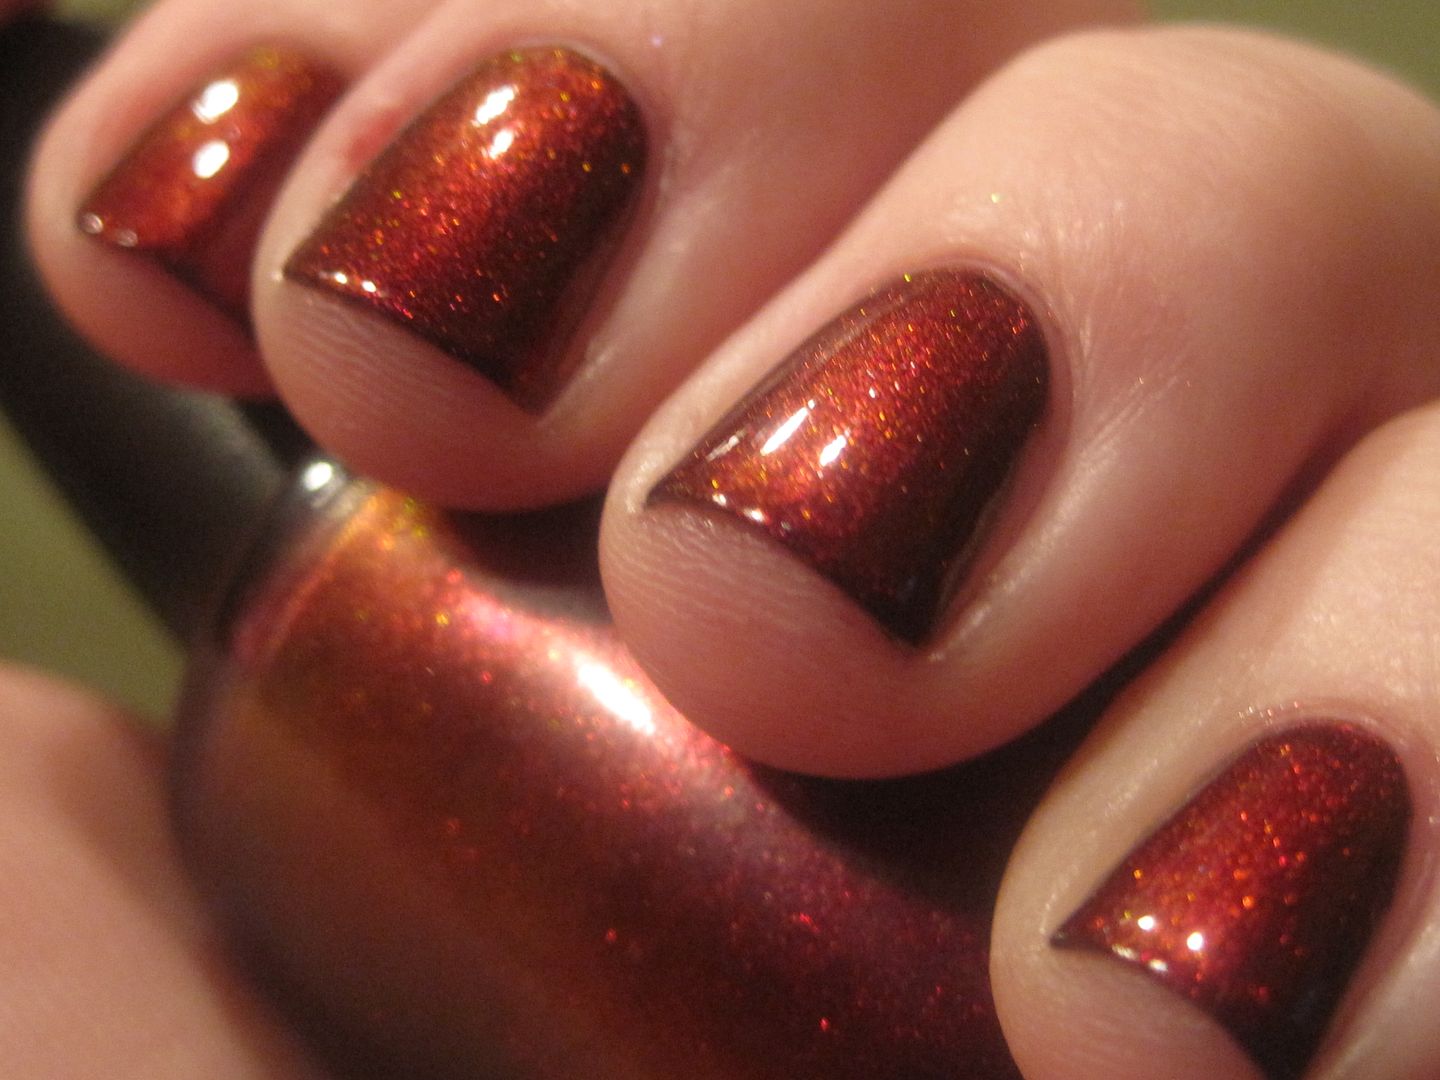
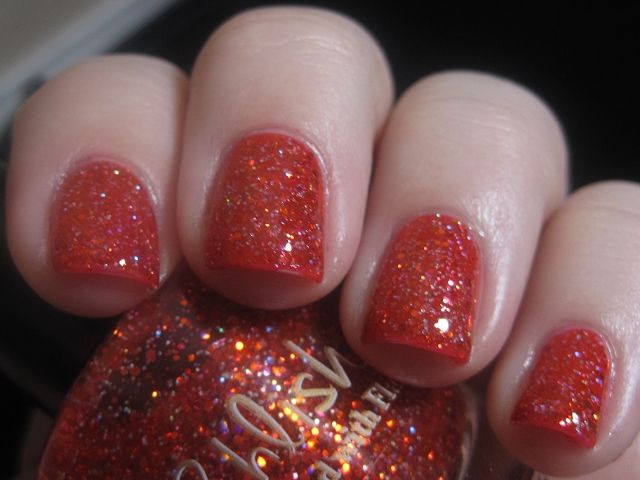
Pahlish Pianos Filled with Flames. Yet another of the original Pahlishes that has stolen my heart. It is simple, but perfect. 


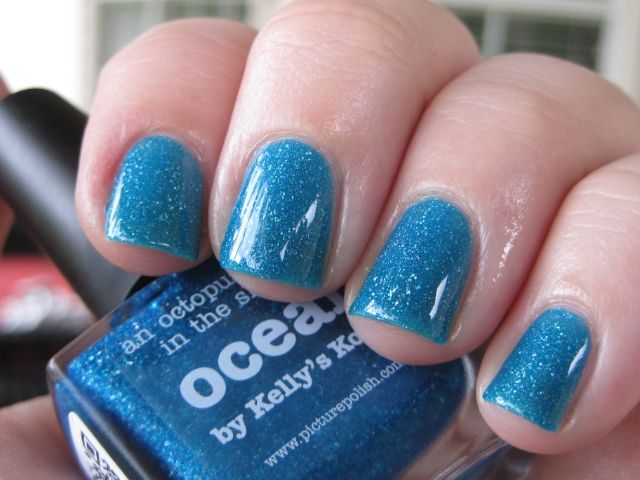
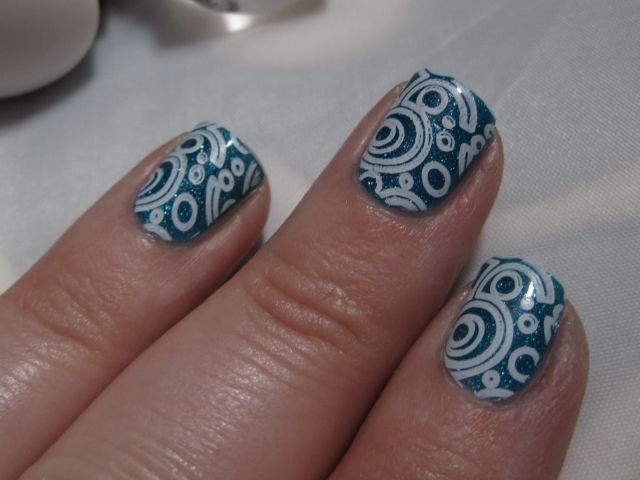
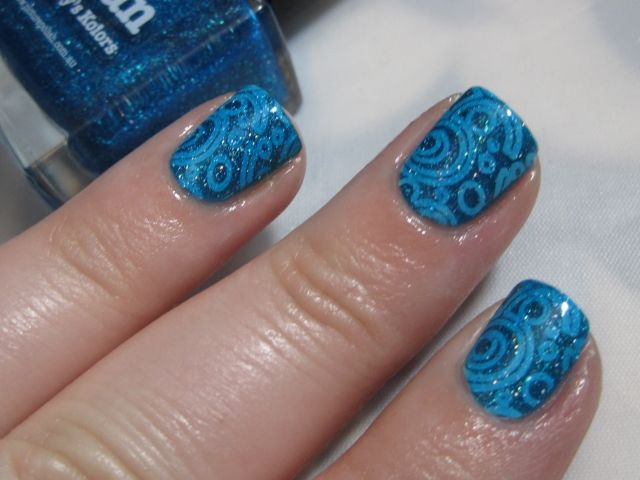
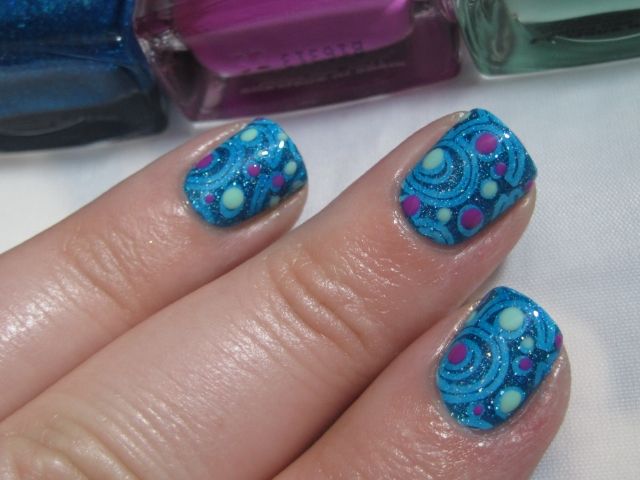
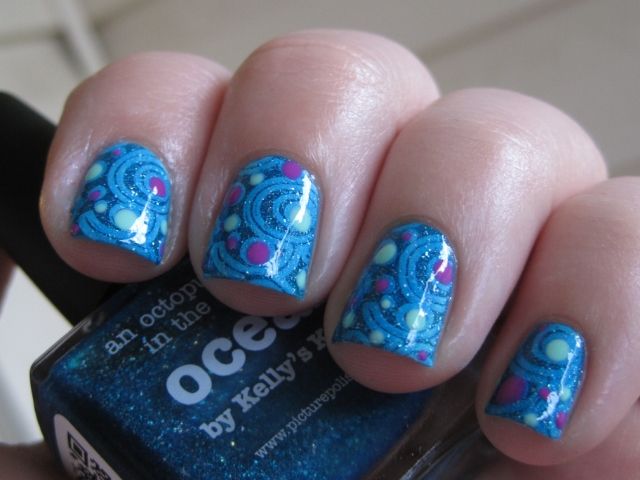
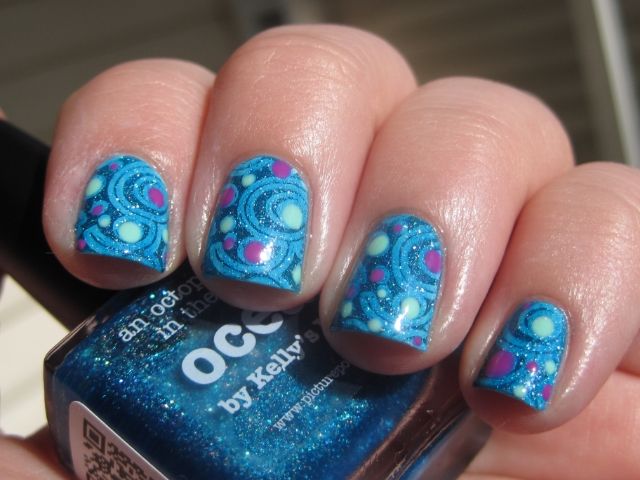
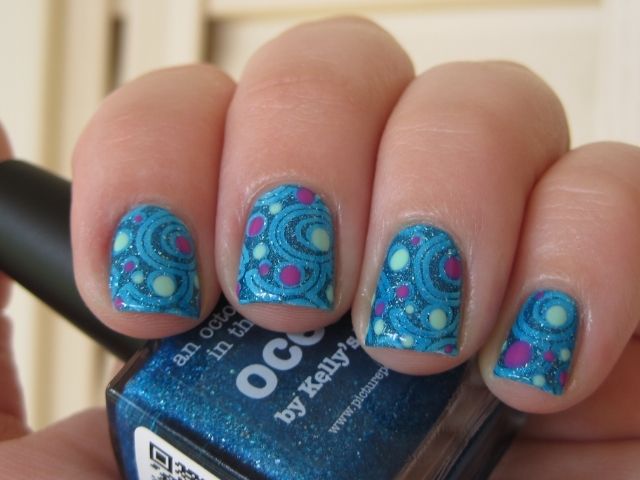
If you think reds are bad...the blues, greens, and purples are MUCH worse! There are SO MANY! Thanks for looking everyone!

Tuesday, July 30, 2013

Oopsies Daisies Back to Nature Trio

Hi everyone! Today I have a late summer trio from Oopsie Daisies that is themed around camping! I always love creator Cathryn's inspiration behind her collections. She always manages to bring her very literal ideas to life in polish and I dig it. The Back to Nature Trio has two brand new polishes and one that is a reformulated (and renamed) version of a current polish.


Campfire Tales is a juicy red-orange jelly with red, yellow, and orange glitters. The color of the jelly base is really gorgeous and is very campfire-esque. I used 2 coats for this mani. Glitters dispersed very evenly during application and gave me no trouble at all. This one is a winner for sure!


Cloudless Night was a surprise favorite for me in the collection (because I thought for SURE it would be the red since I'm such a red hoor). The silver shimmer in the base is what makes this polish so special and also the surprise small white glitters. When I first saw it, I just thought it was silver glitter in a black jelly base, but those additions make it super special. I used 3 coats for this swatch. Definitely let it dry between coats to eliminate dragging to help you build it up to opacity. I think you have to see this one in real life to really appreciate how gorgeous it is.


S'mores is a reformulated version of Fawn from the spring collection. I remember when that collection came out, Cathryn mentioned that after she made it, this polish always reminded her of s'mores, so she made it happen! The addition of white "marshmallow" squares really make it a perfect s'mores polish. This is 2 coats plus topcoat. This polish is really packed with glitter, so I did have to be sure to spread them around evenly when applying to get an even look, but I have to do this with a lot of glitter polishes so it was nothing out of the ordinary (I think it is related to my tendency towards heavy handed coats vs thin, dainty coats when polishing). 


The Back to Nature Trio went on sale today in Oopsie Daisie's Etsy shop so be sure to check it out! For international customers, be sure to check out Edgy Polish because hopefully this collection will arrive there soon. Thanks for looking everyone!

*products provided for my honest review*


Monday, July 29, 2013

piCture pOlish Blog Fest 2013: Year of the Blogger

Hi everyone! I am so honored to be selected to participate in the piCture pOlish Blog Fest 2013, which features bloggers from all over the world. A year ago, I never would have thought I would be selected to take part, so I'm very excited! This year's theme was "Year of the Blogger", which focuses on celebrating bloggers and what we do best. We were challenged to create our "most amazing nail art manicure ever" using 3 different piCture pOlish shades. I feel like simple, yet bold designs are what I do best, so I have one here for you today!


Oh and guess what...there are awards! How exciting! All of the participants in Blog Fest 2013 will go into the running to win the chance to create a Collaboration Shade with piCture pOlish to be released in 2014! There will be 3 awards chosen based on voting. You can view the entries on a special pin board on Pinterest created for the Blog Fest, and then cast your vote on piCture pOlish's website in the Blog Fest 2013 Zone. You have a chance to win free polish when you cast your vote as well! The awards are as follows:

 1 x award as voted by piCture pOlish friends and fans    
1 x award as voted by the participants of Blog Fest 2013
1 x award as voted by Jules and Megs of piCture pOlish


piCture pOlish sent me 3 shades to use in my mani: Ocean (turquoise blue jelly with scattered holo shards), Mad Magenta (hot pink/magenta crème), and Honey Dew (soft mint green crème). We were allowed to use the 3 shades that we were given as well as black and/or white as accents in our manicures. After much deliberation, I decided that I really wanted to play on the jelly quality of Ocean with my nail art and chose to use it in a stamped jelly sandwich with dotted accents. For those of you who are unfamiliar with jelly sandwiches (at least the nail variety), it is a technique in which you "sandwich" glitter between layers of a jelly polish so that the glitter peeks through due to the sheer nature of the jelly. In this case, I am using a stamped design instead of glitter.


Here are some quick swatches of Mad Magenta and Honey Dew before we get started. 

Mad Magenta (2 coats) - this one wanted to lean more purple in pictures than in real life


Honey Dew (3 coats) - It did not give me lobster hands in real life, but mints seem to do that in pics 


Here is a step-by step tutorial on how to achieve this look. As you will see, it is quite simple.
1. I started off with a base of Ocean (2 coats). If I was going to wear it on its own, I would probably use 3 coats because there is still a bit of visible nail line, but for the purposes of the jelly sandwich, I just used 2 because I am going to add more coats. Allow to dry completely before going to step 2.

As you see, Ocean has those lovely holo shards (NOT glitter) that piCture pOlish does so well.


2. Using the Cheeky XL Musical Nails stamping plate and Konad White polish, I stamped a design over Ocean. You could use pretty much any design you wanted with white and it would work equally as well with this manicure, I would just choose one with a bold pattern. Also, something that has recently been a big help with stamping is my discovery of gauze squares (found in the first aid section of your local pharmacy). They are lint free and thus don't leave you with fuzzies on your stamper and plate when cleaning up like cotton pads do.

3. Next, I layered 1 additional coat of Ocean over the stamped design. Doesn't this look awesome? I have done this with regular jellies before, but the holo shards in Ocean make this look sparkly and magical!


4. Finally I used Honey Dew and Mad Magenta to add dots to my design. I used a paper plate to dab little pools of polish to dip my dotting tools in. As you can see, the design I chose has some logical places to add dots (the circles) but if your design doesn't have circles, you can certainly still add dots to liven it up it. When I did the dots, I did not do them all the same size but instead used several different sizes of dots to give the design more of a random, unstructured feel. Wait about 10 minutes or so before adding topcoat to complete your design to avoid smearing the dots.


So that's it! The completed look is very striking, but the process to achieve it is quite simple. I hope that it will be easy for anyone to reproduce using the pattern of your choice. It reminds me a bit of a psychedelic Starry Night painting or planets of some sort. And if you are scared of stamping, DON'T BE! Get yourself one of those squishy stampers (like the one I have pictured above) and it makes the process SO much easier. 


piCture pOlish products are available from their website based out of Australia. They do ship internationally and details about their shipping policies are available on their shipping page. piCture pOlish also has international stockists located all over the world. I have personally ordered from Llarowe, Overall Beauty, and Harlow & Co., but a complete list of stockists is located on piCture pOlish's network page. Also, be sure to check out their Everyday Deals section to score awesome deals on polishes! 

To keep up with all of the new happenings at piCture pOlish, be sure to follow them on Facebook, Pinterest, Instagram, Twitter, Google+, and You Tube.

I hope you guys have enjoyed my contribution to piCture pOlish Blog Fest 2013! Please be sure to check out all of the other participants today and see the amazing nail art they have created (and vote (for me!) on Pinterest once the contest is up and running!). You can also find pictures on Instagram using #ppblogfest2013. Thanks for looking everyone!


Sunday, July 28, 2013

Purple Shimmer Sunday?: Zoya Stevie

Ok so...I might be breaking Purple Shimmer Sunday rules with this one (I did consult with Kristy, as I have deemed her the official rule-keeper). I don't guess it is exactly a shimmer in a traditional sense, but it shimmers and sparkles in the sun! That counts, right?! I have been really loving textures lately, and I really wanted to include one on Purple Shimmer Sunday, so Zoya Stevie was it. Please be sure to see what Kristy at The Polish Haven and Kathy at Pied Polish Piper have in store today (probably some legit purple shimmers for you! LOL!)

Zoya Stevie is a pastel purple crelly base with tiny silver glitters from Zoya's Pixie Dust line. When it dries down, it has a sugary textured finish and at that point the glitters give it a shimmery crystalized look vs a glittery look. I really love this polish and it was one I was initially skeptical about. I did 2 coats for this mani with no topcoat. It had pretty good coverage, but if you do thin coats it might require 3 thins coats vs my 2 thickish coats. I love how soft and lady-like this polish is.


I purchased Stevie from Zoya's website with the recent promo that they had (Buy Liberty, get 2 Pixie Dusts free). Zoya polishes are also available at Ulta. Zoya does promos quite often, so keep a check on their Facebook page and blog for information on promos. There is actually a promo going on right now where you can get the entire summer Pixie Dust release for $36 plus free shipping (use code: LULI), which includes Stevie as well as Liberty which I featured in my last post plus the other 4 polishes from the summer release. That's a pretty awesome deal for these, so jump on it while you still can if you are wanting to try out some Pixie Dust polishes. Until next time, thanks for looking everyone!